|
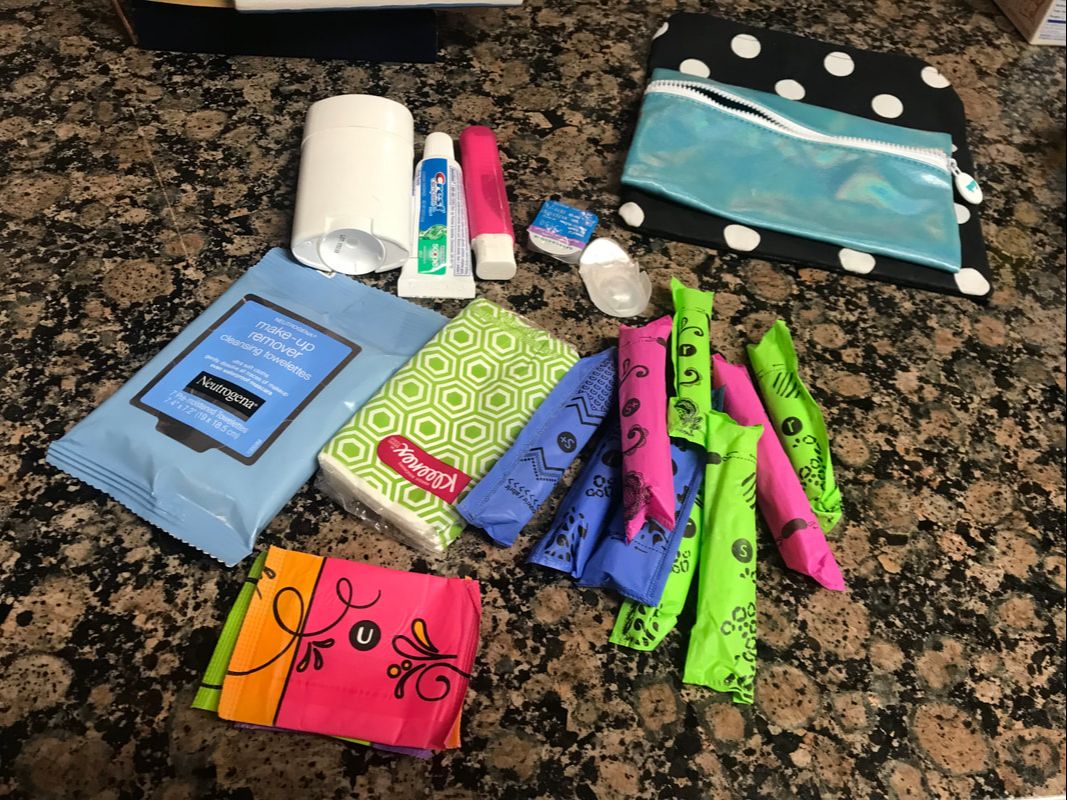
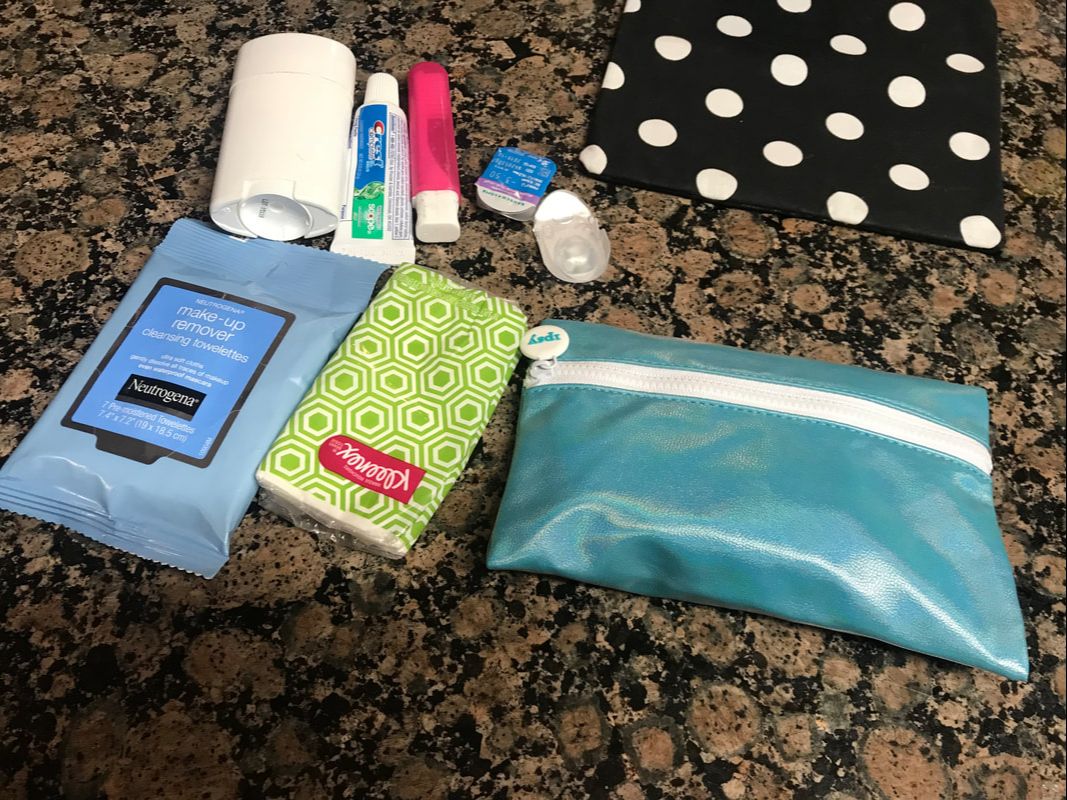
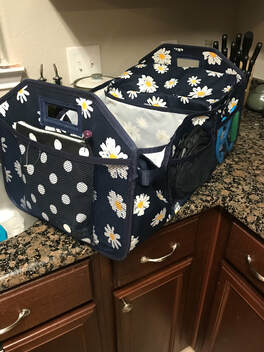
I'm excited to announce that we have a guest blogger today: Kris Louis of Parenting with Kris. She and her husband recently sold their home and wanted to share some of the tips and tricks they learned throughout the process. Please give her a warm welcome to the blog.   Source: Pexels 5 Ways Busy Parents Can Prepare Their Home for ShowingsYou’ve made the big decision to put your family’s home on the market. You know that relocating to a new neighborhood is the better choice for your family, but when you have young kids, preparing your home for showings is no easy task. As a busy parent with a packed schedule, you’re probably wondering how you can keep your house in order for buyers and keep your kids happy at the same time. It’s a balancing act, for sure, but sticking to a few basic guidelines will help. These tips can help busy parents get their house looking spotless from top to bottom before inviting in potential buyers. Make a Checklist Before you begin the staging process, come up with a checklist that will help you prepare for every open house. Having a list in front of you will help you stay on task when you’re juggling your responsibilities as a seller with parenting. Which tasks should you include on your list? Redfin suggests asking a loved one or pet sitter to watch your pets for a couple of hours during open houses. You’ll also need to ensure that any valuables in your house are safe and secure. In addition, make a note to open your blinds to let natural light in and take steps to minimize smells. Basic Home Makeover When you list your home for sale, it’s time to take down personal family items. According to HomeGo, depersonalizing your home is a crucial aspect of staging it for buyers — they need to be able to envision themselves living there. Don’t be surprised if this sparks some strong feelings from your children, especially when you have to make some changes to their rooms! Be patient with them and give them space to express their emotions. Decide What to Keep As you declutter your home, everyone in the family will have to be prepared to get rid of a few things. Help your kids sort through their toys and decide which ones they want to keep in the house, which can go in storage, and which they are ready to let go of. If your child is attached to a particular toy, make sure it does not get placed in storage! You can donate unwanted toys, or you could host a garage sale to bring in a little extra cash. Prevent Messes Want to spend less time cleaning up before having buyers over? Take steps to prevent your kids from creating messes in the first place. For instance, you might have to explain that they won’t be able to paint or do certain arts and crafts activities in the kitchen right now. It’s also smart to be a little stricter than usual about having your children take off their shoes after walking in the front door so that they don’t accidentally track mud through the house. Tidy Up Daily When you’re showing your home to buyers on a regular basis, the cleaning never really stops. You’ll need to spend a day or two deep cleaning each room, but even after you’ve put your mops and sponges away, you’ll need to keep up with your efforts to make your home shine. Each day, dedicate a little time to tidying up. Whenever possible, have a loved one watch your kids for an hour or two before each showing so that you can clean without interruptions. When you have children, keeping your home looking clean and tidy is an ongoing challenge. If it’s time for your family to pack up and move, you’ll have to put in a little extra effort to spruce it up before open houses. By keeping a checklist of essential tasks and making it a point to clean up each day, you’ll have no problem impressing prospective buyers.  I all but live in my car... legitimately. Last year I put almost 35,000 miles on it (super glad I had a hybrid or the gas would have killed me!) between work, side hustles, choruses and folk dance, and errands around town. There were two small road trips in there to be completely fair but they were both only a couple days long so didn't make a huge impact on that number. All that is said mostly so that you understand why I have so much stuff in my car. :) This year I'm trying to keep my car organized, clean and clutter free. I haven't done super well on that if I'm honest but as part of the KonMari challenge I set for myself I thought that my car should count as a space that needed de-cluttering. Unfortunately I lost the footage for almost all of the actual sorting and organizing part of the challenge (nooooooo!) but I did manage to get footage of the afters and in some cases I had photos from in progress. That's the case for my car thankfully. When I cleaned out my car I really only had things in the trunk and center console surprisingly so this was the fastest area I de-cluttered in the entire process. It's rather cold here at the moment so I brought everything inside onto the couch to go through. 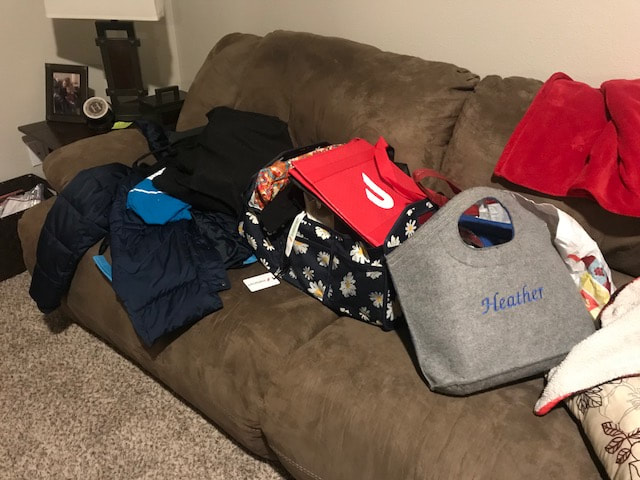 The coat and 'Heather' bag both have places they should be living other than in my car so they were put away immediately which left me with a minimal amount of sorting and some folding to do. The first thing I did was go through the trunk organizer (the blue contraption with white daisies on it). In it I had a lot of things that I haven't even looked at in a year including some medications. Oops. Those obviously had expired so they were disposed of as well as a package of dried out hand wipes, old papers and notebooks from classes and seminars, and various odds and ends that must have seemed important to carry around at the time I put them in my car. Next up was my emergency hygiene kit. You'd be surprised how often I have to break into this. Since I'm away from the house so often having a travel size of a few important things like makeup wipes, toothpaste, tissues and a deodorant in my car along with an extra pair of contacts and some feminine hygiene items means no worries or last minute dashes into a drug store if I'm in need of something. This saves me time and money and has been a part of my emergency kit since I was a teacher.
This kit is stored in the front pouch of my trunk organizer bin for quick access. On the side pockets I have sun screens- in case I have little ones in the back seat- and a bag carrier tool that I haven't had a chance to try out yet. I may end up getting rid of it but I do want to see how it works before I do that.
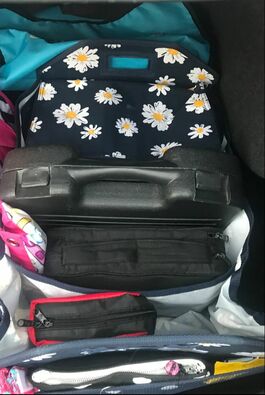
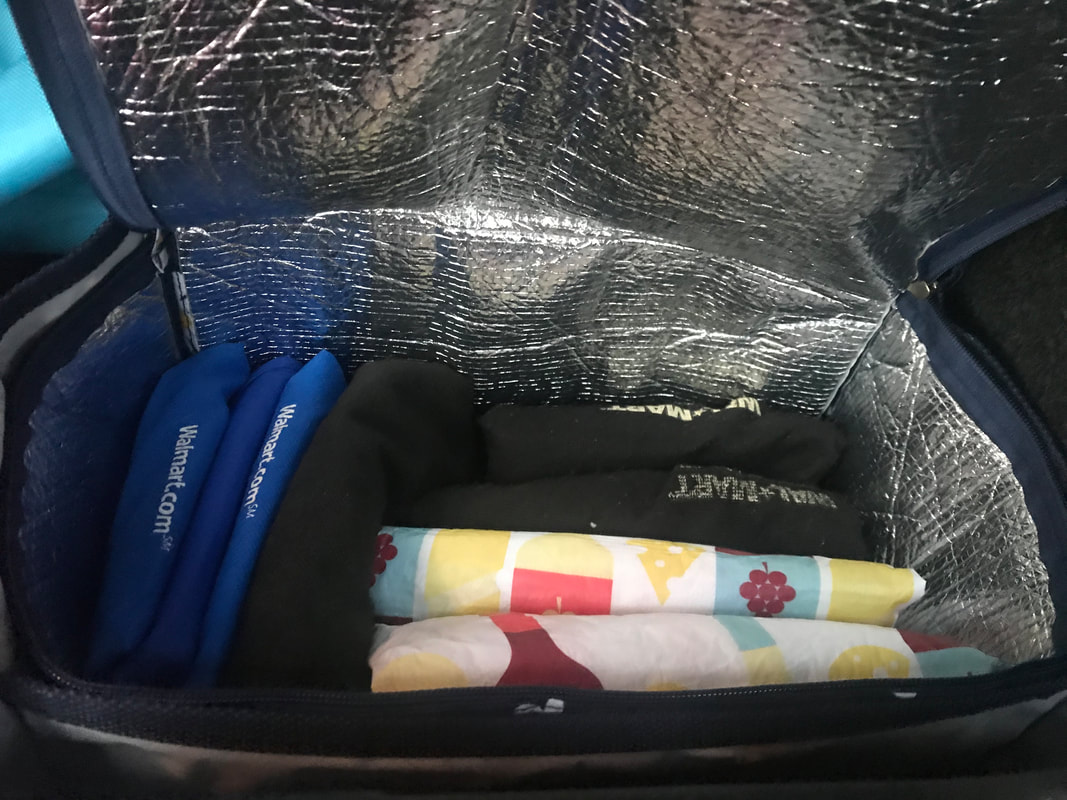
I put all of the bags, ID tags, and shirts for side hustles I'm trying out into the Favor pizza bag so that they would be available if I had time to pick up a shift. That is stored behind the organizer on top of where the car's battery is located. With a hybrid my trunk space was basically halved from other cars of the same model so there is a ledge that is perfect for storing items like that bag. Then I added a first aid kit, my Bible, a bag with pencils & highlighters (for chorus rehearsal), and the car's emergency kit (road hazard triangle, tools, jumper cables, and etc.) in the front two compartments of the organizer and an insulated cooler bag went into the last compartment. I used Marie Kondo's method of folding to fold all of my reusable grocery bags into the cooler bag and I was good to go. I don't believe she actually has a tutorial on how to fold reusable shopping bags but I used her method of making a rectangle, tucking in any bits that overhang it and them folding in thirds. Here's a video showing how I did this. The entire process took about half an hour and having a clutter free car trunk has actually helped keep me accountable to my goal of keeping the rest of the car clean and organized. Right now I have to get it washed and vacuumed but other than that I would say it's clean and presentable. I just took a new hire to lunch in it and had no second glances from him or anxiety from me about the state of my car and I didn't have to make sure it was clean the night before. Steps in the right direction for someone as prone to a cluttered car as I have been known to be in the past. Did you include your car in your de-cluttering efforts? Let me know, I'm curious if I'm the only one who prioritized that space or not. Until next time,  Continuing on from last week’s clothing decluttering post we’re moving on to the second task on Marie Kondo’s list: Books. I used to have a ton of books. I had three bookshelves stacked two deep in books while I was in college. When I got engaged had found a job in Dongducheon, South Korea to be near my ex I realized that the logistics of me storing all of those books for an indefinite amount of time was just not going to work. So I gave away and donated about half of them. After coming back to the US and unpacking two households (my college apartment plus our joint things from Korea) I once again consolidated the books, halving them again as there was simply no way we could continue to bring them from home to home. All this to say that I’m not new to decluttering books… but I’m also good at collecting them. I love books. Curing up with a good book and a cup of tea on a cold evening is one of my favorite pastimes. This time around I had a full bookcase to begin the decluttering process with. In Marie Kondo style I started pulling them all out of the shelves. I didn’t have enough room to take down the teaching books (that I also actually needed to keep whether or not they brought me joy… a departure from her method) so those stayed on the shelf. Oops, not a perfect KonMari decluttering here either but it worked nonetheless. The KonMari method would have had me ‘wake up’ the books by touching them all then, without opening the books, hold them and decide if they ‘spark joy’ or not. If they don’t then you discard them. Simple, quick and you would think fairly easy. I found this one less easy than it sounds on paper because there are books that I have not for regular use or because they bring me joy but because they are useful- a concordance, sheet music, teaching materials and books, etc. There are also some books that don’t themselves bring me joy but doing the activity that it helps me to do does bring joy- singing the songs from my music collection, cooking, etc. I also have books that I am saving for when my nieces visit, for use in my classroom and for my future children. None of those really felt like they fit into her plan for decluttering books. Perhaps I misunderstood her idea of sparking joy here but I definitely kept books that didn’t spark joy when everything was said and done. Books were just hard and to be honest I didn’t like her method when applied to them. It did force me to think about the books I kept though which I’m going to take as the lesson of the day and move on to another area. I had some books that don’t fit my life any longer- ballet books for instance, I no longer teach ballet and don’t see that in my immediate future or cookbooks full of recipes that contain gluten… I’m never going to use them, I can’t- all of those made their way to the sell & donate piles as well as a few others. Another handful of books are heading to my sister for the girls to enjoy now rather than when they visit. All in all I got rid of a large box of books, I would estimate 25-30. Next up is supposed to be Papers, and we’ll get to that next week, but I actually did a quick declutter of my car first as I was about to go out of town and all the decluttering and organizing had me itching to put it to rights before I left. I’m actually not sure if the car would be considered part of Komono or not part of my home at all actually but I spend quite a bit of time in my car commuting to work, chorus, dance and doctor’s appointments so having it cluttered can actually affect my whole day. Until next time, 
Since most of my belongings were in storage for nearly two years while I was trying to find and buy a home I had a LOT of stuff that I really didn’t need and was not likely to use again anytime soon. Finishing the unpacking coincided everyone’s suggestion to read Marie Kondo’s book The Life-Changing Magic of Tidying Up as one of my 12 non-fiction books for 2019. I finished the book in just a few days and, of course, started using the KonMari method to declutter my home. Her process is simple: gather all items together that are alike and sort through them, deciding which items ‘spark joy’ and which don’t. Those that do not you thank for their service to you and let go from your life (often in donations). That’s my summary, on her website she lists them as: There is also a specific order you must go in if you are following her method of decluttering, and it doesn’t follow a location system but rather goes by item categories:
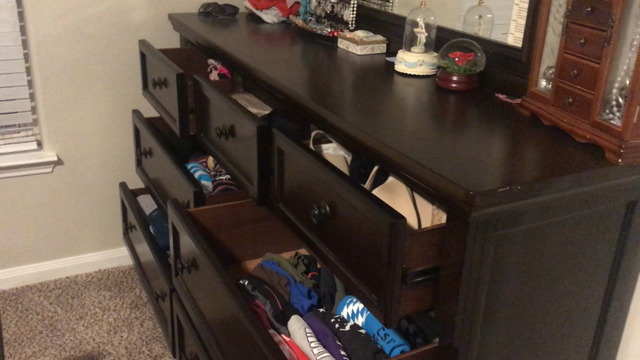
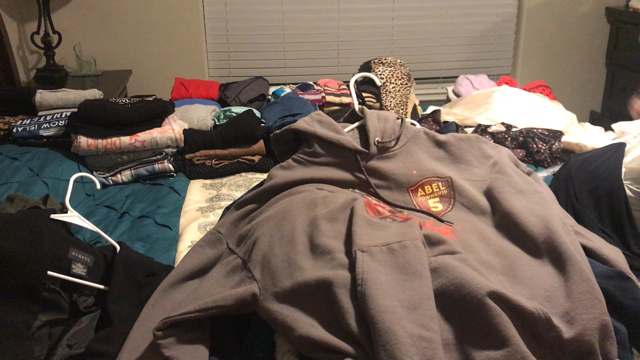
Since the first step was clothing that’s where I started. I had recorded the entire process but unfortunately the footage was corrupted so I lost it all. Instead I recorded a video of the aftermath of finishing the decluttering showing you my closet and all the drawers holding clothing so that you can see her filing system. I also discussed some of the things I did differently than she suggests. They are:
That’s pretty much it though. While it did take a long time, I enjoyed the process and found a lot of value in going through everything. My local charity also found value in me doing it as I had a backseat full of bags just from the clothing (which includes shoes and accessories as well) over haul. Finally, the process of going through all of my things has made me more mindful of not only what I purchase clothing wise but also why I am purchasing it. I needed a new pair of slacks and I almost didn’t get them, despite needing them, as they didn’t really meet the need of ‘sparking joy’ that is, they weren’t really my favorite style. I did end up getting them as I actually needed them and hadn’t been able to find a better alternative but I was mindful about it and the incident has made me realize I need to be more pro-active in my clothing purchases rather than reactive so that I can find things that really suit my taste and budget as well rather than just making a purchase out of necessity that I may not be happy with. Next up was books, which was a fast but insightful evening. We’ll talk about that next week though. Have you tried decluttering your closet yet? What did you learn if so? Did you have any tweaks like I did? Until next time,  P.S. As a bonus for this week I have an extra video on how to fold plus size clothing using Mari Kondo's filing method of folding clothing in drawers. I really like this method and have used a similar method for years (her method has one additional fold than mine did). Here it is if you, like me, find yourself needing to tweak the folding method on some items to get them to fit into the drawers better... or if you just want a run through of how to fold with her method. I tried to be comprehensive. I am really loving Dropbox at the moment for all things e-file as I can view/listen to them from my phone but still pull them up on my laptop so I don't have to type out edits on my phone. It's cold right now so my fingers often get cold and a bit stiff which makes typing on my phone a hassle... plus, I simply don't enjoy typing out much of anything on my cell phone when I can do it in half the time with a keyboard. My keyboard supposedly will work with my cell phone but I have yet to try it out as I may as well use a larger screen if I am at home with my keyboard. :)
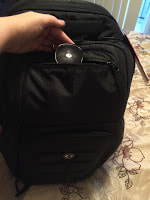
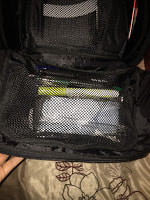
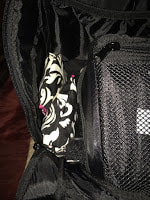
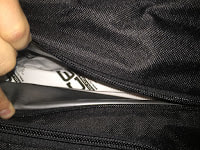
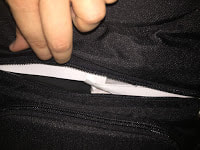
That's all said only so that you understand why I have come to use my current meal planner- the simplicity of moving back and forth by keeping it on my Dropbox. I have been experimenting with various ways of meal planning over the past few years with the goal of being able to do this but there aren't that many apps that also have a laptop version that syncs that aren't a subscription service (though if I missed one please let me know!). I've tried using Cozi, which I absolutely LOVE as a calendar, but I need a tablet or laptop in order to be able to menu plan on their app... and I don't have a tablet at the moment so I can't really use the planner on the go. I did love that I just click one button to add a recipe's ingredients to my shopping list though so all I had to do was delete what I already had in stock... super simple process on my laptop... just bulky to cart around my laptop. I also didn't like the fact that it is just a dinner plan... I eat more than dinner so I need to plan for more than dinner if I don't want to have to keep popping out to the store for something (and overspending because I didn't plan). I've tried many ways to plan and I still haven't found a way that I love enough to make it my forever way but I've found something that works for me for now so I thought I'd share. Right now I am using a separate recipe storage that I haven't gotten to where I want to share it but know that my recipes file is sometimes used in conjunction with my meal planning. As an fyi, right now I am living at my parents' house in order to save up money for a bigger down payment on a house since I was being outbid right and left when I tried to purchase a house several months back (they are awesome for inviting me to do so!). I only prepare dinners for everyone in the household a few days per week as not everyone is home in the evenings to have meals together. For myself though, I plan and prepare for all of my meals (with the exception of weekend meals if I will be eating out)... so I need to know which days to shop for meals that will feed more people and which days it is only me eating or I will have over/under prepared and we could potentially waste a lot of food and money. To track this and help me visually see what was going on each day I added a row above the 'dinner' area on my meal plan that says "Who?". If you end up using my planning spreadsheet you can easily change what this says to fit a variety of options: evening activities, who will cook, etc. or remove it altogether. A similar method worked just fine when I was on my own and when I was married though so I think that this will work for just about any family with a little tweaking depending on your lifestyle. So, the first step to planning my meals is to sit down with my schedule and see what is going on... when will I be home for dinners, what days do I need to have more flexibility, what meals do I need to pack to take with me on the go, who will be home on days I am home for dinner, etc. I note this in the "Who?" line and then move on to checking my freezer. Before I pick out recipes/meals I check my freezer. I like to keep my freezer stocked with meats of various kinds so that I can purchase when something is on sale verses when I run out. I am out of ground beef at the moment but have many other options (I'm using chicken to make tacos this week instead for instance) and don't feel pressured to purchase just because I am out which helps me to not over spend on my grocery bill. Normally I prefer to have at least one meal's worth of all the meat types I would typically gravitate to in the freezer but I am on an 'eat from the freezer/pantry' challenge at the moment so I didn't purchase ground beef when I ran out. I've got plenty of other options though! Starting by picking my main protein narrows my choices on recipes straight from the get-go so I don't spend half an hour flipping through recipes to decide what sounds appealing. This week I picked a pork roast, some chicken thighs and a whole chicken. Some weeks there will be a new recipe I really want to try and I may need a meat I don't have but I count that in with occasional deviations. Usually when I am looking in the freezer I already have meal ideas churning based on what I've been interested in recently but if I don't I head to my cache of recipes and quickly thumb through until I find a main dish that sounds like it would fit the time allotment I have for each given evening. If I am not going to be home until late then I won't want to cook an hour long dish or even a half hour dish most likely for instance so I would want it to be a crock pot dish or even have leftovers from the day before. I do incorporate leftovers into my meal plan... and multiples of the same meal per week, especially in breakfasts and lunches! It saves me time and money in the end, both of which I prefer to spend less of in the kitchen if I can help it. This week I decided to make a roasted chicken on Monday in my crock pot (I am making the cooking style from my rotisserie chicken but with the BBQ dry rub this week), eat leftovers of it with my parents on Tuesday (and make some stock for soup from it), grab a meal I already have in the freezer from previous weeks' leftovers for Wednesday and Thursday since I will not be home until late, whip up some chicken soup from the stock on Friday and finish with a roasted pork loin on Saturday... Sunday evening would be leftovers of the soup and loin. I head to my lunch mains next. Lunches I am mostly getting from the pantry this week due to the challenge but I plan them similarly to dinners in that I check what I have protein-wise first and go from there. This week I will be having tuna boats (made with homemade mayo!) but I decided to try out some 'taco boats' this week as well so I tossed some chicken thighs, taco seasoning, and a can of salsa on the stove to cook on low last night and now I can mix it up and have tuna some days and taco meat the others. I will save half of the taco mixture for the freezer for another week as I made more than I needed for just that purpose. It could also be for a dinner that I planned poorly or planned to eat out but ended up not feeling up to getting out... planning ahead with a few meals in the freezer is rarely a bad idea I have found. Breakfasts often will be a rotation of 2-3 meals for me, I'm not very picky when it comes to my breakfasts but I need it to be a protein and lower on the carbs if possible. Sometimes I will make a paleo breakfast bread for the week though and have a little of than with my protein option. Other times I will have a smoothie with lots of veg and fruit plus some algae for the iron and protein content. It has to be fast in the morning and keep me going until 1-2pm as I don't always know when my lunch will be. I love paleo pancakes but I'm not a morning person so those are typically saved for 'breakfast for dinner'... which should probably make it onto next week's rotation because yumm! The final thing I do is add my veggies and fruits to my meal plan. I insist on at least 2-3 servings of non-starchy veggies with lunch plus an optional fruit depending on my breakfast choices. For dinners I insist on at least 2 servings of non-starchy vegetables and I have one starchy vegetable depending on the rest of the meal plan for the day. I try to limit my carbohydrates as an excess of them tends to make my more symptomatic but that's my personal preference. Occasionally this is different, for instance I plan on having a whole baked potato tonight with my roasted chicken and green beans... that is more than one serving of starchy vegetable but it isn't an every night occurrence and I have no plans tonight other than resting (I am sick so getting over this cold with rest is a must) so I don't need to worry so much about carbs so long as I don't go crazy. Once I have my meals planned out I double check my fridge, freezer and pantry for everything I need to make my meals before I head to the store. For instance: chicken soup needs an onion, chicken, tomatoes, carrots, and potatoes. All these items are in the pantry other than the onion... did I add an onion to the produce section of my list? I did and I have everything else so I'm done with that meal. I also make sure that I went over my household goods stocking list the week before (One of my to-do's during the week is to check on things like pantry staples, toiletries, pet items, etc. and add things that I am low on to my shopping list. This week I added toilet paper, borox and dog treats for instance.) so that I don't run out of anything during the week. I also double check my stock of homemade items like mayo, ketchup, salad dressing, and etc. based on my menu needs to ensure I have enough for the week. If I don't it get's added to my to-do list in the Notes area of my planner... a condiment is usually something I can make in a few minutes during the meal prep for the week if I am prepared. Then I head to the store. The whole process, minus the shopping, usually takes me about 30 minutes but it took longer at first until I got into a pattern so be prepared for that. I have saved money and noticed that food waste has gone down significantly as well and that is always a good thing! How do you meal plan? 9/10/2015 6 Pack Bags Expedition 500 VS Isolator Fitness Isopack, Part Two: The Expedition 500Read Now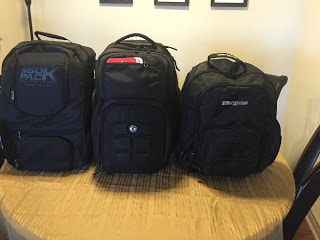 It was difficult to find a good comparison online of the two meal management backpacks I had narrowed it down to- the Expedition 500 and the Isopack. Since this was the case I ended up ordering both the Expedition 500 and the Isopack to compare and decide which worked best for me. I decided on the Isopack so the Expedition will be returned. I'm hoping that this post will help someone else that is trying to decide which to purchase so that they won't have to order blindly. Due to the large number of photos I have to divide the comparison into several pieces, here is the second... the Expedition 500. 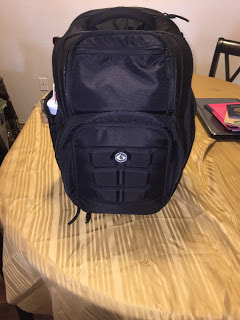 There is a chest clip to help distribute the weight. This is quite heavy even empty. I couldn't weigh it but I read that it was over 12 pounds empty and that seems pretty accurate. After it was full I definitely needed the weight distribution but it was just too heavy for me to carry easily so that was one of the negatives of this bag. 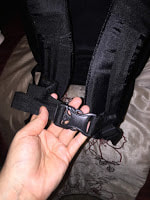 There are two front pockets. The very front one is meant for sunglasses and it fit mine quite well. The inside of the pocket is lined to avoid scratching your glasses. The only problem with this pocket is that once you fill the pocket behind it there is no longer room for the glasses if they aren't completely flat... which mine are not. The pocket behind it has two smaller compartments as well as a clip and a mesh pouch. I was able to put my wallet in this compartment and my keys in the sunglasses pouch.
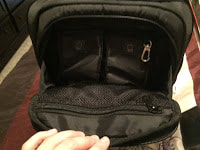
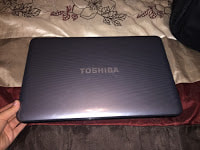
Next up is the laptop compartment. I was able to fit the same laptop, kindle and paper notebook in this laptop pouch as in the Isopack. This pocket is lined with the same fabric as the sunglasses pocket to avoid scratching. There is a pouch for a tablet in this backpack just as in the Isopack.
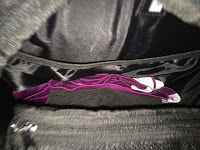
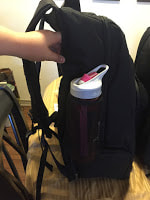
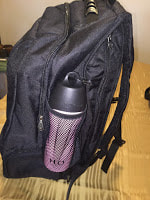
Inside the main compartment there are two small items that are not included with the Isopack: a drawstring bag and a vitamin/supplement storage container. These were nice additions but I personally didn't need them as I already had a set. Some bags seem to also come with a shaker bottle (I believe it was the black and red set from one of the sellers on Amazon) but that was another item that I didn't need. There are two side pockets that zip closed when not in use (or if you want to use them as another pocket) that convert into water and shaker bottle holders when unzipped. Zipping the pocket up helps to lock the bottle in place. I saw no issues with slippage of the bottles I placed in the pockets to test it out.
On to the inside of the main compartment... the front lays out for easy access to the inside pockets. There is one on the front of the bag, one on the top of the meal management section, a pocket on the back of the bag and two small pockets on the sides of the meal compartment. The side mesh compartments would fit a can of soda or small bottle of water. When you first get the bag you will see that the drawstring bag is located on top of the meal compartment. This is where I would continue to keep the bag. The last pocket, on the back, does not go all the way to the bottom of the bag but would be a good place to keep a laptop cord and wireless mouse.
I was able to put two smaller bags on the side of the meal management box but I did not use the mesh pouch. You should be able to put a pair of flats in the bag, one on each side in this area. A pair of minimalist running shoes would likely also fit here. A set of workout clothes fit behind the meal management area and left room to put items in the pouch above it or just atop the clothing. This is where I would put my toiletry bag.
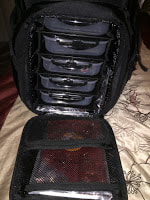
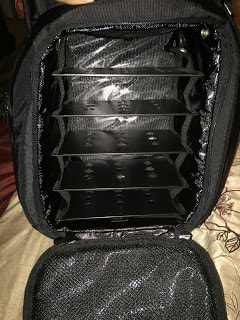
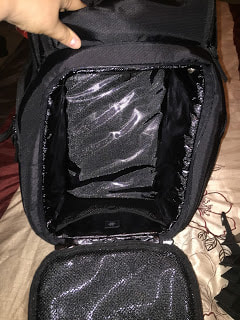
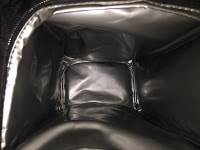
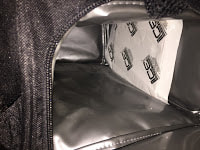
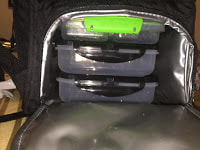
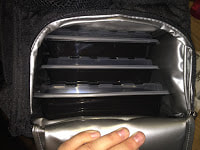
On top of the meal management bag you can put a few other odds and ends but cannot overfill the area atop the meal management area as the front of the bag angles in when you close the bag. I wasn't able to fit as much into this bag as I could in the Isopack. I was able to fit everything except the following and the ball: 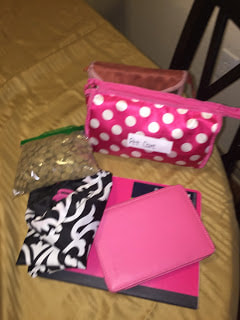 from the same items that were in the carry-on set of items as in the other bag...  And finally on to the meal management area. Here is what you see when you open the bag. There are five containers in a removable rack system as well as two small and one large gel ice pack.
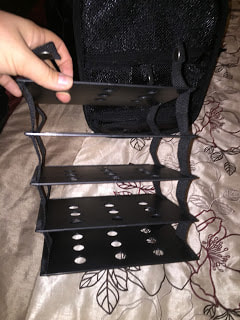
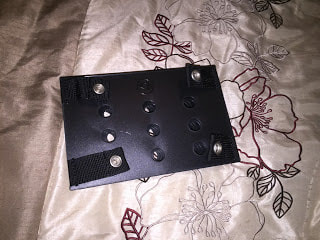
I wasn't a big fan of the rack system as finding replacements or containers the correct size proved to be a bit difficult. I did like that they are leak proof though! I also liked the fact that they seem very durable. Here is a photo of the rack system both extended and flat when removed as well as the meal area empty with and without the rack.
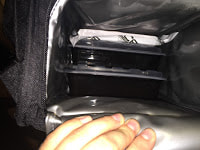
As you can see the rack simply snaps into the top of the meal area and drops down to extend.  The last pockets are located on the front of the meal area. The large icepack fits in the back pocket (it goes from the top all the way down) and utensils and napkins fit in the shorter top mesh pocket.
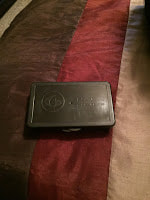
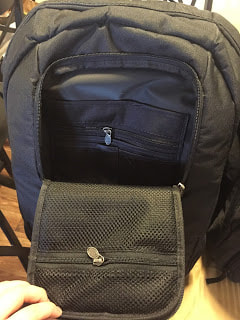
All in all this seems like a good all-in-one backpack if it wasn't so heavy to carry. It didn't fit quite as much as the Isopack but for most people that wouldn't be a problem since they don't need to carry around the medical items that I carry around. Without them I could fit everything I would need to carry in this bag quite easily... it carries everything I need for daily usage already just not quite everything I keep in my carry-on bag.  It was difficult to find a good comparison online of the two meal management backpacks I had narrowed it down to- the Expedition 500 and the Isopack. Since this was the case I ended up ordering both the Expedition 500 and the Isopack to compare and decide which worked best for me. I decided on the Isopack so the Expedition will be returned. I'm hoping that this post will help someone else that is trying to decide which to purchase so that they won't have to order blindly. Due to the large number of photos I have to divide the comparison into several pieces so first... the Isopack! 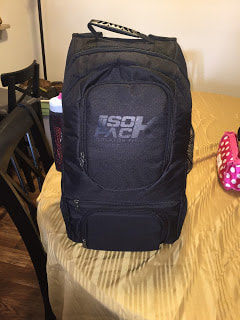 The front pocket (that has the logo) opens up like so:
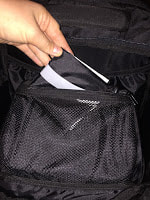
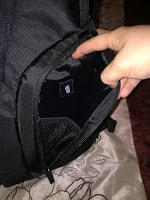
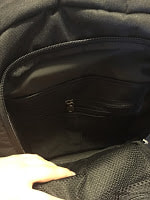
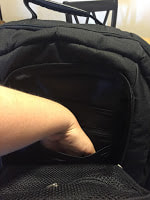
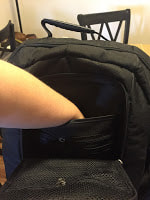
As you can see from the photos the pockets are fairly deep. You could fit a wallet, passport, phone, keys and a few other odds and ends that you need regularly here very easily. I am going to be using this area to carry the contents of my purse (since I am no longer carrying one on weekdays... I am keeping an empty purse in my vehicle in case I end up needing to go to lunch for work or some such) plus my passport and medical ID when I travel. I forgot to take a photo of the chest strap but this bag has a chest strap to help with weight distribution. Next we'll take a look at the laptop pocket.
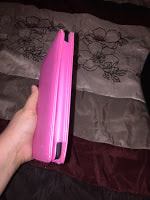
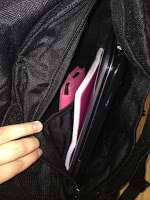
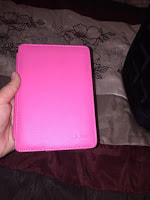
I was easily able to fit my laptop, kindle and a notebook in this pocket. The kindle is in a pink case and it didn't go to the bottom of the pouch. The pouch within the laptop area is meant for a tablet computer according to the website and it looks to me like it would easily fit. Here are better photos of the kindle and laptop so that you can see the size.
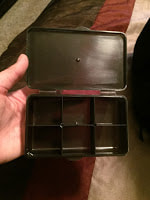
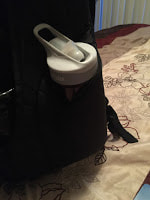
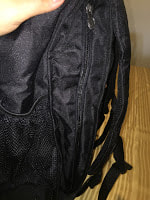
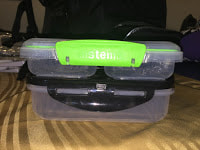
There is a small front pocket as well that I will be using to store utensils and a napkin. This is deep enough that I can put the two compartment plastic container with the green lid from a few photos down into and still easily zip closed. I will likely put that container in this pocket when I travel filled with nuts and seeds or a protein bar. 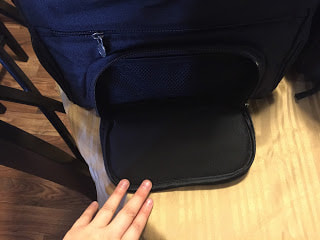 The water bottle pouches are made of mesh which I am a little concerned will snag but they seem to be of similar quality to the ones on my Targus backpack which hasn't snagged in about 6 months of near daily use. Both my Camelbak Eddy and the H2O4K9 fit in the pockets without issue.
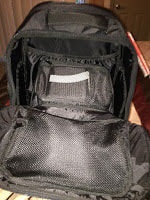
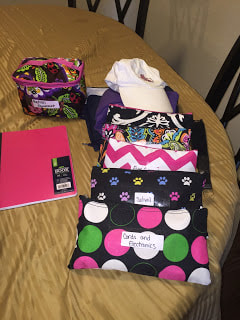
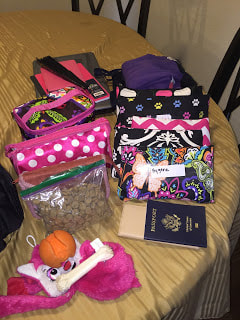
Next we will check out the main compartment. It is actually quite roomy and I was able to fit A LOT of stuff in the bag. Some of the small bags that you see here have been combined for my daily usage of this bag but when I was comparing them I was still trying out different organization methods with my cute new pouches I picked up while shopping with my mom last weekend. The photo on the left is for my daily use and on the right is for when it is being used as a carry on... everything fit in both cases. For the average user I will say that it can hold a binder, your gym clothes, and your toiletries easily. You may even be able to put your athletic shoes in the bag as well depending on what size shoe you wear and how bulky your clothing is.
Here is the inside of the main compartment. It is quite deep and has a small mesh pouch on the front where I am keeping a small folded drawstring bag. 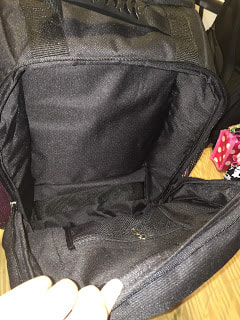 There is a zipper just above the front pocket that opens to a narrow pouch meant for the ice packs. It will fit one of the ice packs that come with the backpack. I had already purchased some of the smaller 7 oz. packs so I have a large one and a small one in the pouch and they fit perfectly. EDIT: It can fit both of the large packs that come with the bag... I was just putting them in wrong. {brainfog} Oops!
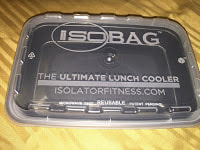
Here are the pouches... the one on the left is what comes with this backpack and the right are the smaller 7 oz. versions that are used in some of the other Isolator Fitness bags. According to the website the larger ones can keep food chilled for 12-16 hours. I have only used the smaller ones so far but it was still chilly at the end of the business day in my lunchbox so I don't doubt it. Further, these pouches are not gel or liquid even when they are defrosted so they should work fine with TSA regulations. I will let you know if they say otherwise once I travel in a couple of weeks. 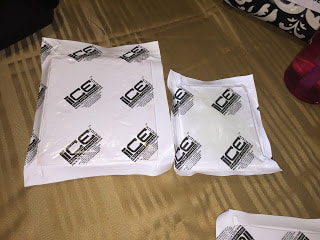 The final, and arguably most important, area is the meal management compartment.
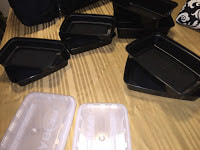
I used the containers from the 6 pack bag as well as the ones that came with this pack to show an accurate comparison.
All five of the containers fit in the bag plus one extra. A comparison picture of how it compared to the 6 pack bags container is below. 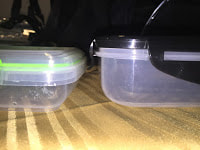 Now for the containers that came with the Isopack. I was able to fit one of the large ones, two medium ones and two small ones plus the second large Isobrick
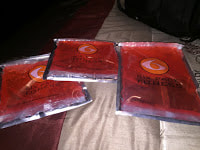
Here is a photo of everything that fit in the cooler area. 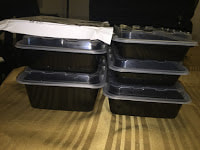 If you are wondering how many of the containers you get here is a close up of one of containers as well as a photo of all the containers that came with the backpack. There were two 12 oz., two 16 oz., two 28 oz., and two 38 oz in the bag to mix and match as you need them. Isolator Fitness has extra containers for sale if you want to purchase more.
Next up: The Expedition 500...
|
Archives
October 2022
Categories
All
|


 RSS Feed

© COPYRIGHT 2015. ALL RIGHTS RESERVED.