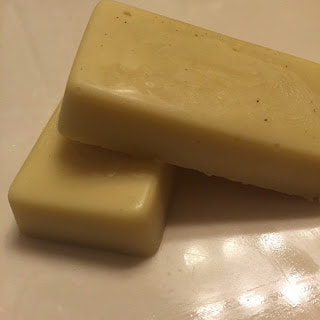
I recently discovered lotion bars and I pretty much love them. In my opinion, they aren't for everything but I love being able to use them on my hands and arms after a wash-up without the grease that typically comes with lotions. Don't get me wrong, I love (and use regularly) my body butter... just for different purposes than I use lotion bars for. A lotion bar has become the go-to for my morning routine and I don't see it going anywhere anytime soon, especially with the hot Texas summer coming up!
A couple reasons I have a few of these bars around the house:
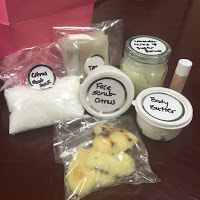
Not sure if you would like them? The good news is that these bars are quick to and super easy to make so you can try them out without much at stake. Plus, you can customize them with various molds and additives to make pretty gifts for friends and family or as a bit of decor on the bathroom counter top... but you'll like them! First Up, Gather Your Ingredients:
The How-To: 1. Melt all ingredients in a double boiler on low to medium heat. Don't have a double-boiler? No problem! Since I am living with my parents at the moment I don't actually use a double-boiler for this... just a pot of boiling water with a metal or glass bowl inside. It works great!
2. Add in any essential oils you would like in your lotion bars.
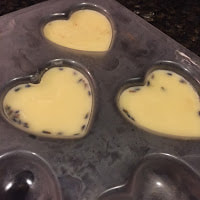
3. This is your time to customize your bars! For the bars shown below I did the following (before pouring the mixture into the molds) to showcase the scent and add a bit of a decorative touch for gifts: a. Chocolate: Dust a small amount of cocoa powder onto the mold. b. Lavender: Sprinkle a few dried lavender buds into the mold. c. Sweet Orange: Sprinkle a bit of dried orange peel into the mold. You could also do rose petals, dried lime or lemon rind, ground cinnamon or vanilla... the possibilities are endless! Note: Use dry ingredients so that the moisture content is correct. 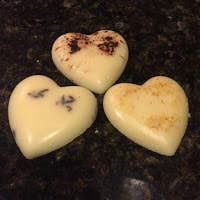
4. Pour the mixture into soap molds (or cupcake tins, chocolate molds, etc.) and pop into the fridge until they harden.
5. After ensuring that the bars are fully cooled and solid remove them from the mold and package as you wish.
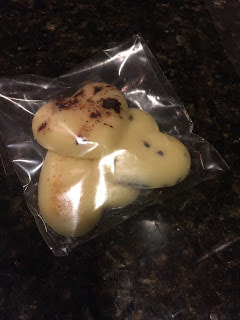
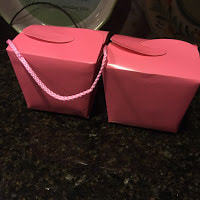
6. Give them away in gift baskets or as hostess presents... or use them yourself!
Non-perishables I used in this DIY (I used a different mold from Hobby Lobby but prefer the silicon ones over plastic so have added a few silicon ones here for you guys).
I've been using DIY deodorants for a good long while now and 'natural' deodorants for even longer due to my allergy to aluminum- since high school. It's been a long and frustrating journey I have to say but I'm almost to the end of it in that my latest batch of deodorant was nearly exactly what I wanted. I'm pretty psyched about that fact actually and that means that I'll have a post upcoming on my finalized recipe in the next few weeks if things go as expected.
On this journey to finding something that works for me I've learned a few things that would have been super helpful to know.
That's all for now. I'll be posting an update on what I've been working on lately this week as well (I haven't been slacking, promise, just trying a lot of different things with mixed results). One of those things is my Instagram account... feel free to hop over and check out things I'm working on recipe wise, see some meal ideas and just keep in the loop on what's going on with me (my two pups pop up from time to time as well... love them!) Laundry detergent has a ton of chemicals and fragrances in it typically that I don't want in my house... and it's much more expensive than it needs to be. I'm sure we've all seen more than a few articles and posts in the past few years that made us question if we should be using detergent at all: the scary piece in the news about brighteners, a blurb on social media saying that detergent manufacturers are telling you to use too much detergent in order to get more of your money, detergent remaining in clothes after washing and potentially causing skin irritation, detergent destroying your clothes... yikes! Were any of these pieces accurate? What was the alternative if they were? If you are like me you may have thought there was none and just kept using your detergent for a while but kept a watchful eye open. Eventually I decided I didn't want to continue using detergent on my clothes any longer so I searched for alternatives. There are tons! I found all-natural brands of detergents, homemade detergents of various types as well as laundry balls and probably more that I haven't come across yet. I used a laundry ball for about a year and, to be honest, I really liked them. I was able to run my washer on cold water which saved me money, my laundry cost was low as I only needed to replace the ball after a large number of washings, my clothes seemed to get clean, all was right in the world but people kept asking me how I knew they were really clean if I didn't have any soap or detergent in the wash. Eventually though I decided I felt better about using some form of cleaning agent in my laundry. I continue to read information on alternates to store-bought laundry detergent regularly. It's a personal preference and I may change my mind someday but, for now, I'm back to using a detergent. The difference this time is that I make it myself so I know what is in it. As a plus: it saves me money and is soooo simple to make. Score! Ingredients:
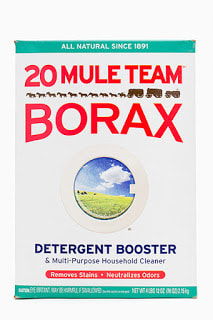
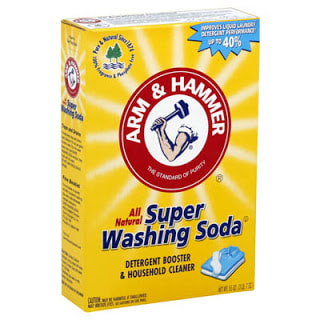
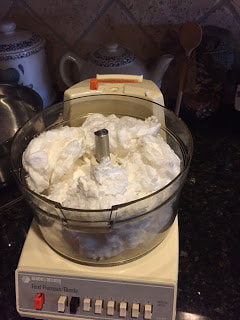
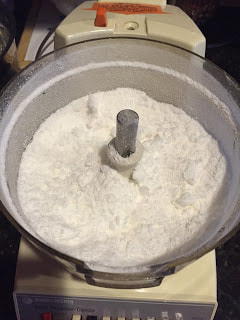
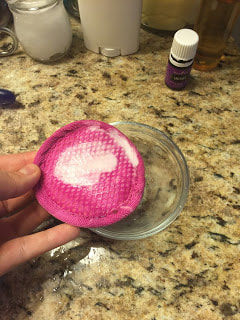
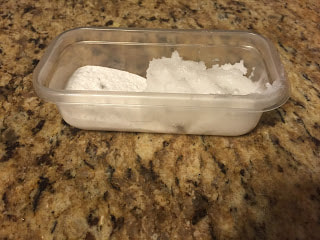
I had a bit of trouble finding Washing Soda and Borox in my store after I moved as few people apparently request them there... so here are the boxes of the brands I am using in case you run in to a similar issue. Procedure: 1. You will need to start by flaking/grating your soap. There are at least two options to do this: grate it with a cheese grater or toss it in the food processor. Zote does come in a flaked form but I had read some reviews about using it in detergent that I wasn't very happy about so I'm back to Ivory now. One cool thing about Ivory is that you have a third option: microwave! I don't know if this works with other forms of soap as I haven't attempted it. (If you do, let me know! I'd love to find out!) If you are using Ivory and want to use a microwave here's how: 1. Chop your soap bad into smaller pieces and arrange them on a microwave safe dish.  2. Then place the dish in the microwave and microwave it for about 1-2 minutes... you'll know you've reached the right time when it looks like this. 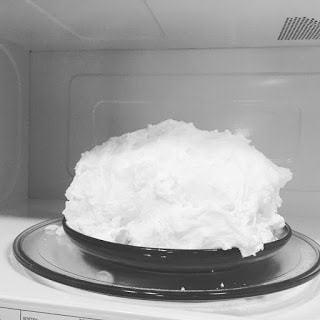 3. Let the 'soap cloud' cool. It may smell a bit at first so if you leave it in the microwave for about 45 minutes or so it will be cool to the touch and won't really smell anymore. 4. Place the soap cloud into your food processor and it will turn into powder! Ok, this step isn't 100% necessary, you can use your hands to turn it into powder as it will crumble very easily. I just prefer doing it this way and I already had the processor out for another project so I blitzed it quickly and moved on with making my soap.
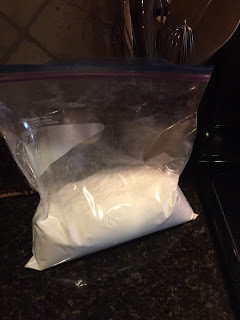
I've found that the most efficient way to make detergent regularly has been to grate up enough soap for 3-4 batches all at once so that I can quickly measure out the ingredients and get on with my day when it comes time to making detergent again every month or so. Again, a personal preference.
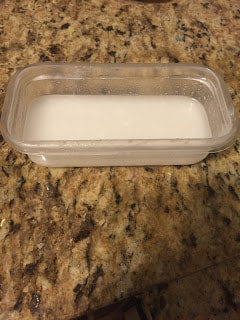
5. Mix your borox, washing soda and soap together in a 2:2:1 ratio (so 2C borox, 2C soda, 1C soap or 1C borox, 1C soda, 1/2C soap, etc.). 6. If you want to add some baking soda or OxiClean (both are optional) you would make this at the same amount as your soap. 7. Done! You will typically need between 1/8-1/4C of this detergent per load depending on size. I keep mine in an airtight container with a scoop in it so that I just pop it open and put 1-2 scoops in and am on my merry way come laundry day. :) What alternatives to store bought laundry detergent have you used? Which worked best? A while back I did a post about DIY deodorant. I wasn't a big fan of the scent and the consistency needed to be firmed up a bit in my opinion. The original recipe can be found here and is pretty awesome in and of itself so you should go check it out. My tweaks are below.
INGREDIENTS:
OTHER:
PROCEDURE:
This is another favorite recipe for a super moisturizer. It is a bit more greasy than the lotion recipe I posted the other day but it a great night moisturizer for dry feet and hands especially. I only mention that it is a little more greasy because I do not use this as a hand cream personally. I know some who have skin that is more dry than mine and use it all day long. They rave about how it has helped their dry skin so it all depends on your skin/body. Another good thing about this recipe is that there are fewer ingredients... the beeswax and aloe vera are left out of this version, making it a more simple and cheaper option to start out making. The procedure for this body butter is almost identical to the lotion so if you thought that was a piece of cake then this one will be too. I typically make a batch of both the lotion and a batch of the body butter and keep them both around the house as I use them for different things... experiment a little and see what works best for you and your family.
NOTE: A single pound of these 'butters' will likely last you nearly a year's worth of lotion or body butter for one person or several months for a family so there is no need to over purchase. INGREDIENTS:
EQUIPMENT:
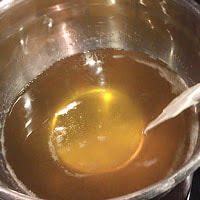
PROCEDURE: 1. Measure out your ingredients. You will likely need a knife to cut the cocoa butter. 2. Place the shea butter, cocoa butter, coconut oil, and sweet almond oil in a small saucepan on LOW heat. You do not want the mixture to boil or smoke... it needs to be kept very low. The ingredients will melt fairly quickly even on low heat. 3. Once everything has melted, mix in the vitamin e oil and any essential oils you may want for added scent or aromatherapy needs then remove from heat immediately. I prefer peppermint as it smells delightful with the cocoa butter but sweet orange (think one of those chocolate oranges in scent), lavender (for calming, evening use especially), or citus work very well also. 4. Allow the mixture to cool until it has just begun to set up. You can just leave it on the counter for a few hours and go about your day or be like me and toss it into the freezer for 10-15 minutes to speed up the process. 5. Once it has begun to set up you will use the electric mixer to beat the mixture into the creamy consistency we are looking for. This adds air to the mixture so that it isn't quite as dense. NOTE: If you let the mixture get to hard/cool then it is easy to apply a little heat and mix with a spoon for a minute or two to get back to the correct consistency. 6. Add it to a jar and allow to finish setting up for half an hour or so. Curious where I get my ingredients? I get my ingredients all over the metroplex, on Amazon and through Young Living as a distributor. Don't want to search out stores to pick them up? I'll make it easy! You can place an order through me for any oils you may need and there are quick links for the non-perishable ingredients and tools on Amazon should you wish to order online on this page... just click on the ingredient. For the past few months I have been experimenting with creating my own lotions, body butters, lip chaps and other moisturizers. To be honest, there have been so many batches of lovely smelling lotions in my kitchen recently that I couldn't possibly use all of it! Thankfully family and friends have been helping me try out the various versions I came up with and offering feedback. This one was one of the favorites as it isn't very greasy, helps to ease dry skin, and leaves skin silky soft. I also like it because I don't have to constantly re-apply to get the benefits, a single application can last me quite a long time even in a dry office building or out in the Texas sun. One thing to know about this lotion is that it set ups to be a thicker, creamy lotion than you may be used to. This means that you will end up taking a small amount out of the jar and using on quite a large area of skin rather than use a pump to dispense a large amount into your hand as it is not a thin liquid like you may be used to when you think of lotion.
NOTE: A single pound of these 'butters' will likely last you nearly a year's worth of lotion for one person or several months for a family so there is no need to over purchase. INGREDIENTS:
EQUIPMENT:
PROCEDURE: 1. Measure out your ingredients. You will likely need a knife to cut the cocoa butter. 2. Place the shea butter, cocoa butter, coconut oil, and olive oil in a small saucepan on LOW heat. You do not want the mixture to boil or smoke... it needs to be kept very low. The ingredients will melt fairly quickly even on low heat so watch carefully. 3. Once everything has melted, mix in the vitamin e oil and aloe vera gel and remove from heat. 4. Add in any essential oils you may want for added scent or aromatherapy needs. I prefer peppermint as it smells delightful with the cocoa butter but I have used sweet orange (think one of those chocolate oranges in scent), lavender (for calming, evening use especially), and a unique mixture of citrus (lemon and lime) and frankincense for one individual. You can be as creative as you want or stick with the plain version which smells slightly of chocolate from the cocoa butter. 5. Allow the lotion to cool until it has just begun to set up. You can just leave it on the counter for a few hours and go about your day or be like me and toss it into the freezer for 10-15 minutes to speed up the process. 6. Once it has begun to set up you will use the electric mixer to beat the lotion into the creamy consistency we are looking for. This adds air to the mixture so that it isn't quite as dense. NOTE: If you let the mixture get to hard/cool then it is easy to apply a little heat and mix with a spoon for a minute or two to get back to the correct consistency. 7. Add it to a jar and allow to finish setting up for half an hour or so. Curious where I get my ingredients? I get my ingredients all over the metroplex, on Amazon and through Young Living as a distributor. Don't want to search out stores to pick them up? I'll make it easy! You can place an order through me for any oils you may need and there are quick links for the non-perishable ingredients and tools on Amazon should you wish to order online on this page... just click on the ingredient.
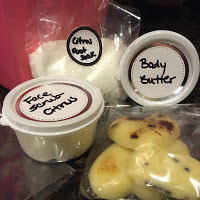
Your facial skin is very sensitive and as such it is important to take good care of it. Most cleansers and exfoliation creams have harsh chemicals in them that can cause more harm than good, especially to sensitive skin. For this reason I have slowly moved to an all natural skin care regime myself. The best part? Well, other than the fact that my skin isn't being exposed to chemicals I mean... I can make everything from items already in my pantry which means its super inexpensive and I don't have any wasted 'products' expiring before I use them. How much does one teaspoon of baking soda cost? Less than a penny typically. A healthy pinch of coconut oil? Usually, less than $0.07... and a single teaspoon of apple cider vinegar costs less than 3 cents. So It costs me AT MOST $0.10/day or $3.00 a month to clean, exfoliate, tone, and remove make-up off of my face... and I don't need to do it every day! How much does your skincare routine cost you each month? A brand name pack of make-up removing cloths will run you $4.50... so that cost can add up very quickly.
Make-up Remover: Coconut oil is amazing! You will see it in most of my recipes used for moisturizing just to begin with (and not even touching on cooking!)... from lotions to pre-shave cream to make-up remover this is a very versatile substance. Simply rub a bit on your eye lids in a circular motion and then wipe it off with a soft cloth to remove makeup, including mascara! 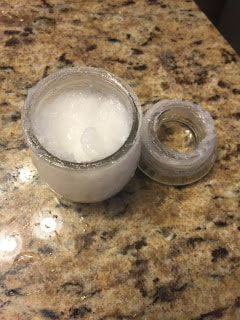
Exfoliator #1:
This is a simple mixture of baking soda and water and is ideal for occasional use rather than everyday use. Mix together 1 tsp baking soda, 1 drop lavender (optional) and 1 tsp water. Put mixture on a cleansing pad and rub in gentle circles on your face. Rinse with warm water, pat dry and follow up with toner
Exfoliator #2:
While sugar is not a good choice for your daily nutrition it is a good option to exfoliate your skin. Simply mix sugar and oil in a 1:1 ratio and rub gently on your face. Let it sit for a few minutes before rinsing with warm water and pat your face dry. I have seen this type of recipe used in spas with some added oils as part of a massage or other treatment... you can even purchase sugar scrubs at beauty supply stores. Without fail they are far more expensive than they should be. It will cost you less than $1.00 to mix up a fairly generous amount of this concoction which leaves your skin smooth and glowing. Again, exfoliation isn't something you should do every day as once or twice a week should be plenty. Toner: Another super simple beauty item directly out of your pantry... apple cider vinegar. A mix of 4 parts water to 1 part ACV makes an effective toner. Simply pat a bit on after you exfoliate and this pantry staple is now a cheap but effective skin toner. It does, of course, smell like vinegar but the smell dissipates very quickly so should not be a deterrent. 
Cleanser:
Cleansing your face is something you do every day most likely so it needs to fairly gentle on your skin. Personally, I typically just cleanse with warm water most days but there are some days that I want something a bit more substantial... like if I get a breakout of acne. Usually acne isn't a problem for me anymore unless I fall off the wagon so to speak but there are indeed times where I eat something I shouldn't or don't realize that there is an ingredient that I shouldn't eat in a dish while I am out to eat. These are the times I rely on my cleanser and some do some extra TLC on my skin. Like all the other recipes on the list here I have the ingredients for my cleanser in my kitchen pantry. Simply mix 2 tsp of coconut oil with 1 tsp of baking soda and you have an effective but gentle cleanser. Rub in gentle circles on your face, wait a few minutes then rinse with warm water and pat dry. Follow up with toner for a complete skincare routine. One note about coconut oil: while it should be liquid at room temperature sometimes your room temperature is a bit cooler so it will be solid. If this is the case it is a little more difficult to mix together. Simply toss it in the microwave for 10 seconds and it is very easy to mix!
I will be discussing lotions and body butter in about a week so check back then for some all-natural but still simple recipes. What other diy all natural recipes would you like to show up in the blog? Until next time, have a healthful day!
Curious where I get my ingredients? I get my ingredients all over the metroplex, on Amazon and through Young Living as a distributor. Don't want to search out stores to pick them up? I'll make it easy! You can place an order through me for any oils you may need and here are some quick links for the rest of the ingredients on Amazon should you wish to order online:
I am allergic to aluminum... this means traditional, store bought, deodorants are pretty much off the table for me. Now-a-days this doesn't bother me as I've seen quite a bit of research to show that our traditional deodorants with antiperspirant properties are bad for you anyways but for years it was the bane of my monthly shopping expedition. Until you have tried more store-bought options than you can remember you just don't understand the struggle to find a good aluminum free deodorant. Ones I remember off the top of my head:
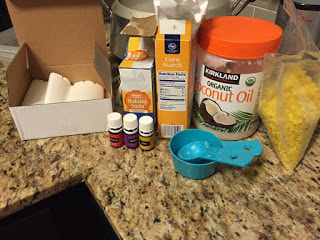
The ingredients were pretty much things I already had on hand in my house (except corn starch but that was a quick fix at the grocery store and now I have more than enough for my suburban homesteading/diy adventures to come for quite a while): cornstarch, baking soda, coconut oil, beeswax, and essential oils (lemon, frankincense, and lavender).
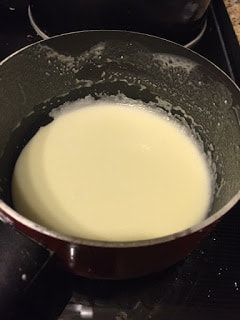
I simply followed the step by step directions to combine all the ingredients with low heat then add in the essential oils once well combined. It was a quick recipe to follow and ended up giving me two beautiful sticks of deodorant.
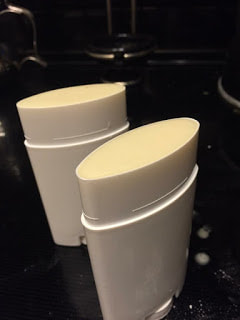
One note: it is a little difficult to get them to turn properly with my containers at first but I just used a towel to get a firm grip and kept turning until it began to move and now there are no issues.
I've been using the deodorant for about two weeks now and have had no problems with smelling sweaty and gross in the day to day activities, even in a Texas summer! Now for the problems...
UPDATE: I have tried about a million combinations at this point it feels like. I ended up halving the recipe but upping the beeswax and using Purification oil and Sweet Orange Oil plus a little bit of Lemon Oil to create the deodorant I am using now. I will post an official update post with the measurements in September. Give it a try... it's easy, healthier than store bought options for your body, and quite inexpensive to boot! I will be sharing my lotion/body butter recipe soon (wonderfully rich and silky... and only slightly more complicated than this recipe) so look for that in a few weeks! What would you guys like for me to try and make next? Comment below! Curious where I get my ingredients? I get my ingredients all over the metroplex, on Amazon and through Young Living as a distributor. Don't want to search out stores to pick them up? I'll make it easy! You can place an order through me for any oils you may need and here are some quick links for the non-perishable ingredients and tools on Amazon should you wish to order online:
|
Archives
October 2022
Categories
All
|

 RSS Feed

© COPYRIGHT 2015. ALL RIGHTS RESERVED.