|
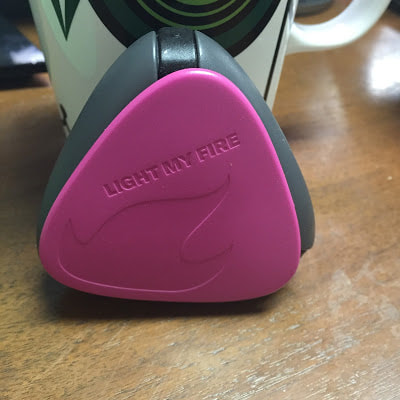
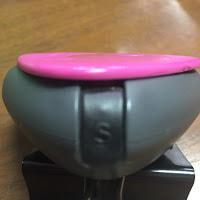
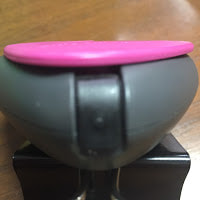
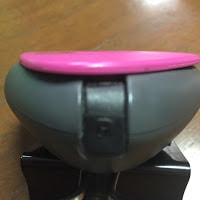
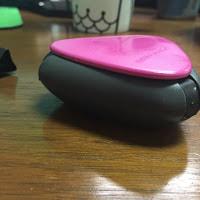
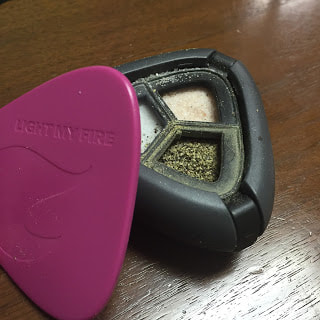
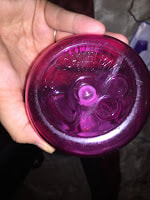
Salt is very important to my well-being due to the fact that I live with dysautonomia. We tend to use sodium to raise our blood pressure which will help abate some of the symptoms associated with dysautonomias. Personally, I'm hypovolemic so serious amounts of water and electrolytes, including sodium, are needed each day to combat that issue. Because these electrolytes are so important to my health I to keep various forms of salt, electrolyte drink mixes and some Thermotabs on hand at all times. To keep the salt on hand I've been using the Light My Fire Salt and Pepper Plus now for about five months. I keep it in the front pocket of my IsoPack usually but if I won't be using my backpack and I know that salt might be something I won't have access too throughout the day I will toss it in my purse along with a few other health items that come with me everywhere. The color option I chose was fuchsia (of course, I LOVE pink) but there are many possibilities: pink, orange, black, green (bright green), red, yellow, cyan, blue (dark blue), dark green, lime and, of course, fuchsia. If I bought another one I would either choose black or green I think but they are pretty much all lovely vibrant colors. In the Salt and Pepper Plus there are three compartments for spices, one is labeled S for salt, one P for pepper and one simply has a dot for anything you choose to put in it. Right now I have pepper and sea salt in the P and S and the additional compartment is Himalayan pink salt. If I was going camping with it I might put paprika, lemon pepper or garlic powder in the final compartment for cooking. When I opened mine to take a photo of the inside I jostled the salt and pepper a bit unfortunately and got some pepper in the salt compartments... so that is a slight problem with this model. If you are one to only refill when things are out it really wouldn't be an issue at all I imagine. (Sorry about the not so awesome photos of the tabs... they didn't want to focus on my cell phone sadly.)
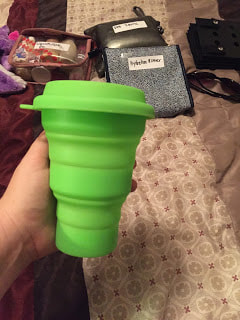
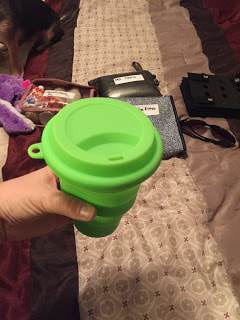
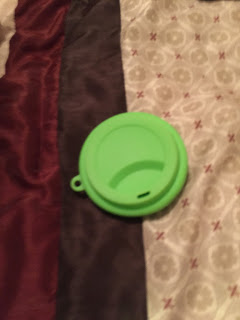
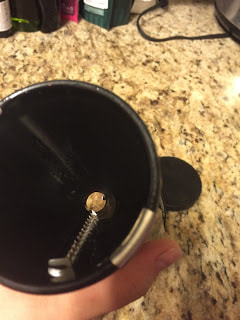
The labeled tabs are simple to pop out to sprinkle your ingredient onto food but they stay attached so that you don't lose the stopper... a plus if you tend to drop things like me. Durability wise I would give it 5 stars. Like I mentioned, I drop stuff... a lot... but it still looks brand new on the outside and even using the shaker regularly at work and when I'm out and about I still haven't seen any problems with the tabs/stoppers in the 5 months I have had it. For $9.99 I was pretty happy with my purchase and would make a second purchase if I was a regular camper (I'm not) so that I could travel with more spices easily. I love cooking and adding a few spices to my bag for the space of half a pack of tissues is something I would totally chose to do. Does the salt come out too fast? Not at all, both myself and my brother-in-law have used it without issue. I mention him because I can't always tell if something is too salty but he doesn't eat salt as often as I do so he would be able to tell if he accidentally used too much. I use the salt and pepper at lunch reguarly and if I angle the container slightly down and shake slightly I get exactly how much I want every time. It might be easy to over pour though if I dumped it vertically over my food... but the same would happen with any salt shaker. Another thing that I like is the fact that it is difficult to open the top to refill it. I know that seems to make no sense but the fact that it takes a bit more effort has meant that it has never opened accidentally in my bag or otherwise. It's a little annoying when it comes time to refill it but the lack of mess the rest of the time makes up for it in my opinion. As I mentioned at the beginning though, if you are refilling it when it is still mostly full you may have some cross contamination so don't refill it if you don't need too. I'm really liking this company's products so far. I may be ordering one of their Sporks in Titanium (I snapped my plastic Spork in two when traveling sadly but I loved it while I had it and my parents are still loving theirs as well) and a Pack-Up Cup here in the next couple of months. If I do I'll let you know how I like them compared to the other Spork and collapsible cup I had purchased and reviewed in the past. I've become so accustomed to home and work being within minutes of each other that I am still getting used to being as over-prepared as I once was for medical issues that might arise. One of the things that I used to keep in my car was an extra water bottle and Gatorade powder. I don't usually drink Gatorade anymore like I have mentioned in a previous post but I still need to keep electrolyte drinks on hand for emergencies. To this end it seemed that I needed a collapsible cup or fold-able water bottle to mix up my electrolyte drink powder in that could fit in my med kit. I could of course just use my water bottle but I like to retain that as pure water due to the bite valve and straw mechanism being a little more difficult to get completely clean at times. I ended up deciding against a foldable water bottle as it would be more difficult to clean as well so I started searching for a cup that would fit my needs. The cup I ended up getting held 16 oz, was made of food grade silicone, and had a lid. It is called the LevelOne Collapsible Travel Silicone Camping Cup. The lid was a selling point because i wouldn't need a spoon or straw to mix up the drink, just cover the hole and agitate the cup until it is mixed. The fact that it held a full 2 cups of fluid was important as well since a lot of collapsible cups are much smaller... this means that the drink would end up being thick which is not something I can handle if feeling ill already typically (nausea is one of the first symptoms once my heart rate and blood pressure start doing gymnastics... followed by headache). I believe this is technically a camping cup which is why it has a spot to attach it via a chain or similar to the outside of a backpack. For my uses it will be in the medical bag I keep in my backpack but if you want to use it for camping this would be nice feature I can imagine.
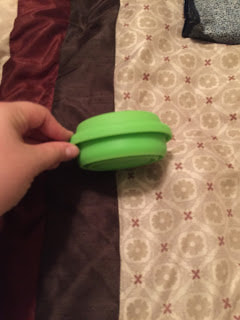
The cup doesn't collapse down as far as I would like but it isn't very bulky and fits easily into my med kit. One thing I do not like about it is that, due to the fact that it is silicone, it isn't particularly well suited to hot liquids. I don't see myself needing to drink hot liquids from it but when I gave it a try at home it wasn't a pleasant experience. The cup itself doesn't suffer from the heat at all but it was too hot to hold so I would not use it for coffee or tea should you use it as a camping cup. I did like that it was very easy to clean and that I can toss it in the dishwasher should I want to. I don't foresee a need to do so as I can clean it in the sink in a few seconds and let it air dry but I like options.
All in all I like this cup but it isn't something I would purchase multiple of or take camping as my only cup since I like to drink hot tea.
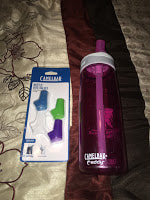
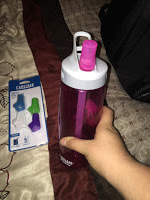
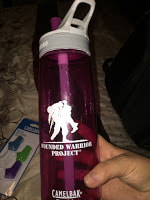
Staying hydrated is of top priority for myself and others with dysautonomia. If we get dehydrated even a little our symptoms can flare badly so you will often see us with a bottle of water or electrolyte drink of some sort. I used to drink a lot of Gatorade and the like but they tend to have a lot of sugar, artificial dye and chemicals so I try to stay away from them these days. There are some days where I cannot do so if I want to control my symptoms but I am working on finding a similar formulation that doesn't have those ingredients or at least limits them significantly. For now I am making sure to eat plenty of salt, drink water throughout the day, and supplement with other minerals daily that I tend to be low on. To help with the goal of staying hydrated I have tried numerous water bottles but I find that they all eventually began to leak into the bag or tote that I was using which would cause issues as I could have homework, clothing, or even medical equipment in the bag that needed to stay dry. So far the Camelbak Eddy has been my favorite but it doesn't work well if you are bed bound and need to by supine. The best for that has been the Contigo Autoseal Water Bottle. This one began to leak after about 6 months but they do have a warranty that they will replace the top or the gasket if you contact them and send in the top that is leaking. I have had my Camelbak Eddy for over a year now with very few problems. It did begin to leak a few months ago but upon inspection it appeared that the bite valve needed replacing. I purchased a package of 4 valves on Amazon for $10 and the leaking went away. Easy fix! The Camelbak Eddy comes in several versions and colors from child sized bottles to 1L bottles. The one that I have is 0.75 liters and part of the purchase price went to support the Wounded Warrior Project. Just like there is a warranty on the Contigo bottle there is also one for the Camelbak. It does appear at first glance to be more difficult to utilize and doesn't cover general wear and tear which gasket leaks could fall under but should be an issue you could contact them to see if their warranty would cover it. I haven't needed to utilize the warranty yet so I cannot speak to it other than just reading over it. Note:If you cannot drink from a straw for some reason do not get this water bottle as you will need to use suction to drink from it that is slightly more than using a typical straw. As for how durable this bottle is I can say without a doubt that it can take quite the beating. It has been in numerous bags that have been tossed about, dropped fairly regularly and seen more than its share of bumps and falls over the last year. This rough handling has not caused any noticeable cracks or chips but it does have a small scuff at this point. All in all I would say this bottle was a good investment and I will likely purchase a second one in green soon. One thing to understand about these bottles is that they can be a little difficult to clean until you get the hang of it. The valves and straw remove to make the process easier and can be put in the dishwasher but make sure to get in the crevices by hand as tossing the valve in the dishwasher doesn't clean everywhere and you don't want to be drinking contaminated water.
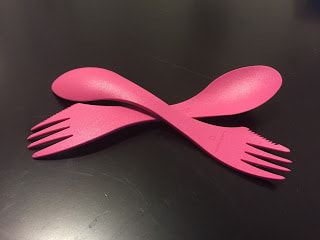 The Spork is basically a fork, spoon and knife in one. The original is
6.75 inches long and weighs 0.3 oz according to their website (I did not whip out the scale to test it but that feels about right... it is very lightweight). I like that, while it is plastic, they use a BPA free material so I am limiting that exposure. I literally take this with me every day to work in my lunchbox. I own two- both in pink- that I purchased in a little novelty store while traveling. I would suggest purchasing them online as they are cheaper online than I paid originally... I overpaid but they were still worth it! The Spork comes in original size as well as a medium and large size for you who like camping and need serving and cooking utensils. The website says that the medium is good for eating freeze dried food out of pouches if you backpack though I have not tried it out so can't speak to that... I don't really backpack with my medical issues all that often as you can likely imagine. Amazon has this item in a 4-pack for $9.99 but they also have it individually if you search for it. It may not be on Prime though so if you are like me and have Prime and don't want to pay additional shipping you may be more inclined to purchase the 4 pack and get a bit more for your money (plus have to wash dishes less often or have one for every lunchbox in the family!). This may seem a little more expensive than you want to pay right off the bat for plastic-ware. I agreed actually but then changed my mind after seeing how durable these sporks are. They aren't your typical cheap cutlery where the tines bend a bit in the wash or nicks gouge out of the plastic easily (at least not in the past few months for my sporks). They haven't stained or warped at all in the dishwasher either. One thing that I wasn't sure about was kids with a knife edge though, but they covered that as well... If you do not want your little ones to have a knife edge the company offers the Spork Little which is A- adorable, B- smaller than the original for little hands, and C- lacks a knife edge. They also have it in Titanium for those not wanting plastic! I think this company has pretty much covered all their bases when it comes to making a product that most people would be able to use. I love this nifty product as I don't really like taking my silverware to work in a lunchbox and I'm all about colors... we need more color in the world. Color=happiness. Yes... I taught kindergarten and love to color. I'm just one of those people. :) So, pros and cons time... PROS:
CONS:
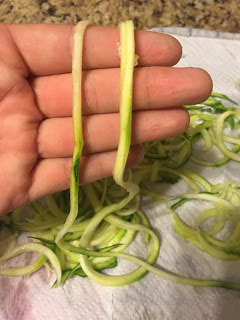
I was at Jason's Deli the other day and decided to try zucchini. I really enjoyed the addition to my salad! It was had great bite and the flavor wasn't overpowering. Since there has been so much buzz lately about zucchini noodles- or zoodles- I decided to give it a try. Everything seemed pretty simple but I didn't have a spiralizer in my kitchen. A little comparative shopping and one was on it's way to my doorstep- the Greenco Spiral Julienne Vegetable Slicer. It was a fairly inexpensive gadget that ended up being really easy to use. 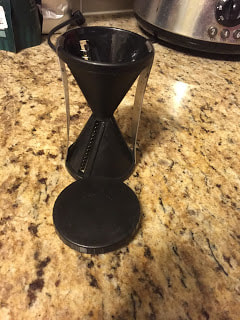 As you can see from the photo this product is constructed from a sturdy plastic as well as stainless steel. It is two sided and comes with a cap to attach to the vegetable you want to turn into strips. Each side contains a set of teeth that quickly and efficiently turn the veggies into noodle like strips. One thing that I like about this gizmo is that each side has a different width of blade.
You can see that the zoodle on the left is about half the width of the one on the right.
I was able to turn two zucchini into zoodles in about two minutes from start to finish... super fast and simple. I'm not sure how long it would take to spiralize a more dense vegetable but based on the sharpness of these little teeth I would assume not much longer. Now on to things that I didn't really like about this model... The biggest issue I had with it was that it is not particularly ergonomic. Luckily, you only need to be using the gadget for a few minutes to have enough zoodles for several people so it isn't a huge deal breaker. Perhaps it is because I have tiny hands but the two metal pieces meant for holding were further apart than necessary so it hurt my hands a bit to use. The only other thing that I disliked was that the model did not come with a cleaning brush... easily solved with spare/new toothbrush! I was afraid to clean it with my hand or a cloth as the blades are quite sharp so I suggest that you pick up a cheap toothbrush to clean your spiralizer. Overall I would recommend the Greenco Spiral Julienne Vegetable Slicer
So I love pineapple... it is hands down my favorite fruit. It's just sooo messy! I prefer to purchase my foods in their natural form and most definitely NOT packed in syrup so my options were to give up pineapple, pay extra for the pre-chopped snack packs (and hope they are fresh and not sprayed with chemicals to keep the beautiful yellow coloring for longer), or get messy trying to slice it myself. Then I went to Walmart to pick up 1-2 things between shopping trips and saw this gadget. It's plastic and was fairly expensive so I didn't have great hopes for it but decided it was worth the risk if I could save the messiness (and maybe some of the juice to use in smoothies!) and still have my pineapple fresh. It was a good choice... this inexpensive gadget both cores and spiral slices your pineapple with minimal effort.
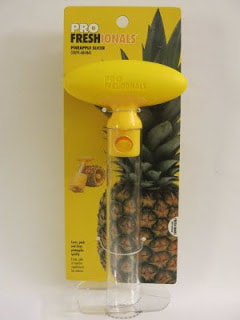
The packaging is fairly simple, a couple twisty-ties and piece of cardboard. Easy to remove from the 'packaging' so that is a plus in today's overly difficult packaging world (I'm talking to you electronics plastic packages that take a knife, scissors and two people to open on Christmas day!).
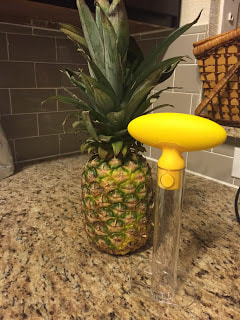
My beautiful pineapple ready to be cored and sliced by a PROfreshional.
I chopped off the top of the pineapple and placed it in a small dish to catch any juice. I suggest this quite a bit because the first time I used my pineapple corer I went through the bottom and juice went everywhere.
Next you simple align the tube over the pineapple's core and twist. It is surprisingly easy... just keep twisting until you reach the bottom of the pineapple. What is difficult to judge however is how far down into the pineapple your corer actually is. You can gauge by seeing where the corer hits just below the top of the pineapple before you begin but if it is in a dish you can just go until you reach the bottom of the pineapple. It isn't stated on the packaging but pulling the pineapple corer out is a bit difficult and I tend to break the rings when I attempt to do so. For this reason I just cut through the skin of the pineapple in a straight line which makes removing the corer much simpler. The final step to using this nifty device is to remove the handle by pressing in the yellow buttons and lifting it out of the tube. Then invert the tube and slide the rings right off. The whole process took maybe 5 minutes, including packaging up the pineapple and cleaning up. To clean the gadget you push the core out of the tube, rinse and run it through the dishwasher. If you don't use a dishwasher you can clean it with the rest of your dishes by hand. It it pretty easy. 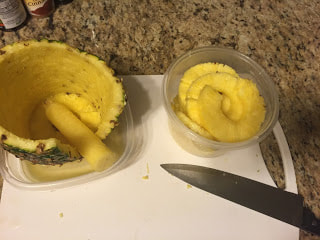
Should your Walmart not have pineapple corers there is a link to this exact one on Amazon at the bottom of the post. If you don't use plastics in your house then you'll be pleased to know that there are plenty of pineapple corer/slicer combinations out there made in stainless steel as well.
Now to go have some pineapple... yumm! 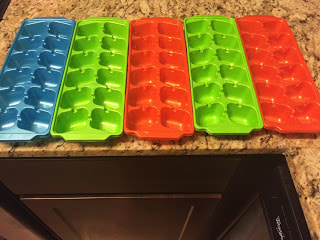
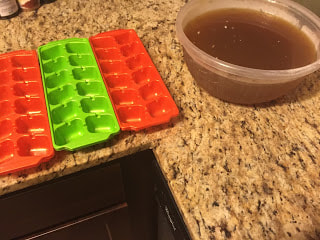
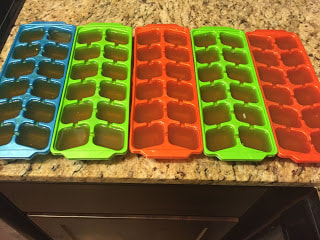
Want to know what one of my most useful kitchen tools is? The one that saves me the most money out of everything in my kitchen? No, I don't have one of those nifty food saver machines (though they look pretty cool). it is so much simpler and CHEAPER than that. Ice trays... simple, $1 for 2 at the dollar store, ice trays. I use them to freeze up bone broth, sweet potato and pumpkin purees, ketchup, BBQ sauce, and even fresh herbs (in olive oil). I can't tell you how much time I save in the morning when I can just grab some pre-chopped and frozen fruit, a cube or two of pumpkin puree, a handful of greens and a cup of liquid to make a smoothie in less than a minute. No measuring, no mess, no spoiled food... easy, quick and I save money to boot! Or the evening I come home exhausted and just want a quick burger with some yummy homemade ketchup or a bowl of soup but don't feel like spending 10 minutes making that ketchup or an hour or more making soup... nuke 1-2 cubes of ketchup while the burger is cooking and dinner's done or toss a handful of ready-made stock cubes with some chopped veg in a small pot while I do my evening chores (think laundry... so much laundry... why is there ALWAYS laundry!?!) and I'm done. I'm not a big fan of cooking for one and even less of a fan of cooking for more than 20 minutes on a weeknight... is anyone?
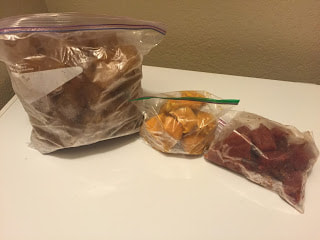
From left to right (what is in my freezer RIGHT NOW): beef bone broth (the chicken bone broth is freezing still), homemade sweet potato puree and homemade ketchup. All of these are simple to freeze, simply ladle them into the trays and freeze them.
If you wanted to store herbs you just chop or mince them, put them in the tray and fill the remaining space with olive oil. How would I use these cubes of oil and fresh herbs you ask? Just toss it in a hot pan and saute away... fast and easy way to start off your stir fry or pan seared Tilapia. Best part? Those fresh herbs you worked so hard to cultivate don't wilt away unused and wasted! I don't have any fresh herbs right now so unfortunately I can't show photos of how to do this... yet. I will try and come back to add photos the next time I do.
I measured my ice tray compartments by taking a cup of water and filling the compartments of tray one by one until the water was gone in order to measure the volume of each cube quickly and efficiently. Now I know exactly how many cubes I need when a recipe calls for something I have frozen away for later use and don't have to guess. |
Archives
October 2022
Categories
All
|
 RSS Feed

© COPYRIGHT 2015. ALL RIGHTS RESERVED.