|
I'm not a huge bread/pasta/pastry eater anymore even when they are Paleo compliant. When I first started eating Paleo I tried out a lot of bread recipes and never really found anything that I just loved. That, plus the fact that I like easy in my normal day-to-day life since it's a little hectic most of the time led me to sticking with mostly meat and veggies 90% of the time... but sometimes you just need a cupcake. So I've been experimenting with Paleo baking again... it's a lot harder than normal baking. I'm actually fairly good at baking with wheat and sugar (my French bread gets rave reviews whenever I make it) but since I don't eat either wheat or processed white sugar now I need to learn a whole new science of how everything reacts (texture, rise, density) and learn how new flavors work with each other under heat. Nut flours, coconut flour, arrowroot powder, tapioca flour, honey, maple syrup, new oils... they just react differently that anything I am used to baking with so it will likely take some time but I like a challenge. I have a great respect for anyone who can rock an awesome wheat and white sugar free baking recipe but I'm not quite there yet. All that being said, I have a few sweet treat recipes that I'll be sharing over the next couple of days. They may not be perfect yet so if you have suggestions please leave a comment... I'm ALWAYS learning and LOVE cooking up a batch of goodies to share with my coworkers or friends. When I made these I used coconut oil as the main baking oil but I realized that I wasn't a huge fan of how they turned out so I have adjusted the recipes to sub some of the coconut oil for butter... real, grass-fed butter... not margarine. I understand that a lot of people who eat a more Paleo diet abstain from butter and other dairy products but I do not. I stick to a high fat, low carb real-food inspired Primal/Paleo/Ancestral style of eating that allows for quality dairy. Just throwing that out there... if you don't do well with dairy then you can go back to coconut oil in equal amounts as the butter and the consistency will still work just fine. INGREDIENTS:
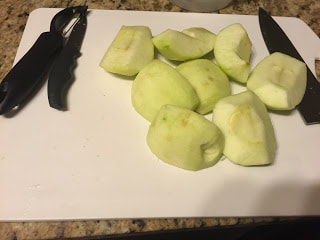
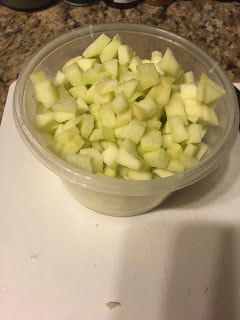
PROCEDURE: 1.Peel and chop your apples. I skinned the apples with a potato peeler and then just quickly diced them up... I did two apples and had about one whole one left so one large apple should be enough (I wanted some apples in a salad for lunch).
2. Juice about half a lemon (again, I was making more in the photo than necessary as I was planning on using it for additional recipes... work smarter and not harder right?). 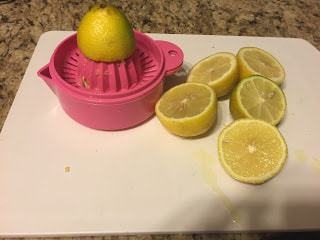 3. Pre-heat oven to 350 degrees Fahrenheit. 4. Mix all dry ingredients other than baking soda in a bowl. 5. Mix all other ingredients except the apples in a second bowl. 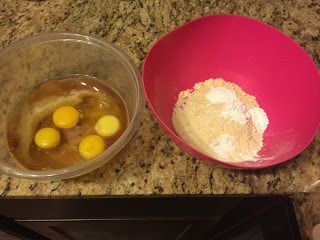 6. Pour the wet ingredients into the dry ingredients bowl slowly while combining. Mix until smooth and well combined. 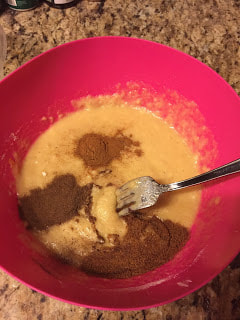 *When I took the photos I added the spices after combining but realized this was unnecessary... so there is slight discrepancy here but it gives you an idea of the consistency. 7. Once combined well mix in the apples. 8. Oil the baking pan you are using. You can use butter, coconut oil, etc. 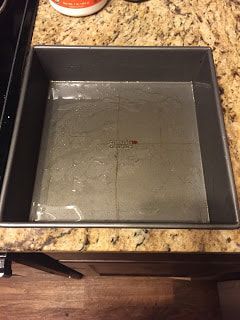 9. Pour the batter into the pan and smooth top. You can sprinkle some additional apples and cinnamon on top if you would like. 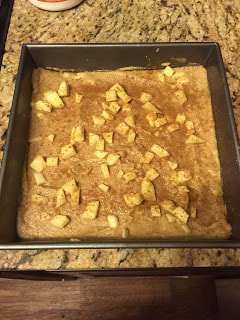 10. Bake for 15-20 minutes. Remove when the center is firm and allow to cool before cutting. 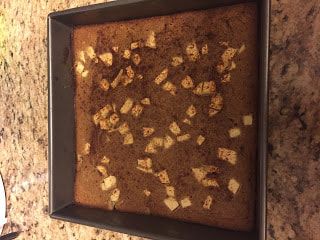 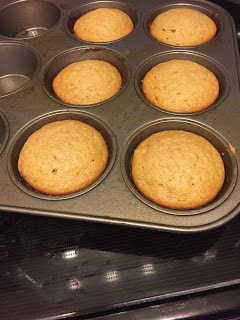 Sometimes you just need a cupcake. It's a birthday or anniversary and you want to celebrate... or its just been one of those days and something sweet would just be perfect right about now. Cupcakes are pretty awesome I have to admit. A co-worker of mine has a daughter who is diagnosed Celiac so I thought I would try my hand at making her some vanilla cupcakes... without frosting unfortunately as my frosting still needs a lot of work. I started with vanilla because, honestly, I was out of chocolate in the house (wow... well I was craving sugar like crazy in my week off grains so I guess it's no surprise that the chocolate disappeared). This recipe makes a dozen cupcakes. I'll be experimenting with a variation of this recipe to make blueberry muffins in a few weeks once I'm done with the 21-Day Sugar Detox (Diane Sanfilippo).
INGREDIENTS:
PROCEDURE: 1. Preheat oven to 350 degrees Fahrenheit. 2. Mix coconut flour, sea salt and baking soda in a bowl. 3. In a separate bowl mix the remainder of the ingredients. 4. Mix in the dry ingredients to the wet ingredients slowly. 5. Once everything has been fully mixed and the batter is smooth, pour batter into a greased cupcake pan. You can also use liners if you prefer, either paper or silicone. 6. Bake for 20-25 minutes. Cupcakes should be firm and golden. 7. Allow to cool for at least one hour before frosting them. Do you guys like the new link verses the amazon buttons? I want everyone to easily find the items I am discussing but I don't want the blog to end up overwhelmed with what look like shopping ads so I think I'll be going with this method unless I hear that the other way is preferred. Hope you all have a wonderful day!
So I love pineapple... it is hands down my favorite fruit. It's just sooo messy! I prefer to purchase my foods in their natural form and most definitely NOT packed in syrup so my options were to give up pineapple, pay extra for the pre-chopped snack packs (and hope they are fresh and not sprayed with chemicals to keep the beautiful yellow coloring for longer), or get messy trying to slice it myself. Then I went to Walmart to pick up 1-2 things between shopping trips and saw this gadget. It's plastic and was fairly expensive so I didn't have great hopes for it but decided it was worth the risk if I could save the messiness (and maybe some of the juice to use in smoothies!) and still have my pineapple fresh. It was a good choice... this inexpensive gadget both cores and spiral slices your pineapple with minimal effort.
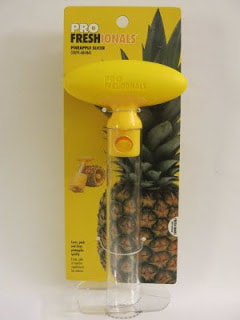
The packaging is fairly simple, a couple twisty-ties and piece of cardboard. Easy to remove from the 'packaging' so that is a plus in today's overly difficult packaging world (I'm talking to you electronics plastic packages that take a knife, scissors and two people to open on Christmas day!).
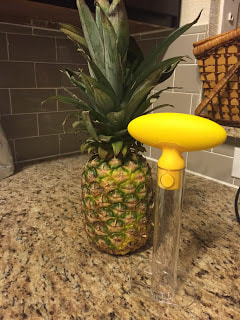
My beautiful pineapple ready to be cored and sliced by a PROfreshional.
I chopped off the top of the pineapple and placed it in a small dish to catch any juice. I suggest this quite a bit because the first time I used my pineapple corer I went through the bottom and juice went everywhere.
Next you simple align the tube over the pineapple's core and twist. It is surprisingly easy... just keep twisting until you reach the bottom of the pineapple. What is difficult to judge however is how far down into the pineapple your corer actually is. You can gauge by seeing where the corer hits just below the top of the pineapple before you begin but if it is in a dish you can just go until you reach the bottom of the pineapple. It isn't stated on the packaging but pulling the pineapple corer out is a bit difficult and I tend to break the rings when I attempt to do so. For this reason I just cut through the skin of the pineapple in a straight line which makes removing the corer much simpler. The final step to using this nifty device is to remove the handle by pressing in the yellow buttons and lifting it out of the tube. Then invert the tube and slide the rings right off. The whole process took maybe 5 minutes, including packaging up the pineapple and cleaning up. To clean the gadget you push the core out of the tube, rinse and run it through the dishwasher. If you don't use a dishwasher you can clean it with the rest of your dishes by hand. It it pretty easy. 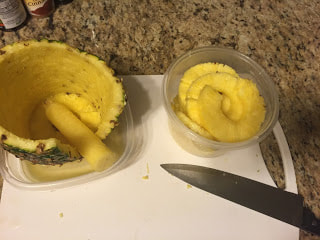
Should your Walmart not have pineapple corers there is a link to this exact one on Amazon at the bottom of the post. If you don't use plastics in your house then you'll be pleased to know that there are plenty of pineapple corer/slicer combinations out there made in stainless steel as well.
Now to go have some pineapple... yumm! This is another favorite recipe for a super moisturizer. It is a bit more greasy than the lotion recipe I posted the other day but it a great night moisturizer for dry feet and hands especially. I only mention that it is a little more greasy because I do not use this as a hand cream personally. I know some who have skin that is more dry than mine and use it all day long. They rave about how it has helped their dry skin so it all depends on your skin/body. Another good thing about this recipe is that there are fewer ingredients... the beeswax and aloe vera are left out of this version, making it a more simple and cheaper option to start out making. The procedure for this body butter is almost identical to the lotion so if you thought that was a piece of cake then this one will be too. I typically make a batch of both the lotion and a batch of the body butter and keep them both around the house as I use them for different things... experiment a little and see what works best for you and your family.
NOTE: A single pound of these 'butters' will likely last you nearly a year's worth of lotion or body butter for one person or several months for a family so there is no need to over purchase. INGREDIENTS:
EQUIPMENT:
PROCEDURE: 1. Measure out your ingredients. You will likely need a knife to cut the cocoa butter. 2. Place the shea butter, cocoa butter, coconut oil, and sweet almond oil in a small saucepan on LOW heat. You do not want the mixture to boil or smoke... it needs to be kept very low. The ingredients will melt fairly quickly even on low heat. 3. Once everything has melted, mix in the vitamin e oil and any essential oils you may want for added scent or aromatherapy needs then remove from heat immediately. I prefer peppermint as it smells delightful with the cocoa butter but sweet orange (think one of those chocolate oranges in scent), lavender (for calming, evening use especially), or citus work very well also. 4. Allow the mixture to cool until it has just begun to set up. You can just leave it on the counter for a few hours and go about your day or be like me and toss it into the freezer for 10-15 minutes to speed up the process. 5. Once it has begun to set up you will use the electric mixer to beat the mixture into the creamy consistency we are looking for. This adds air to the mixture so that it isn't quite as dense. NOTE: If you let the mixture get to hard/cool then it is easy to apply a little heat and mix with a spoon for a minute or two to get back to the correct consistency. 6. Add it to a jar and allow to finish setting up for half an hour or so. Curious where I get my ingredients? I get my ingredients all over the metroplex, on Amazon and through Young Living as a distributor. Don't want to search out stores to pick them up? I'll make it easy! You can place an order through me for any oils you may need and there are quick links for the non-perishable ingredients and tools on Amazon should you wish to order online on this page... just click on the ingredient. |
Archives
October 2022
Categories
All
|
 RSS Feed

© COPYRIGHT 2015. ALL RIGHTS RESERVED.