|
I was flipping though the pages of 21 Day Sugar Detox and saw a soup that looked really tasty but unfortunately I didn't have all the ingredients to make it in the house. It was a Miso soup remake and I'll definitely make sure to try it soon but I didn't want to go shopping so I took the inspiration and made my own soup with things I already had in the house. It made an awesome lunch and there were enough left overs to add to my ready meal stock for the rest of the week (more on that in a future post). This recipe could easily be made in a crock pot- just put everything in at once and set it on low for 4-6 hours. The recipe below made 5 portions. Here's the recipe:
INGREDIENTS: 36 oz Bone Broth (I used beef today because that is what I had on hand) 1 Tbsp coconut aminos 3 drops fish sauce 1/2 medium onion, diced 2 medium zucchini, diced 2 cloves garlic, diced 1 Tbsp parsley, dried (feel free to use fresh, I didn't have any on hand) 1/2 lb white mushrooms 1 lb cooked shrimp PROCEDURE: 1. Bring the broth to a simmer with the coconut aminos and fish sauce in a large pot on the stove top. 2. Add all other ingredients to the pot. 3. Put the lid on the pot and turn the temperature to low. Allow the soup to simmer on low for about 30-45 minutes. That's it... simple with very little hands-on time. While I don't personally eat a lot of carbohydrates there are certainly times when I need a few more carbs (or just want some yummy sweet potatoes). When that is the case this is my go-to recipe! It is super simple and takes me very little hands-on time so that I can get on with doing other things before dinner time. INGREDIENTS:
PROCEDURE: 1. Preheat the oven to 425 degrees Fahrenheit. 2. Slice the sweet potato through to nearly the bottom (vertically). Continue cutting so that the slices will be very thin until you have an entire potato sliced but still connected along the bottom. 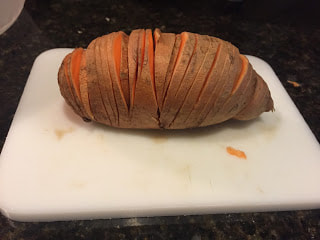 I was having a bit of trouble with a borrowed knife... you would ideally like for the slices to be thinner than in the photo. 3. Place the potato on a baking pan with a lip on it so that the oil does not drip onto the bottom of your stove. 4. Fan the slices a bit so that there is a little separation between them to catch the oil and salt. 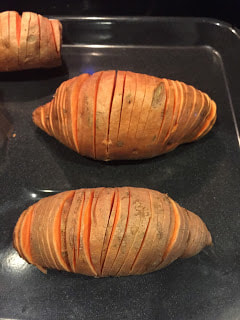 5. Drizzle olive oil over the potato generously. 6. Sprinkle sea salt to taste over the oil. You can also add any other seasonings you may want at this time such as garlic or paprika... whatever you are in the mood for! I really enjoy a little garlic and sea salt. 7. Bake for about 30-40 minutes (this can vary depending on how thinly you slice your potatoes so please check on them periodically). 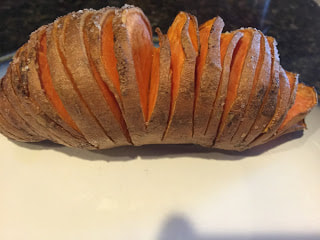 I'm all about working smarter, not harder. With a full time job, grad school, house hunting, choir practice and dance practice I just don't have time to waste in the kitchen no matter how much I love to cook. Anytime you see me make something that takes more than 20-30 minutes of hands-on time it is most definitely done on the weekend as a stress reliever and fun activity- I really do love to cook. I already mentioned in a previous post that I use my crock pot a lot... at least once or twice a week. I use it to make bone broth, whole chickens, stews and soups, roasts, BBQ, pretty much anything I can find a way to adapt to a crock pot I'll be making in that awesome kitchen gadget. I do this because the food is moist and tender at the end and it takes so much work off of my hands. BBQ Beef is just one of dozens of recipes I regularly make in my house for this very reason. It lasts me at least several days worth of meals plus more for the freezer to rotate into future meal planning... and the dogs usually get a bit as well just to be fair since they have to smell it cooking all day long while I'm at work. It smells pretty awesome. I use a BBQ dry rub but you can easily sub in a sauce or glaze if that's how you like your BBQ- just make sure to either make it yourself or check the ingredients to insure that you know what you are putting into your body. When you are using a crock pot it is usually best to quickly sear all sides of your meat before placing them in the crock pot. I have found that it is not 100% necessary to do this but it does help to seal in some of the juices which will create meat that is very moist and tender. To sear your meat simply heat a skillet on the stove top and place your meat inside once it has reached high temperature. After a few seconds you can turn it to another side. Continue doing this until all sides of the meat are seared. It is quite simple and very fast. The only thing left (other than putting it in the crock pot) is to rub in your dry rub mix of choice. Mine is here. I always use quite a bit of the rub and occasionally will add a little citrus juice on top right before I close the lid (not a lot, maybe the juice of one medium orange) though I did not do so today. If there is a fat cap (layer of fat) you will want this face up so that the fat will melt slowly and baste your meat throughout the cooking cycle. I don't stick with just one cut of meat when doing this type of meal. Since the slow cooking process produces very tender meat you can easily use cheaper cuts of meat and get very tasty result all the same.  I usually do all of my slow cooking overnight these days so this lovely dish cooked for between 10-12 hours on low but if you want to do 6-8 hours you can set the temperature to high. 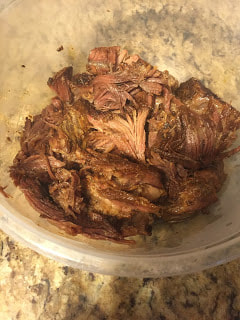 The meat literally fell apart when I took it out of the crock pot. 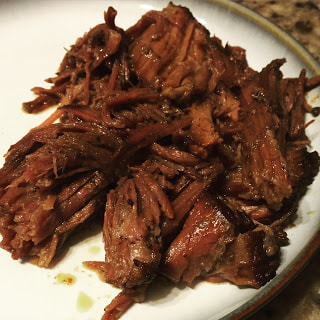 I love pasta. It really is that simple. Lasagna, manicotti, spaghetti, linguini, mac 'n' cheese... the whole lot of them... love them. Before going Paleo I was working on perfecting my recipes for all things pasta related. I had some pretty awesome lasagna and manicotti recipes to be honest. When I stopped eating wheat literally the first thing I did was start searching the web for pasta replacements... nothing quite matches the texture of wheat-based pastas unfortunately. I still eat 'pasta' these days but it comes in a different form. There is a bigger emphasis on hearty sauces in my case... lots of chunky tomatoes, chopped mushrooms, meat, fresh garlic and herbs, a little olive oil. I don't do a lot of cream sauces myself simply because I'm not a huge fan of cream sauces. The 'noodles' are the secondary part of the meal these days, a small portion of the total meal. I will be talking about two types of noodles this week... shiratake noodles (Miracle Noodles are a branded version of these) and zoodles, or zucchini noodles.
Miracles Noodles come in several forms- angel hair, fettuccine, ziti, rice, spinach (angel hair), black (angel hair) and garlic and herb (fettuccine). I only tried three of these for the review... eventually even I get a little tired of pasta. I tried: angel hair, spinach and fettuccine. There were some good things and some bad things for each of the styles but overall I thought they were an replacement but not something I am going to be using all the time in my cooking. I would like to try the ziti and garlic and herb varieties at some point and will review those if I do try them as I think the texture might change somewhat. For all of these noodles there are some important tips you should know: 1. Rinse... rinse a lot. As soon as you open the pouch you will smell a fishy odor as shirataki are packed in brine. This isn't a huge deal in the scheme of things though as you simply dump them into a colander and run them under cold water for several minutes to remove the scent. 2. Cook them in the sauce. The good thing about these 'noodles' is that they absorb the flavors they are cooked in. I made a shrimp scampi with the angel hair... lots of lemon, parsley, garlic and butter. Guess what the noodles tasted of... lemon, parsley, garlic and butter. When I made a meaty tomato sauce they tasted of tomato and garlic. The key is to cook the noodles in some of the sauce so that they absorb the flavors. Toss a little of your sauce in the pan when you are heating the noodles for a better flavor. Angel Hair: This one was the first one I tried. I also tried an off brand of this variety that I found at the local Asian market near my house. I saw very little difference if between the off brand and the brand named angel hair shiratake. This was my favorite of the three simply because I am a texture person and there was less of a chewy consistency to these because they were thinner. I keep a pouch of these in my pantry just in case I get a craving for pasta so that I can grab some of my homemade sauce out of the freezer to cook up with these and be done in a few minutes with little planning. Spinach: I saw very little difference between the normal angel hair and the spinach variety of angel hair shirataki. There may have been a slight difference in the chew but overall they were still chewier than a wheat pasta so I tended to cut the pasta in my sauce rather than twirl the pasta... again, huge texture person and my focus on pasta nights is now the sauce with a little bit of 'pasta' on the side. Fettuccini: These were my least favorite... they are a lot chewier than the angel hair variety since they are thicker. I really did not enjoy the chew as it reminded me of sea food... like a calamari texture almost. My ex enjoyed these as part of a shrimp scampi dish though so it is all about the sauce. If you are a big texture person like me though I would steer clear of these thicker versions of the shirataki noodles. I do need to warn you to read the labels on shirataki you may purchase though (anything you purchase in a package actually) as some contain soy or other ingredients you may not want to eat now that '0-calorie' noodles have been around for a while. I would imagine the additions help the texture but I do not want those things in my body- especially the soy- so I have not tried them. Without a doubt the biggest question I get is "If you don't eat __________ what DO you eat?" So I figured I should do a post about a typical week for me. I do a lot of bulk cooking and preparation since I have a very busy schedule between work, grad school, choir practice, dance practice, church and house hunting so I usually do the majority of my meal prep on Saturday night or Sunday depending on what I am making. Sometimes both... if I am making something in the crock pot I will usually put it in on Saturday night so that when I do the rest of my prep on Sunday I can portion out my crock pot meal or protein. I used to plan something new every day but I don't any longer as it created an overabundance of food and therefore unnecessary work and possibly wasted food... not good. The plan I am currently using is 2-3 options for lunches and dinners that I can mix and match each weekday and then veggies and fruit sides and snacks.
Breakfasts: I typically prep veggies, mushrooms and a protein such as sausage or diced ham for fast omelets on the weekend then it is just a matter of scooping out a little veg into the scrambled eggs, tossing some extra protein in and letting it cook up while I pack my lunchbox. Lunches: Tuna tins or pouches, sliced deli meats, and "leftovers" from other meals make up my protein sources. I will typically purchase thicker cuts of deli meats or bake/roast meats and freeze them after slicing in small quantities. Sometimes I will have a few smaller portions of cheese that I can add to a lunch and I almost always have some homemade mayo on hand for tuna salad. Salads: I make up a large salad each week... enough to last me 6-7 side salads minimum. This makes prepping lunches and quick dinners very quick and only takes a few minutes longer than making a single salad would take so it is a but time saver. My typical salad is a mix of: kale, chard, spinach, red or green leaf lettuce, romaine and maybe a little radicchio. My other veggies go in small containers on the side so that they don't get my salad mushy. Veggies for Salads and Snacks: I most commonly use carrots, zucchini, cucumbers and tomatoes as they are all easy to use as both salad toppings and snacks that I can eat on the go. Other Salad Toppings and Snacks: Nuts, seeds, hard boiled eggs, and dried berries all make for easy salad toppings and double as snacks as well. These are things I personally use sparingly but as everything but the eggs are fairly shelf stable I keep them on hand to use when I need to. Dinner Mains/Proteins: This week's dinners are BBQ rubbed beef in the crock pot, roasted chicken (which can also be made in the crock pot... just make one on Saturday and one on Sunday!), and zoodles with meat sauce. Zoodles aren't something that I usually make up early as they are easy to make and take very little time but I will make the meat sauce ahead of time. Honestly, I usually keep 1-2 servings of marinara and/or meat sauce in the freezer. Dinner Carb-Based Sides: I personally eat very few carbs in the grand scheme of things so you won't find me making these regularly but if you need some extra carbs in your diet then these are quick and easy sides: roasted root vegetables such as parsnips, yams and carrots (just drizzle in olive oil and sprinkle with sea salt then roasted), sweet potatoes either sliced, mashed or baked and sauteed veggies w a small amount of rice (portion the fresh veg and steamed rice ahead of time then you can saute everything when you are about to eat for crisp fresh veggies). Dinner (non-starchy) Sides: I eat more of the large salad I eat for lunch or toss a Ceasar salad, steamed or stir fried Asian veggies, cauliflower 'rice', zoodles, or pretty much any veggie at the farmer's market works here. I aim to try a new veggie every month. Other: Sometimes I am not very hungry but want a little something... or I am not feeling well suddenly. During these times I pull out my frozen bone broth. Tossing in some fresh vegetables or protein makes for a fast soup as well. Bone broth has a lot of health benefits so you may even want to keep this as a regular meal. Treats: Treats for me aren't usually baked goods... but it is sometimes. Maybe once a month or if I have an event I will bake up a batch of something sweet. My more common treats are whole fruit, smoothies, fruit salad, dark chocolate and unsweetened applesauce with cinnamon. What Prep Looks Like: Saturday Afternoon:
Sunday Morning:
Sunday Evening:
Breakfast and lunch meats are often done in bulk as well as mayo. other condiments and bone broth. Usually biweekly works well for me as the meats from one week (such as the one listed above) will last nearly two weeks' worth of meals since it is just me so I can use that time on the opposite weeks to make condiments and breakfast/lunch meats like a roasted turkey breast or ham (cook, slice and freeze in portioned packets). Weekday Morning:
The whole routine usually takes about 10 minutes (like I said- I am not a morning person) and often includes some other morning odds and ends like changing the laundry over or other chores. Add in another few minutes for the dogs, 15 minutes for a shower and getting ready for work (my hair is super short right now so it doesn't take very long) and a couple minutes to grab whatever I need for after work activities and I'm ready to leave for work. Grand total from waking up to walking out the door you ask? 30-40 minutes usually... including preparing 2-3 meals for the day, a household chore and taking care of myself and the dogs. When I was married I followed a similar routine but made the dinner proteins in the crock pot every other day so they would be ready when I got home in the evening... and there were more carbs as I had a very active military husband. Lunches and breakfasts were pretty much the same but cooking for 2+ meant less space in the fridge so I would do meal prep twice a week instead of just once. Making up packets of marinaded meats and freezing them for use on the grill or in stir fry was also something that I did a lot of to speed dinner up on the evenings where I didn't want to use a crock pot. Casseroles are another time saver as you can prep one in the morning or the night before and pop it in the oven when you get home for a meal in usually less than half an hour (enough time to do a load of laundry and clean 1 room of the house if you are me... I like to be done with everything before dinner if possible). It's all about making the most of your time and finding a routine that works for your schedule and family. As I already discussed in a previous post, I am just starting out on my Paleo baking journey but I love cooking and baking so I am always trying out new recipes and variations. Here is a variation of the apple spice cake that actually turned out quite different in the end as a pineapple upside down cake. Again, I understand that a lot of people who eat a Paleo diet abstain from butter and other dairy products, but I do not. I stick to a high fat, low carb real-food inspired Primal/Paleo/Ancestral style of eating that allows for quality dairy. If you don't do well with dairy then you can go back to coconut oil in equal amounts as the butter and the consistency will work just fine. INGREDIENTS:
PROCEDURE: 1. Core and slice your pineapple if you did not purchase it sliced. I used the Pineapple Corer I reviewed here. 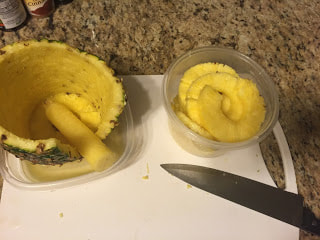 2. Juice about half a lemon (again, I was making more in the photo than necessary as I was planning on using it for additional recipes... work smarter and not harder right?). 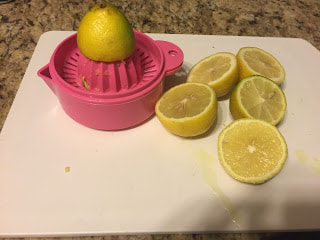 3. Pre-heat oven to 350 degrees Fahrenheit. 4. Mix all dry ingredients other than baking soda in a bowl. 5. Mix all other ingredients except the pineapples and syrup in a second bowl. You will only use half of the honey (1/2 C) at this time. 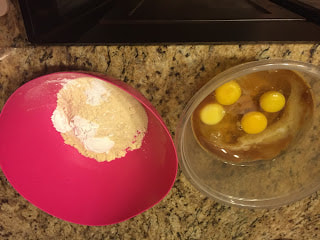 6. Pour the wet ingredients into the dry ingredients bowl slowly while combining. Mix until smooth and well combined. 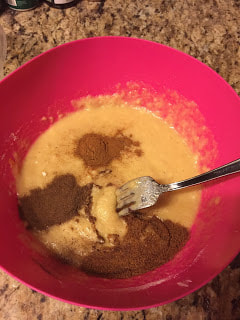 *When I took the photos I added the spices after combining but realized this was unnecessary... so there is slight discrepancy here but it gives you an idea of the consistency. (I made both the apple cake and the pineapple cake on the same evening to take in to work for a treat so they have many of the same photos.) 7. Slightly oil the baking pan you are using. You can use butter, coconut oil, etc. 8. Mix remaining syrup and honey together and spread in the bottom of the pan. 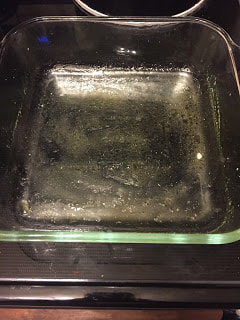 9. Place your pineapple into the bottom of the pan. I don't like cherries particularly well so did not use them but feel free to do so... or get creative in the design of your pineapple pieces even! I love cooking because it is creative and fun... have fun! 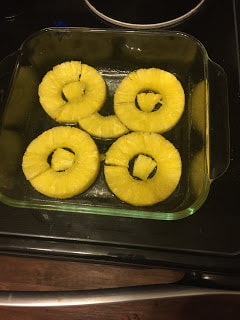 10. Bake in the oven for about 5-8 minutes. 11. Remove from oven and pour batter over the pineapple, smooth and return to the oven to bake for another 15-20 minutes. Depending on the dimensions of your pan you may need to adjust the cook time. Thicker cakes will take longer to cook through. The cake needs to be browned on the top and firm throughout or it will be too moist to eat as a cake once it cools. 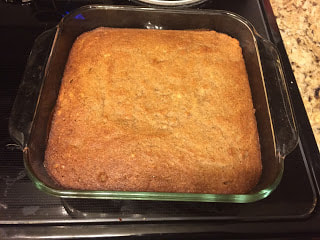 12. Allow the cake to cool before removing and flipping the cake to make the pineapples right side up.
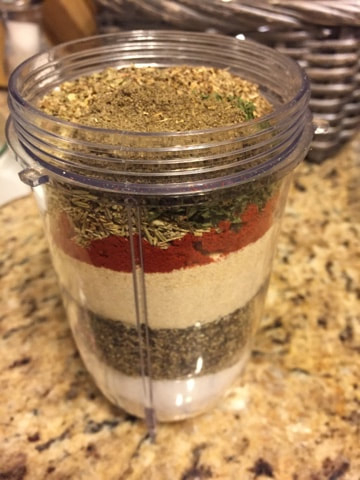
I had a bit of a kitchen mishap when I flipped mine and it did not look very pretty as a result (people who are klutzy should not attempt to flip cakes, just sayin'... next time I'll take a photo of how it looks completed. Happy baking! It get's costly to purchase a store bought rub or spice mix any time I want to make something (and there are usually added sugars and other chemicals that I don't want to eat) so I mix my own spices in bulk for things I make regularly. For me this means that, in addition to the dozens of individual spices I have in my cabinet, I have small mason jars of mixes and rubs in the pantry all of the time. It saves me money but, even more importantly on days I get home tired and need to cook still, it saves me time and effort. $1.50 for a packet of taco seasoning or $0.25 or less using quality ingredients and no fillers... let me think... easy decision, right? Right now I only have a couple homemade mixes on the shelf as I have been a little lazy lately and just thought "I'll do it later" when I ran out of things but I have: BBQ dry rub, Rotisserie rub and taco seasoning. This is the recipe for the rub I used on tomorrow's post on the Slow Cooker Rotisserie Chicken. One note: It does cost more upfront to purchase all of the ingredients to make your own spice mixtures but the per portion cost is lower... so if you are like me and on a budget it might be easier to start with one mix at a time and see how often you use it before mixing up another batch of something so that you don't have unused spices sitting for months on end. INGREDIENTS:
PROCEDURE: 1. Mix all spices together well. You can use a spoon, a whisk, or (if you want a really fine powder that is more consistent) you can even use a Magic Bullet or other processor.
2. Store in an airtight container.
I'm not a huge bread/pasta/pastry eater anymore even when they are Paleo compliant. When I first started eating Paleo I tried out a lot of bread recipes and never really found anything that I just loved. That, plus the fact that I like easy in my normal day-to-day life since it's a little hectic most of the time led me to sticking with mostly meat and veggies 90% of the time... but sometimes you just need a cupcake. So I've been experimenting with Paleo baking again... it's a lot harder than normal baking. I'm actually fairly good at baking with wheat and sugar (my French bread gets rave reviews whenever I make it) but since I don't eat either wheat or processed white sugar now I need to learn a whole new science of how everything reacts (texture, rise, density) and learn how new flavors work with each other under heat. Nut flours, coconut flour, arrowroot powder, tapioca flour, honey, maple syrup, new oils... they just react differently that anything I am used to baking with so it will likely take some time but I like a challenge. I have a great respect for anyone who can rock an awesome wheat and white sugar free baking recipe but I'm not quite there yet. All that being said, I have a few sweet treat recipes that I'll be sharing over the next couple of days. They may not be perfect yet so if you have suggestions please leave a comment... I'm ALWAYS learning and LOVE cooking up a batch of goodies to share with my coworkers or friends. When I made these I used coconut oil as the main baking oil but I realized that I wasn't a huge fan of how they turned out so I have adjusted the recipes to sub some of the coconut oil for butter... real, grass-fed butter... not margarine. I understand that a lot of people who eat a more Paleo diet abstain from butter and other dairy products but I do not. I stick to a high fat, low carb real-food inspired Primal/Paleo/Ancestral style of eating that allows for quality dairy. Just throwing that out there... if you don't do well with dairy then you can go back to coconut oil in equal amounts as the butter and the consistency will still work just fine. INGREDIENTS:
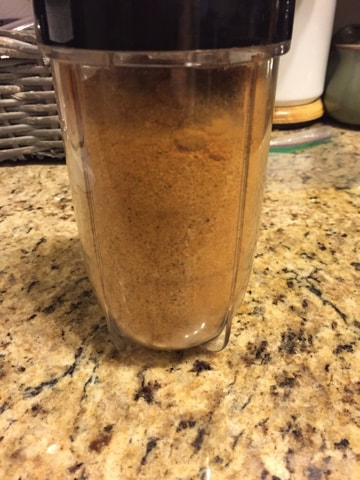
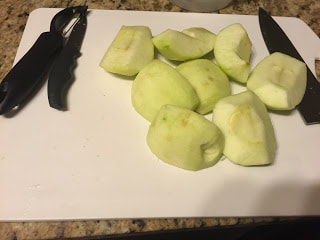
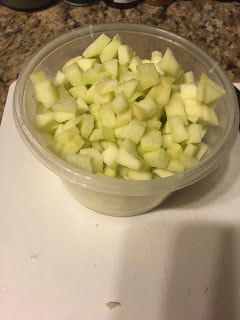
PROCEDURE: 1.Peel and chop your apples. I skinned the apples with a potato peeler and then just quickly diced them up... I did two apples and had about one whole one left so one large apple should be enough (I wanted some apples in a salad for lunch).
2. Juice about half a lemon (again, I was making more in the photo than necessary as I was planning on using it for additional recipes... work smarter and not harder right?).  3. Pre-heat oven to 350 degrees Fahrenheit. 4. Mix all dry ingredients other than baking soda in a bowl. 5. Mix all other ingredients except the apples in a second bowl. 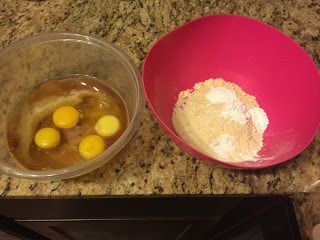 6. Pour the wet ingredients into the dry ingredients bowl slowly while combining. Mix until smooth and well combined.  *When I took the photos I added the spices after combining but realized this was unnecessary... so there is slight discrepancy here but it gives you an idea of the consistency. 7. Once combined well mix in the apples. 8. Oil the baking pan you are using. You can use butter, coconut oil, etc. 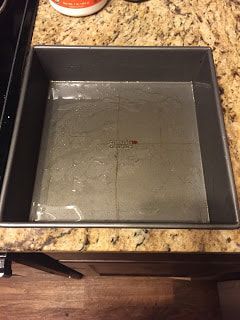 9. Pour the batter into the pan and smooth top. You can sprinkle some additional apples and cinnamon on top if you would like. 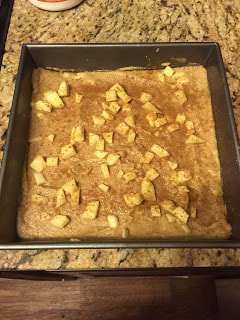 10. Bake for 15-20 minutes. Remove when the center is firm and allow to cool before cutting. 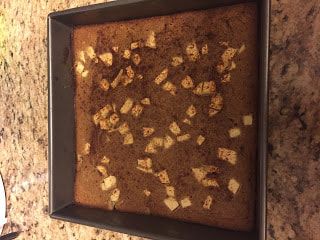 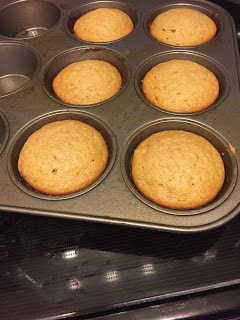 Sometimes you just need a cupcake. It's a birthday or anniversary and you want to celebrate... or its just been one of those days and something sweet would just be perfect right about now. Cupcakes are pretty awesome I have to admit. A co-worker of mine has a daughter who is diagnosed Celiac so I thought I would try my hand at making her some vanilla cupcakes... without frosting unfortunately as my frosting still needs a lot of work. I started with vanilla because, honestly, I was out of chocolate in the house (wow... well I was craving sugar like crazy in my week off grains so I guess it's no surprise that the chocolate disappeared). This recipe makes a dozen cupcakes. I'll be experimenting with a variation of this recipe to make blueberry muffins in a few weeks once I'm done with the 21-Day Sugar Detox (Diane Sanfilippo).
INGREDIENTS:
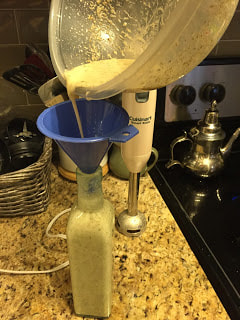
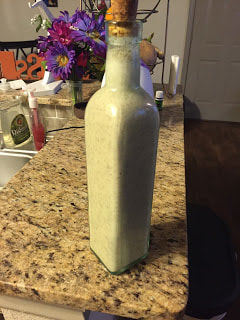
PROCEDURE: 1. Preheat oven to 350 degrees Fahrenheit. 2. Mix coconut flour, sea salt and baking soda in a bowl. 3. In a separate bowl mix the remainder of the ingredients. 4. Mix in the dry ingredients to the wet ingredients slowly. 5. Once everything has been fully mixed and the batter is smooth, pour batter into a greased cupcake pan. You can also use liners if you prefer, either paper or silicone. 6. Bake for 20-25 minutes. Cupcakes should be firm and golden. 7. Allow to cool for at least one hour before frosting them. Do you guys like the new link verses the amazon buttons? I want everyone to easily find the items I am discussing but I don't want the blog to end up overwhelmed with what look like shopping ads so I think I'll be going with this method unless I hear that the other way is preferred. Hope you all have a wonderful day! I love ranch dressing... we established that already... but the longer I have been Paleo the less I have used the creamy dressings and other condiments in my day to day life. I still love salad dressings though and a quick vinaigrette is always tasty. This recipe is easily changed to highlight different flavors by exchanging vinegars, oils or herbs but this is a basic Italian inspired version. It isn't completely necessary to use the immersion blender but I really enjoy the slightly emulsified version that results when an immersion blender is used instead of just shaking it up. The longer the dressing sits the stronger the flavors will get. This means that if you don't really like garlic or another spice lessen it at the beginning and don't over-do spices as you experiment with new flavors. INGREDIENTS:
PROCEDURE: 1. Put all ingredients in a mixing bowl. 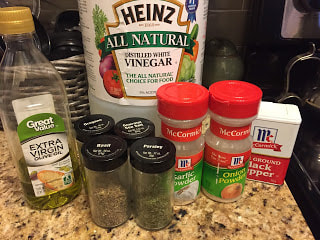 2. Use immersion/stick blender to combine the ingredients. Mix for about a minute. 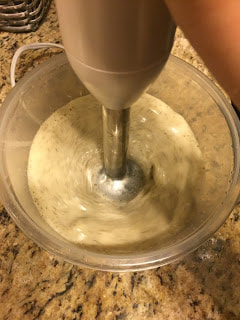 3. Pour into airtight containers.
*You might have to shake the bottle before using it again to recombine as it can settle.
What kind of vinaigrette dressings do you use in your home? |
Archives
October 2022
Categories
All
|
 RSS Feed

© COPYRIGHT 2015. ALL RIGHTS RESERVED.