|
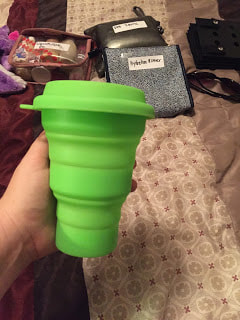
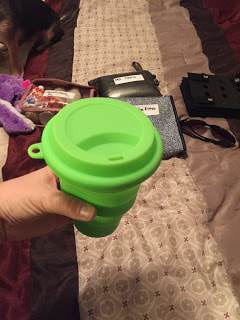
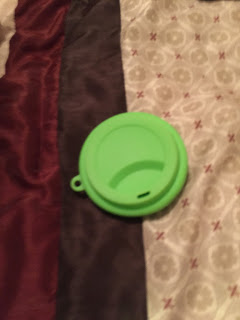
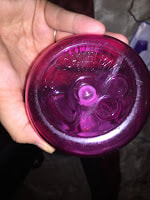
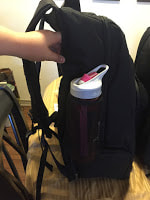
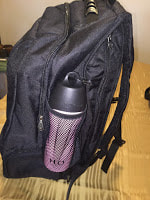
I've become so accustomed to home and work being within minutes of each other that I am still getting used to being as over-prepared as I once was for medical issues that might arise. One of the things that I used to keep in my car was an extra water bottle and Gatorade powder. I don't usually drink Gatorade anymore like I have mentioned in a previous post but I still need to keep electrolyte drinks on hand for emergencies. To this end it seemed that I needed a collapsible cup or fold-able water bottle to mix up my electrolyte drink powder in that could fit in my med kit. I could of course just use my water bottle but I like to retain that as pure water due to the bite valve and straw mechanism being a little more difficult to get completely clean at times. I ended up deciding against a foldable water bottle as it would be more difficult to clean as well so I started searching for a cup that would fit my needs. The cup I ended up getting held 16 oz, was made of food grade silicone, and had a lid. It is called the LevelOne Collapsible Travel Silicone Camping Cup. The lid was a selling point because i wouldn't need a spoon or straw to mix up the drink, just cover the hole and agitate the cup until it is mixed. The fact that it held a full 2 cups of fluid was important as well since a lot of collapsible cups are much smaller... this means that the drink would end up being thick which is not something I can handle if feeling ill already typically (nausea is one of the first symptoms once my heart rate and blood pressure start doing gymnastics... followed by headache). I believe this is technically a camping cup which is why it has a spot to attach it via a chain or similar to the outside of a backpack. For my uses it will be in the medical bag I keep in my backpack but if you want to use it for camping this would be nice feature I can imagine.
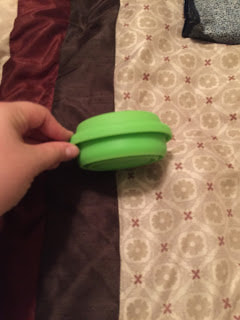
The cup doesn't collapse down as far as I would like but it isn't very bulky and fits easily into my med kit. One thing I do not like about it is that, due to the fact that it is silicone, it isn't particularly well suited to hot liquids. I don't see myself needing to drink hot liquids from it but when I gave it a try at home it wasn't a pleasant experience. The cup itself doesn't suffer from the heat at all but it was too hot to hold so I would not use it for coffee or tea should you use it as a camping cup. I did like that it was very easy to clean and that I can toss it in the dishwasher should I want to. I don't foresee a need to do so as I can clean it in the sink in a few seconds and let it air dry but I like options.
All in all I like this cup but it isn't something I would purchase multiple of or take camping as my only cup since I like to drink hot tea.
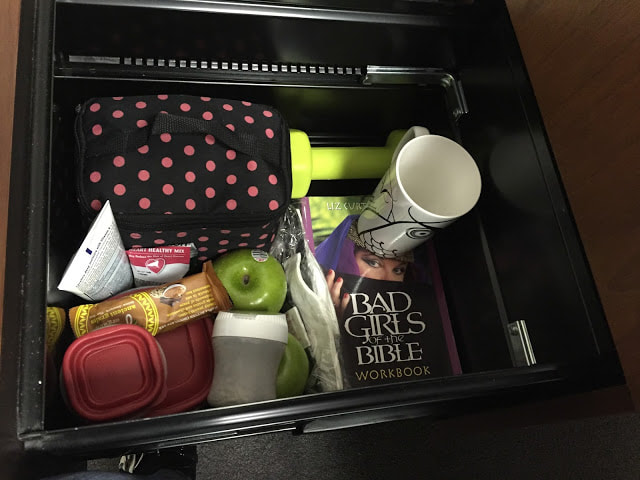
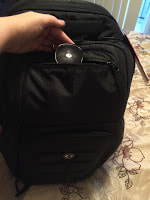
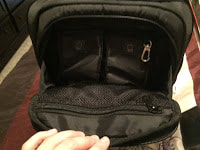
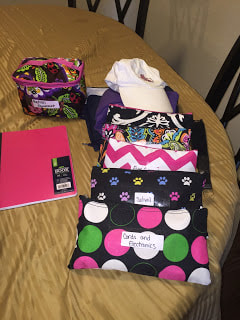
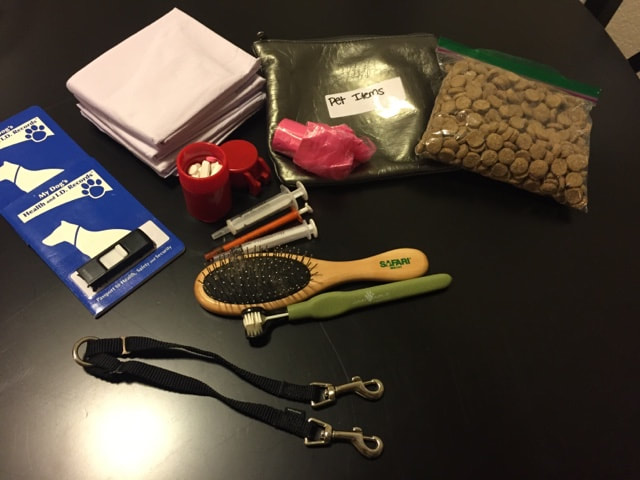
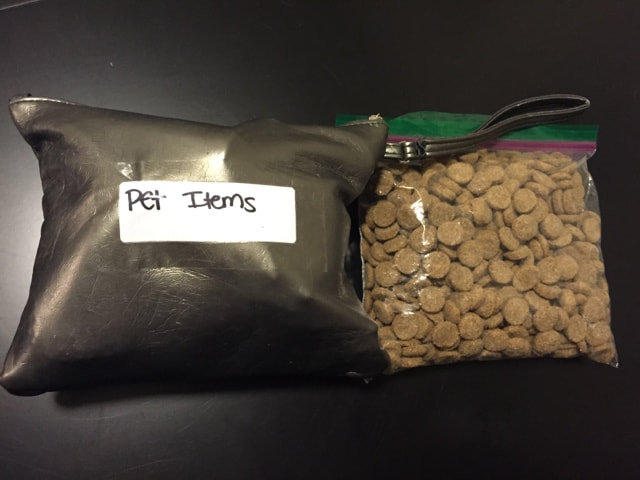
 When I pack my carry-on I have to make sure to be prepared for anything. Perhaps the pups and I will be stuck overnight (or all day... it's happened... the dogs ended up eating Qdoba because I wasn't prepared that day, it wasn't pretty) or maybe I'll end up highly symptomatic. I like to always be prepared for as much as possible. I'll go bag by bag in this post to show you what goes into my carry on. I do not have the water bottles (empty until I am through TSA) for myself and the pups as I had already put them in the bag at the time of this photo... but they are the H2O4K9 bottle and my Camelbak Eddy. Front right you see a couple dog toys and a small bag of dog food. I am trying to rearrange the dog's bag to fit the toys other than Izzy's ball as I think they will fit and make for less lose items in my bag so less chance of losing something when I open my bag. This is simply for if we end up over night or with a really long delay so that I can take them to a pet relief area and let them eat and relax a bit since flying can be stressful for all of us. The ball needs to come with me because if the airline were to lose my luggage and the ball was in there Isabel would freak out as that ball is basically her binky... she sleeps with it and pretty much has it with her 24/7. Next back is my clear quart sized bag of liquids and gels. This has the following:
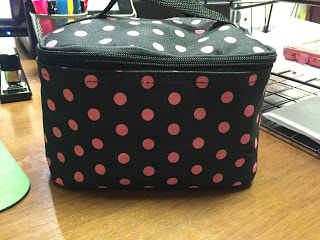
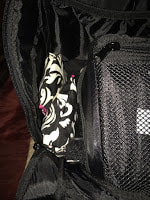
The pink polka dot bag is the pup's bag which has:
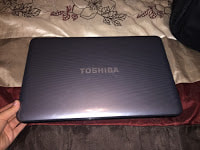
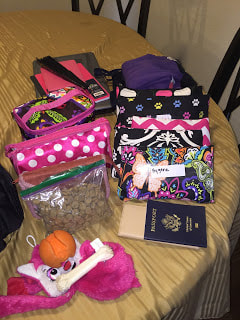
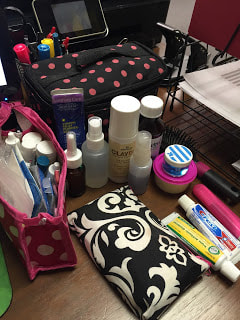
Isabel's orange ball doesn't fit in the bag so it goes in alone. We'll skip over the rectangular bag for now as that is my Medical Kit and we'll get into that in detail later. At the back of the left side you can see my Kindle, laptop, a notebook and a hand fan in case I get overheated (my temperature doesn't always regulate well and overheating can make me more symptomatic). On to the right side of the photo! First you will see my checkbook and passport. I forgot to place my wallet, keys and phone in the photo but all of these will go in the front pouch for quick retrieval. I always have to check in at the desk to pay for the pet fees and arrange/make sure they have a wheelchair for me if I am feeling poorly as I won't be able to stand for long periods which if a sure bet at larger airports. This is easily arranged when you book your ticket or you can just give the airline a call and let them know. You could also do so at the airport but you may have to wait longer. Behind that is my hygiene bag: 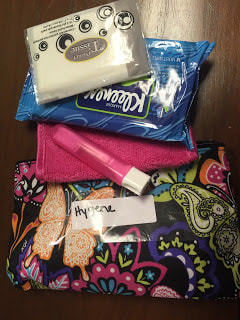 This bag is fairly thin. It contains a toothbrush, tissues, microfiber cloth, wipes and feminine hygiene products (not pictured). Everything else that would be in this bag needs to be placed in the quart bag for TSA. The bag behind the hygiene bag I have since combined into my medical bag so I will not be using it. It contained hydration items like Ceralyte, Thermotabs, and a collapsible cup to mix the Ceralyte in should I get symptomatic and need a quick boost. It isn't as good as an IV of course but it does help and is a great stopgap when traveling. Next is 'Eye Care and Makeup'. Pretty simply it contains extra contact, my glasses, a contact case and my makeup. I keep my makeup pretty simple most of the time so this is most likely the only makeup I will bring with me (lip stick pencil, eye pencil, compact, eye color, and mascara) for the trip. This is the smallest bag of all the pouches I organize with. I purchased the puppy paws bag for the dog items but potty pads don't fit well in it (sad day) so it is now my "School" pouch. Since I am in grad school I will pretty much always have homework to complete while I am on my trip. It's a given, so I prepare for that fact as best as I can. This pouch contains the calculator my professor specified we have for the course, highlighters, and pens. Since it was so empty I ended up adding my cooling off items to this bag as well to better utilize space: the fan you see in the top photo, a neck cooler bandana (dehydrated to get through TSA), and a headband. The neck cooler in the photo is not dehydrated... I needed to use it yesterday so it is still airing out. I have since purchased another one just in case. Many times you will see me working on homework on my laptop while waiting on a layover or upcoming flight time. When I was teaching I would use that time to work on future lesson plans or grading. I like to have as little wasted time in an airport as possible since using that dead time wisely will mean more fun time once I arrive. Always a plus, am I right? If I won't have access to homework or don't have any then I will bring some cross-stitch work or a book of puzzles with me to keep busy. 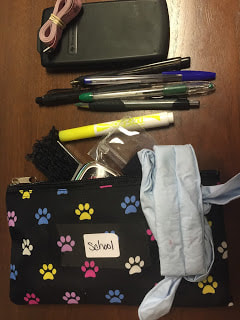 Finally we get to the "Cords and Electronics" pouch. It has extra re-chargeable batteries for all of my medical gadgets as well as a USB charger for them, a wireless mouse, portable hard drive, flash drive and cords for all of my devices. It does not have the cord for my laptop as that one is too large for the pouch so my laptop cord just goes in the bag alone.
I used my workout clothes to represent a pair of lightweight clothes since my luggage has been lost before (coming from Korea... 26 hours on several planes not including the travel time to the airport or the hours early they want you to arrive for international flight and I didn't have luggage on the other end. It was sooo not OK). I typically will lay out a pair of lose pants, top, and undergarments then tightly roll them and place them in the bottom of my bag. I will need to iron (if they are ironing necessary clothes... this time they are not) but at least I will have clean clothing if we get stuck somewhere without luggage. I dress in layers when traveling so that I can adjust to whatever temperature it is and however my body is acting at any particular moment. Honestly I dress in layers most of the time in general for the same reason. When I am traveling you will find me most typically in lose pants and top with a thick sweater or sweatshirt depending on the trip. And flats or athletic shoes... I never wear heels in an airport as it is sure to be a mistake for me. I bring/wear compression stockings... especially if I have had a hard week or am feeling tired or symptomatic. These can be a lifesaver. I also have a neck pillow attached to the outside of my backpack and, if I can fit it in, a small blanket in case I get cold on the plane (temperature regulation issues remember... I pack for being cold and hot). I was able to fit everything, including a travel blanket, into my Isopack if you were wondering. OK, that Medical bag... this one is a big one and an important one. In it I have:
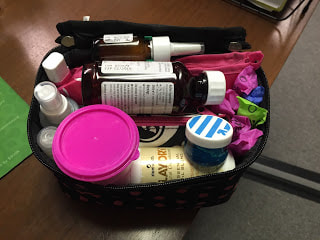
This bag is one that stays in my backpack full time but I have to remove the liquid medications when traveling so it gets a little reorganized. If I'm not flying then you will find the liquid medications in here that are currently in my liquids and gels quart sized bag just like you would normally find most of the other items in the quart bag in either the eye care or hygiene bags when I am not traveling. It seems like a lot... and it is, but I prefer bringing more than necessary but being prepared rather than the alternative. Something as simple as overheating which would be a nuisance to most can ruin my vacation as it will cause me to become more symptomatic. This would leave me exhausted and sick by the time I arrive which could take days to recover from. Your carry-on should fit who you are and what your needs for the trip are in my opinion. This bag will hopefully never be fully utilized but it allows me to have the best possible trip so it fit my needs. This will be the first trip I am bringing food other than snack sized bars and bags of nuts. According to the TSA regualations there shouldn't be an issue since my cool packs are not gel and I am bringing no liquid foods. I have planned to pack chopped chicken, chopped veggies (fresh and cooked), a salad (the dressing is in my liquids bag), fruit (the website specifies whole fruit so I'll be bringing grapes, a banana and possibly try my luck with a quartered apple) and some nuts and seeds. I have a Spork and Salt and Pepper Plus Spice Dispenser in the front pocket of my bag along with the nuts and seeds assortment. The last few times I have had to travel I ate what was available at the airport and my stomach was very unhappy with that choice. This was most likely due to the gluten and vegetable oil that is in just about everything that I was able to find in the wing of the airport my gate was in. So this time I'm going to bring my own food... I checked with the airline and they are ok with it so long as it follows TSA regulations. That's my, quite over packed, carry on. It is obviously less packed when I am not bringing the pups and you would likely not need all that I bring since most of it is to manage or get in front of symptoms. Most people also would be fine eating at the airport I imagine as well so that's quite a lot that would be able to disappear from your bag. It works for me right now though so I'll keep bringing it along... until it doesn't anymore, then I'll adjust what goes in my bag. What is in your carry on bag? What is the one thing you cannot forget? 9/11/2015 6 Pack Bags Expedition 500 VS Isolator Fitness Isopack, Part Three: The ComparisonRead Now It was a difficult decision but I eventually settled on keeping the Isopack rather than the Expedition 500. Both bags seem very well made and quite useful. They also have many of the same features as they are meant to satisfy the same customer needs so it really all comes down to what you are needing in the particulars. For instance, if you are more concerned with branding then you may go with the Expedition as it is by a more well known/popular brand. If you are looking for a lot of space or need depth in the main compartment like I do then you will likely chose the Isobag as it's main compartment is deeper and a bit more roomy than the Expedition. If you are looking for a bag that comes with all the extras then you may want to go with the Expedition. Should you need to keep your meals cool for 12 hours or longer then you will likely go with the Isopack... its all about priorities. I made my choice because I loved the following about the Isopack:
Things I liked better about the Expedition:
I wanted to offer a quick comparison chart between the two bags as the last piece of this series. If you have any questions about the bags just let me know and I will do my best to answer them!  9/10/2015 6 Pack Bags Expedition 500 VS Isolator Fitness Isopack, Part Two: The Expedition 500Read Now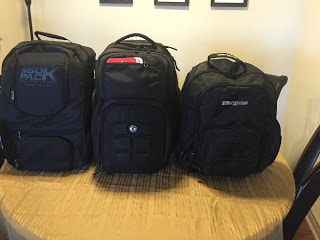 It was difficult to find a good comparison online of the two meal management backpacks I had narrowed it down to- the Expedition 500 and the Isopack. Since this was the case I ended up ordering both the Expedition 500 and the Isopack to compare and decide which worked best for me. I decided on the Isopack so the Expedition will be returned. I'm hoping that this post will help someone else that is trying to decide which to purchase so that they won't have to order blindly. Due to the large number of photos I have to divide the comparison into several pieces, here is the second... the Expedition 500. 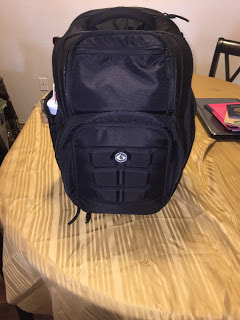 There is a chest clip to help distribute the weight. This is quite heavy even empty. I couldn't weigh it but I read that it was over 12 pounds empty and that seems pretty accurate. After it was full I definitely needed the weight distribution but it was just too heavy for me to carry easily so that was one of the negatives of this bag. 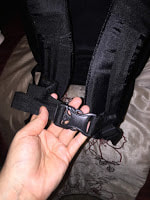 There are two front pockets. The very front one is meant for sunglasses and it fit mine quite well. The inside of the pocket is lined to avoid scratching your glasses. The only problem with this pocket is that once you fill the pocket behind it there is no longer room for the glasses if they aren't completely flat... which mine are not. The pocket behind it has two smaller compartments as well as a clip and a mesh pouch. I was able to put my wallet in this compartment and my keys in the sunglasses pouch.
Next up is the laptop compartment. I was able to fit the same laptop, kindle and paper notebook in this laptop pouch as in the Isopack. This pocket is lined with the same fabric as the sunglasses pocket to avoid scratching. There is a pouch for a tablet in this backpack just as in the Isopack.
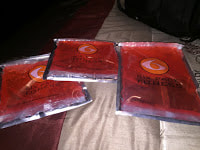
Inside the main compartment there are two small items that are not included with the Isopack: a drawstring bag and a vitamin/supplement storage container. These were nice additions but I personally didn't need them as I already had a set. Some bags seem to also come with a shaker bottle (I believe it was the black and red set from one of the sellers on Amazon) but that was another item that I didn't need. There are two side pockets that zip closed when not in use (or if you want to use them as another pocket) that convert into water and shaker bottle holders when unzipped. Zipping the pocket up helps to lock the bottle in place. I saw no issues with slippage of the bottles I placed in the pockets to test it out.
On to the inside of the main compartment... the front lays out for easy access to the inside pockets. There is one on the front of the bag, one on the top of the meal management section, a pocket on the back of the bag and two small pockets on the sides of the meal compartment. The side mesh compartments would fit a can of soda or small bottle of water. When you first get the bag you will see that the drawstring bag is located on top of the meal compartment. This is where I would continue to keep the bag. The last pocket, on the back, does not go all the way to the bottom of the bag but would be a good place to keep a laptop cord and wireless mouse.
I was able to put two smaller bags on the side of the meal management box but I did not use the mesh pouch. You should be able to put a pair of flats in the bag, one on each side in this area. A pair of minimalist running shoes would likely also fit here. A set of workout clothes fit behind the meal management area and left room to put items in the pouch above it or just atop the clothing. This is where I would put my toiletry bag.
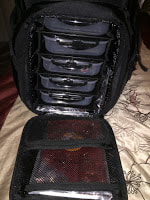
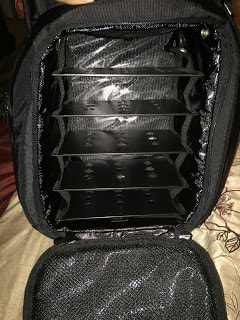
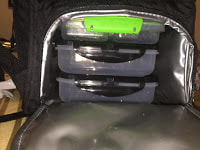
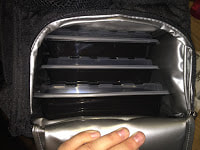
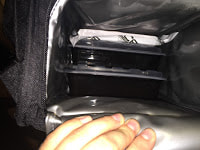
On top of the meal management bag you can put a few other odds and ends but cannot overfill the area atop the meal management area as the front of the bag angles in when you close the bag. I wasn't able to fit as much into this bag as I could in the Isopack. I was able to fit everything except the following and the ball: 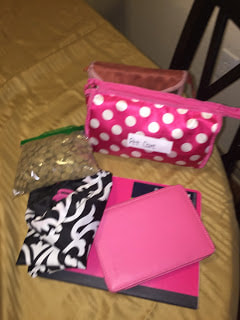 from the same items that were in the carry-on set of items as in the other bag...  And finally on to the meal management area. Here is what you see when you open the bag. There are five containers in a removable rack system as well as two small and one large gel ice pack.
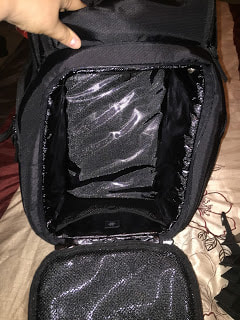
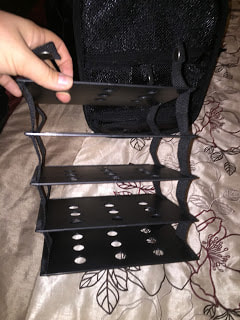
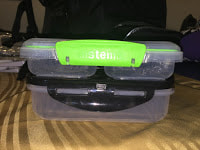
I wasn't a big fan of the rack system as finding replacements or containers the correct size proved to be a bit difficult. I did like that they are leak proof though! I also liked the fact that they seem very durable. Here is a photo of the rack system both extended and flat when removed as well as the meal area empty with and without the rack.
As you can see the rack simply snaps into the top of the meal area and drops down to extend. 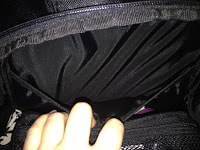 The last pockets are located on the front of the meal area. The large icepack fits in the back pocket (it goes from the top all the way down) and utensils and napkins fit in the shorter top mesh pocket.
All in all this seems like a good all-in-one backpack if it wasn't so heavy to carry. It didn't fit quite as much as the Isopack but for most people that wouldn't be a problem since they don't need to carry around the medical items that I carry around. Without them I could fit everything I would need to carry in this bag quite easily... it carries everything I need for daily usage already just not quite everything I keep in my carry-on bag. I'm a huge list person... it's pretty much how I keep from forgetting half my life. Brain fog is a symptom of several of the issues that I have so being forgetful is pretty common, as is confusion from time to time.
Here is a post from my personal Facebook page that shows a bit of the confusion side: "So I just wondered where the rain was coming from and how it was raining in just one small area of the parking lot... When I passed through about a second later I was like, sprinkler... It's a sprinkler Heather. Hello brain fog! Still not as bad as last week's trying to punch the office number into the floor buttons on the elevator. I was so confused when I got to the zero... At least those are funny incidents :) the worst is having to be so organized... all... the... time... so that I don't forget something. If I ever tell you I'll remember, call me a liar and wait 'till its in my calendar/lists. Till then its a nebulous maybe even with the best of intentions." I organize my life currently with an App/Website called Cozi. I keep a To-Do list called "Vacation Packing List" and one called "Weekend Away Packing List" so that when it is time to pack I don't have to come up with a new list and forget something important. The only big difference between the two lists is how they are arranged as for a weekend away I need to pack dog food and pack everything for the pups separately as they will likely stay with my mom for the two days. When I travel on vacation, if it is more than a couple of days, I will need to buy food once I arrive and their items will be in my bags since they will be traveling with me. Clothing for all seasons are on the lists so I look through it before I start packing and check off things that I know I will not need. There is also a note for me to check my itinerary and the weather before finalizing my packing. You will also see items listed for my hair that I do not need any longer since my hair is quite short at the moment but I am leaving them there as it reminds me to check and see if there is anything in that drawer (my hair items drawer) that I should take for a specific outfit. I am sharing the lists below in case anyone else would like to utilize them... feel free to let me know if I've missed anything! When I am away if I find that I needed to pack something and forgot it I just pull up the app and add it right then and there so that I don't forget it the next time. This list is for when I am driving for the most part but for most people could be used for flying as well. I am working on a better organized version for flying to show how I separate between my carry-on and checked luggage. The difference you will see is mostly just in how it is organized but there are a few odds and ends I need only when I fly as well as a few duplicates that need to be in both my carry-on and checked bags just in case. Sooo... here's my current list! VACATION PACKING LIST: DOG ITEMS
TOILETRIES
WORK/SCHOOL
CLOTHES
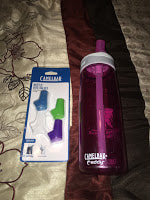
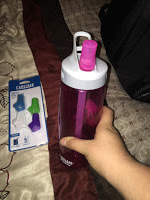
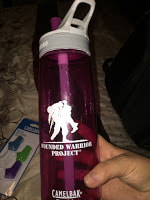
Staying hydrated is of top priority for myself and others with dysautonomia. If we get dehydrated even a little our symptoms can flare badly so you will often see us with a bottle of water or electrolyte drink of some sort. I used to drink a lot of Gatorade and the like but they tend to have a lot of sugar, artificial dye and chemicals so I try to stay away from them these days. There are some days where I cannot do so if I want to control my symptoms but I am working on finding a similar formulation that doesn't have those ingredients or at least limits them significantly. For now I am making sure to eat plenty of salt, drink water throughout the day, and supplement with other minerals daily that I tend to be low on. To help with the goal of staying hydrated I have tried numerous water bottles but I find that they all eventually began to leak into the bag or tote that I was using which would cause issues as I could have homework, clothing, or even medical equipment in the bag that needed to stay dry. So far the Camelbak Eddy has been my favorite but it doesn't work well if you are bed bound and need to by supine. The best for that has been the Contigo Autoseal Water Bottle. This one began to leak after about 6 months but they do have a warranty that they will replace the top or the gasket if you contact them and send in the top that is leaking. I have had my Camelbak Eddy for over a year now with very few problems. It did begin to leak a few months ago but upon inspection it appeared that the bite valve needed replacing. I purchased a package of 4 valves on Amazon for $10 and the leaking went away. Easy fix! The Camelbak Eddy comes in several versions and colors from child sized bottles to 1L bottles. The one that I have is 0.75 liters and part of the purchase price went to support the Wounded Warrior Project. Just like there is a warranty on the Contigo bottle there is also one for the Camelbak. It does appear at first glance to be more difficult to utilize and doesn't cover general wear and tear which gasket leaks could fall under but should be an issue you could contact them to see if their warranty would cover it. I haven't needed to utilize the warranty yet so I cannot speak to it other than just reading over it. Note:If you cannot drink from a straw for some reason do not get this water bottle as you will need to use suction to drink from it that is slightly more than using a typical straw. As for how durable this bottle is I can say without a doubt that it can take quite the beating. It has been in numerous bags that have been tossed about, dropped fairly regularly and seen more than its share of bumps and falls over the last year. This rough handling has not caused any noticeable cracks or chips but it does have a small scuff at this point. All in all I would say this bottle was a good investment and I will likely purchase a second one in green soon. One thing to understand about these bottles is that they can be a little difficult to clean until you get the hang of it. The valves and straw remove to make the process easier and can be put in the dishwasher but make sure to get in the crevices by hand as tossing the valve in the dishwasher doesn't clean everywhere and you don't want to be drinking contaminated water.
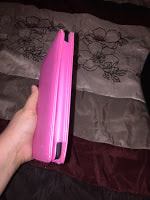
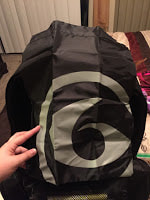
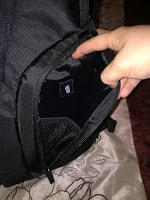
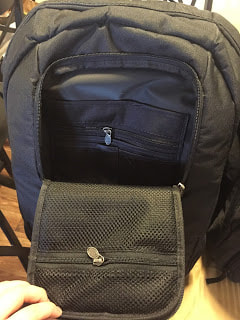
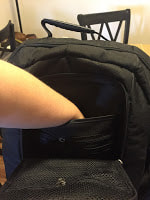
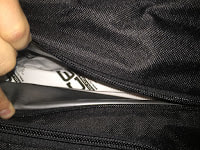
 It was difficult to find a good comparison online of the two meal management backpacks I had narrowed it down to- the Expedition 500 and the Isopack. Since this was the case I ended up ordering both the Expedition 500 and the Isopack to compare and decide which worked best for me. I decided on the Isopack so the Expedition will be returned. I'm hoping that this post will help someone else that is trying to decide which to purchase so that they won't have to order blindly. Due to the large number of photos I have to divide the comparison into several pieces so first... the Isopack! 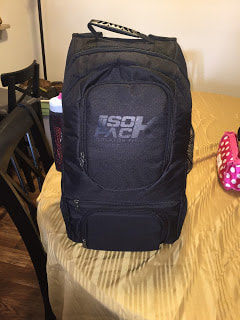 The front pocket (that has the logo) opens up like so:
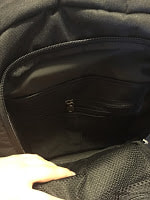
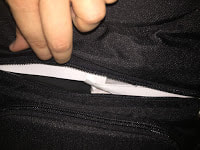
As you can see from the photos the pockets are fairly deep. You could fit a wallet, passport, phone, keys and a few other odds and ends that you need regularly here very easily. I am going to be using this area to carry the contents of my purse (since I am no longer carrying one on weekdays... I am keeping an empty purse in my vehicle in case I end up needing to go to lunch for work or some such) plus my passport and medical ID when I travel. I forgot to take a photo of the chest strap but this bag has a chest strap to help with weight distribution. Next we'll take a look at the laptop pocket.
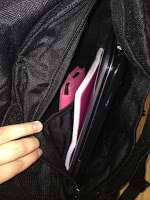
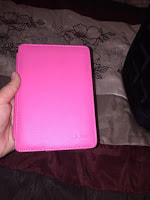
I was easily able to fit my laptop, kindle and a notebook in this pocket. The kindle is in a pink case and it didn't go to the bottom of the pouch. The pouch within the laptop area is meant for a tablet computer according to the website and it looks to me like it would easily fit. Here are better photos of the kindle and laptop so that you can see the size.
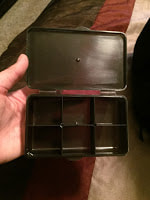
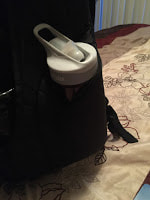
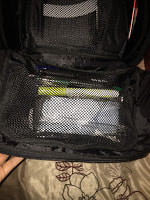
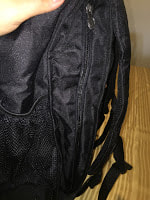
There is a small front pocket as well that I will be using to store utensils and a napkin. This is deep enough that I can put the two compartment plastic container with the green lid from a few photos down into and still easily zip closed. I will likely put that container in this pocket when I travel filled with nuts and seeds or a protein bar. 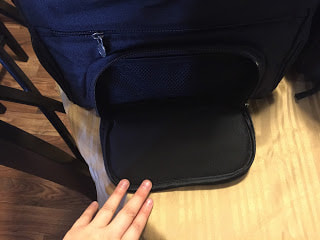 The water bottle pouches are made of mesh which I am a little concerned will snag but they seem to be of similar quality to the ones on my Targus backpack which hasn't snagged in about 6 months of near daily use. Both my Camelbak Eddy and the H2O4K9 fit in the pockets without issue.
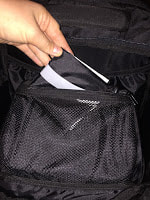
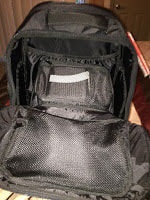
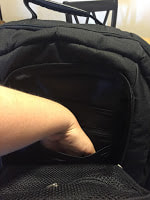
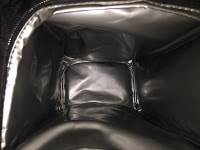
Next we will check out the main compartment. It is actually quite roomy and I was able to fit A LOT of stuff in the bag. Some of the small bags that you see here have been combined for my daily usage of this bag but when I was comparing them I was still trying out different organization methods with my cute new pouches I picked up while shopping with my mom last weekend. The photo on the left is for my daily use and on the right is for when it is being used as a carry on... everything fit in both cases. For the average user I will say that it can hold a binder, your gym clothes, and your toiletries easily. You may even be able to put your athletic shoes in the bag as well depending on what size shoe you wear and how bulky your clothing is.
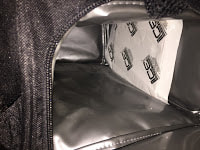
Here is the inside of the main compartment. It is quite deep and has a small mesh pouch on the front where I am keeping a small folded drawstring bag. 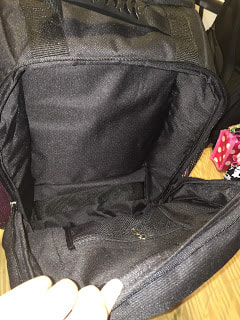 There is a zipper just above the front pocket that opens to a narrow pouch meant for the ice packs. It will fit one of the ice packs that come with the backpack. I had already purchased some of the smaller 7 oz. packs so I have a large one and a small one in the pouch and they fit perfectly. EDIT: It can fit both of the large packs that come with the bag... I was just putting them in wrong. {brainfog} Oops!
Here are the pouches... the one on the left is what comes with this backpack and the right are the smaller 7 oz. versions that are used in some of the other Isolator Fitness bags. According to the website the larger ones can keep food chilled for 12-16 hours. I have only used the smaller ones so far but it was still chilly at the end of the business day in my lunchbox so I don't doubt it. Further, these pouches are not gel or liquid even when they are defrosted so they should work fine with TSA regulations. I will let you know if they say otherwise once I travel in a couple of weeks. 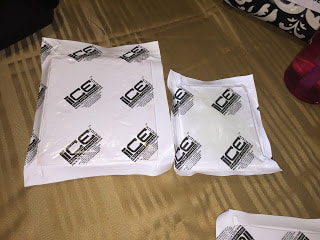 The final, and arguably most important, area is the meal management compartment.
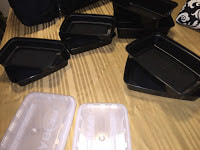
I used the containers from the 6 pack bag as well as the ones that came with this pack to show an accurate comparison.
All five of the containers fit in the bag plus one extra. A comparison picture of how it compared to the 6 pack bags container is below. 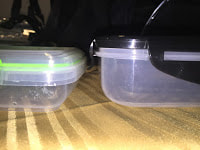 Now for the containers that came with the Isopack. I was able to fit one of the large ones, two medium ones and two small ones plus the second large Isobrick
Here is a photo of everything that fit in the cooler area. 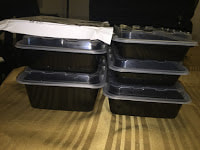 If you are wondering how many of the containers you get here is a close up of one of containers as well as a photo of all the containers that came with the backpack. There were two 12 oz., two 16 oz., two 28 oz., and two 38 oz in the bag to mix and match as you need them. Isolator Fitness has extra containers for sale if you want to purchase more.
Next up: The Expedition 500...
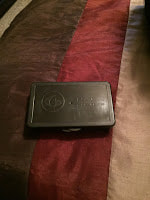
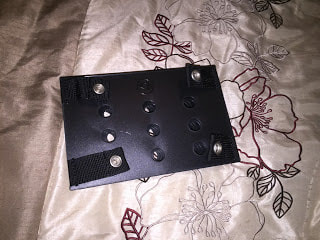
 Everyone should have an Emergency as well as Hygiene Kit either in their car or at the office. I have been assembling mine by trial and error for the past few years so thought I would save you guys the trouble and let you know what I've found works the best. This can all fit in a smaller zip container I picked up for a few dollars down town but I have seen things like this in Walmart as well as the Dollar Tree occasionally. My container measures approximately 7x7x5 (inches) and is soft sided and washable.
I have:
 Well, that's it for today guys... what do you have in your emergency office kit/personal drawer at the office?
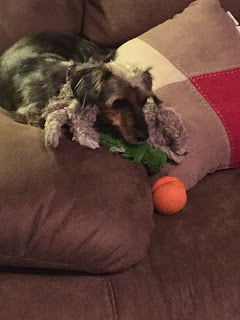
I am going to visit my family in Kentucky soon! I'll get to spend time with my cousins, aunts (except one, who lives in California), uncles, grandparents, sister, niece, parents... pretty much the entire family. It's pretty exciting. Buuuuuut, traveling can be difficult with a chronic illness as you know. So I'm going to show you how I pack to be prepared for anything that might come up during travel, and while I am away from home. For both myself and the wonder pups that will be showing up in the photos (they thought we were leaving because they know the drill for when it's time to get gone... which means that they didn't want to be left behind and were pretty much underfoot most of the night I was taking the photos for this and a few other of the posts in this series). I will have a post on how I pack the pups, how I pack my carry on, my go-to packing lists, and what I do the week of my trip to prepare my body for the stress of travel. I will end the series with a post on anything that comes up during the trip to KY. Let's start with how I pack the dogs...
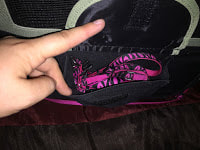
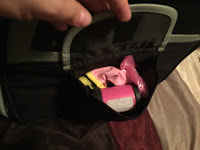
Aren't they adorable? How could I leave them behind!?! I couldn't is the answer. They are well seasoned travelers at this point and actually love traveling most of the time (grandmas and great-grandmas spoil them rotten so why wouldn't they love visiting?). Those who ask why not kennel them and travel lighter... have you seen kennel fees? With my girls being so small we can travel for cheaper usually and I never have issues with them at airports. People often don't even realize I have them until they look closely or one of them moves and it catches their eye. Also, I don't like leaving them with people I don't know or exposing them potentially to kennel cough or other nasty bugs unnecessarily. I do their grooming at home typically as well to save money, reduce the stress on them and keep them healthy. When the girls and I travel we always attach a medical ID card to their carrier as well as my carry-on, just in case. I sometimes have their ID cards attached as well but typically I carry those in my wallet (I am STILL waiting on ones with updated addresses... come on HomeAgain, get your act together). I prefer to have their collars outside the bag so that I can prove their shots quickly if asked without having to take the girls out of the kennel in the middle of the airport (airport people don't like it when you do that). Plus they are a little heavier than I would like on my small pups since where I am currently living has A LOT of required tags. For this reason when I am home and they are just relaxing I often remove the collars. We are on the second floor right now so they won't get out and be lost and even if they did they are both micro-chipped with HomeAgain per our last duty station's regulations so it will be easy to identify that they are mine and contact me if something were to happen. I will go into what they need in my carry-on bag in bit. Just as an FYI, you will have to take them out when you go through TSA as well as have your hands wiped for explosive residue (or whatever that test is... that's what they said it was for last time) which takes a few more minutes so budget your time for that. 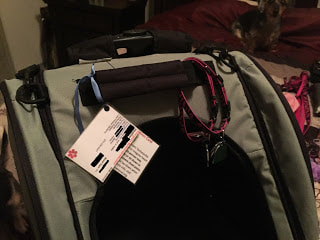 Now, before anyone complains that the kennel/bag is too small for my babies let me just say this: I wish I could take two kennels/bags so my babies could stretch out and enjoy the flight but the airline won't let me (and it is quite expensive as well). Now that I am single I am only allowed to pay for one carry-on pet kennel allowance since I only have one seat to place it under. They sleep the entire time once we are settled on the plane, I do not make them stay in it one second longer than absolutely mandated (so we get on the leads as soon as we leave the airport doors), and it is a lot roomier than it looks due to the sides expanding and they travel in it with the part you are looking at facing the ceiling so they get the entire 'height' as the length instead... plus my babies are both pretty small and they can (and do) turn around in the carrier. They just can't do a whole lot of moving about during the trip, which I hate but I can't move a lot in the airplane seat either and its better that they spend a few hours sleeping in close quarters than days in a kennel upset and not eating. Isabel doesn't eat we when I'm not around I found out when I went for a visit with a friend and left her with my mom, who she loves and knows well. All that being said- if you can take one kennel per dog that is, without a doubt, ideal and the best practice to stick with. A lot of airlines have made this the rule anyways so please check and ensure that if you are traveling within the guidelines for your airline. Further, if you have a layover and there is a pet relief area please, please let them out to stretch if at all possible. Just like we like to stretch after sitting for so long they need to as well. They also need to be able to relieve themselves and be comforted by seeing you again after being locked away beneath the seat for the duration of the flight. Traveling with a pet is not easy and making sure to bring them the best comfort you can is very important to their well-being. My Roxy LOVES her bag and tried to jump in it as soon as she saw it when I took the picture above actually (I had to hold her so that I could get a good picture and not hyper puppy blur) and will often go lie down inside it if I forget to put it back in the SUV after cleaning it just like with her pup-tent (collapsible pen). She has traveled with her sister inside it before without issue BUT not all dogs/pets will be able to do so. Now that that has been said... back to packing... First off, their leads/leashes... super important. I never pack them in the check-luggage as it has gotten lost before and then you end up needing to go purchase new ones until the ones you packed are delivered back to you (hopefully). You will also need the leads in any pet relief area and once you arrive at the airport when you let them out of the carrier so bringing a set is imperative. Wasted money I could be spending on having fun on my vacation in my opinion. In the side pockets of their I-Go-2 Plus I have each of the leads... one side has the lead with the attached canvas bowl and plastic waste bags and the other side has the lead with the harness for my super excited pup. These stay on the leads full time for the walks we have been trying to get in lately so that I don't have to worry about getting it on and off every time we leave the house.
I always make sure they have water available. Roxy is an excited pant-er so she needs water often when we travel (or when I get home, or when we go to Grandmas, or when we go to the dog park... you get the idea). Isabel takes a little more work to get to drink when we are out of the house but it is important that all three of us stay hydrated. I like the H2O4K9 bottle I have now the best out of all the bottles we have used over the years as it is stainless steel and has a drinking cup for them built right in that allows me to return any water that was not drunk to the bottle. Neither my own nor the dogs' water bottles are full when we go through TSA of course so one of the first stops on the other side is to get water for all of us. Hi Roxy! She was insistent on being right there every second in case we were leaving so that she could come... she knows the packing drill. :) 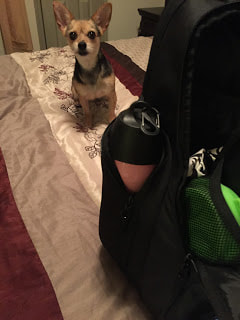 In my carry-on they have their H2O4K9 and a small bag that has their medications (other than the Benadryl Roxy needs in Kentucky for allergies... which is in my 'liquids and gels' bag for TSA purposes) along with anything needed to administer them, several potty pads and extra waste bags, a lead coupler, their brush and toothbrush, thier medical records on a zip drive along with an abbreviates version in thier 'passports', a couple of toys including Isabel's orange ball (that we must not EVER lose for fear of the freak out session that would surely ensue... think baby's lost teddy bear at bedtime but 24/7), food for one day and a couple of treats just in case. In the photo I do not have the toys because the dogs are playing with them or treats because I forgot to grab them from the packing prep area I had assembled.
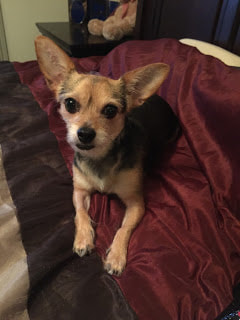
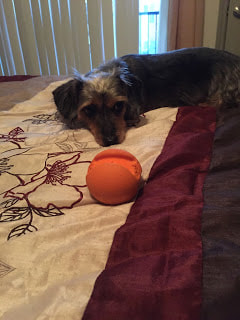
In my main suitcase we have their collapsible pen, a single and double Popware feeder (single for water and double for feeding... traveling with one dog would just need a double), some more potty pads and food for the trip. Since we are only going for a few days I am going to be trying to pack their Gamma2 TravelTainer so that I don't have to go buy food once I arrive as it will store enough food for them for 3-4 days. You could also use some gallon sized ziplock bags but I don't have any right now and I do have the TravelTainer. If I am able to fit it in my suitcase then I will leave behind the double Popware feeder as the TravelTainer has built in bowls I can feed the girls with (if you have one pet you don't need a water bowl either!). If you want reviews on any of the items I use with my pups let me know and I will write one... most of these items I have been using for YEARS and I love them all. I pulled the links from the purchases sections on my Amazon account (ran a search for 'pet' to see everything I had purchased for them over the years) so these are the exact models I have right now. As always, check around for better prices or alternatives if something doesn't quite fit what you are needing. No... I did not purchase all of this at once. This has been over years of traveling frequently with my girls. They have a diaper bag I picked up at a yard sale for $5 that stayed packed in case we decided at a moment's notice to go out of town for the weekend... just grab the bag, fill the water bottle and fold down the pup-tent and away we went (my ex-husband and I already kept hygiene bags packed so it was just a matter of grabbing clothing and medication and we could be on our way). We used to road trip to my aunt's house about once a month when I was married and living in California and have gone cross country as well as on trips to visit family out of state with the girls. I've accumulated their travel kit over the nearly 5 years they have been alive. If it is your first trip with your pet you can easily purchase a small bag of pet food at your destination (I do if the trip is longer than 3 days for sure... I might this trip if I am not able to fit the TravelTainer in my suitcase!), use other bowls you borrow or purchase at your destination inexpensively and get a $1 canvas water bowl to give them water from your own water bottle during travel. The canvas water bowl I have attached to the girl's leads currently for walks I actually purchased at the Dollar Tree several years ago. The reason they have their own water bottle is because I will go through several bottles of water during the course of a 4-6 hour trip. At work, not in a dry environment, I drink about 1.5 L before lunch alone. It makes it easier for me to pack for them the way that I do so that I don't stress once I arrive or on the trip to get there any more than necessary. Being less stressed makes my illness easier to manage so I enjoy my trip more which is pretty much the point of a vacation. Oh and yes... I like pink. :) My favorite colors are actually pink and green, though not together. 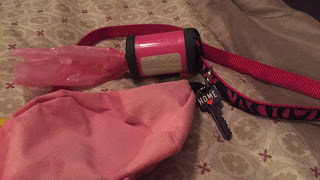 Sorry I've been MIA guys... it has been a little bit crazy in my personal life this past week with a new doctor, an MRI, grad school starting up again and some other personal issues so I wasn't able to get a lot of blogging work completed unfortunately. Never fear, I am not gone from the net-verse! I have a list of posts that I am working on currently including a review of one of my favorite running apps (I can't run but I love it for my walks!) plus I ordered the backpack that I was talking about in my previous post. It should get here this week so that review will be upcoming as well- I'm so excited! Then it's a couple of recipes and a post about how I organize my household chores for quick completion throughout the week. I completely re-did my chart to show you guys how I came up with my personal plan from start to finish so that you can design your own that works for your family! For today though I am talking about two recipes for roasted chicken that are very simple to make. Read more below. 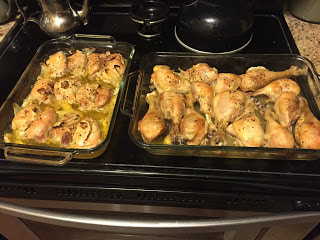 This week I decided to stick with chicken as my main protein as it was on sale and I've had some big expenses lately. I picked up some chicken thighs and drumsticks for a good price and headed home to see what I would come up with once I got in the kitchen. Unfortunately by the time I got home I wasn't feeling very well at all as I had had an MRI earlier in the day and the contrast dye really doesn't get out of system as fast as the doctors say it should- possibly due to the MTHFR but its an unknown and doesn't really matter in the end. The dye makes me sick to my stomach and causes my POTS to act up... I had to wait a while after the MRI before I could leave as I was pretty dizzy actually. So I went with as little time as possible on my feet in the kitchen and had some cuddles with my pups. Here they are... I love my love-bugs! The one on the left is Roxanne or Roxy and on the right is my Isabel or Izzy. They are both 4 years old turning 5 in January and February of 2016. Roxy just had quite the health scare if you recall- she almost died! She is doing so much better now though, happy as a clam and hyper as all get out. Isabel is a bit more mellow but is crazy about her ball and will bug you for hours on end to throw it again and again... do not forget to pack it if we go visit somewhere or there will be craziness. It's basically her binky... and the only toy she cannot destroy in less than a minute (tennis ball to gravel in 60 seconds people, for serious). I will likely review the toy maker at some point since I have quite a few of their toys if anyone is interested.
For the chicken thighs I drizzled a little ghee and 2 cloves of rough chopped garlic (you could use melted butter if you prefer), did a quick massage to get everything coated well then sprinkled on some sea salt and fresh cracked black pepper and popped it in the oven. If you want it with a little kick add some paprika... yumm! 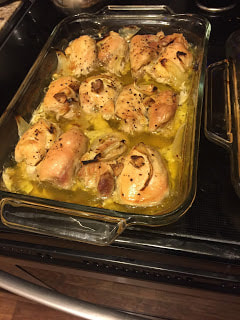 For the drumsticks I went with a citrus taste. I simply squeezed two lemons and a lime on top of the drumsticks and added the same salt and pepper as on the thighs. There are so many options for this with marinades including zest, spices and etc that I will be going back and experimenting with this combination again in the future but tonight I just wanted fast but still tasty. 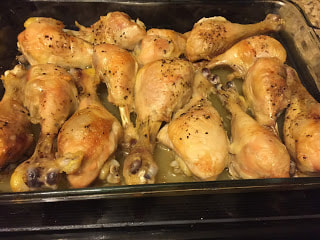 For both of these dishes I set the oven to 300 degrees in order to get a slow roast on the chicken over a couple of hours. Depending on the amount of chicken you have in the oven the cook time could vary but it took about 3 hours for mine to be fully cooked. Make sure to check the internal temperature if you aren't sure if the chicken is fully cooked or not. So far I have enjoyed these dishes as lunches and dinners throughout the week. What other ways do you cook up chicken in your house? :)
|
Archives
October 2022
Categories
All
|


 RSS Feed

© COPYRIGHT 2015. ALL RIGHTS RESERVED.