|
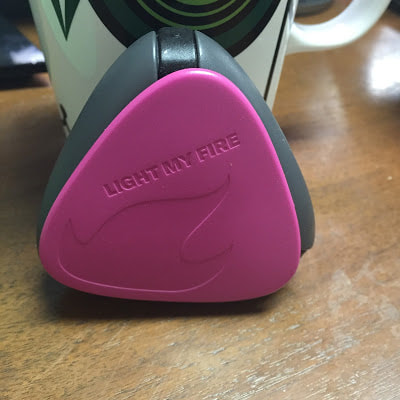
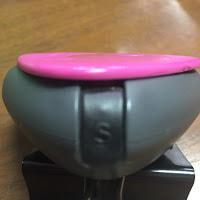
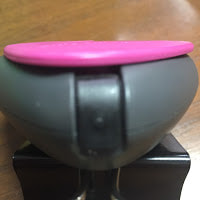
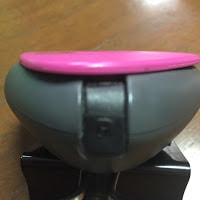
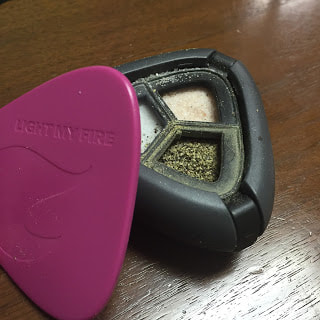
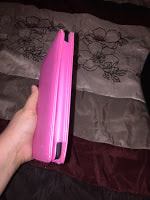
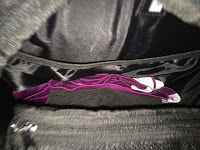
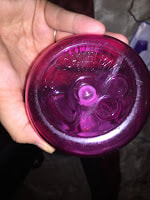
Salt is very important to my well-being due to the fact that I live with dysautonomia. We tend to use sodium to raise our blood pressure which will help abate some of the symptoms associated with dysautonomias. Personally, I'm hypovolemic so serious amounts of water and electrolytes, including sodium, are needed each day to combat that issue. Because these electrolytes are so important to my health I to keep various forms of salt, electrolyte drink mixes and some Thermotabs on hand at all times. To keep the salt on hand I've been using the Light My Fire Salt and Pepper Plus now for about five months. I keep it in the front pocket of my IsoPack usually but if I won't be using my backpack and I know that salt might be something I won't have access too throughout the day I will toss it in my purse along with a few other health items that come with me everywhere. The color option I chose was fuchsia (of course, I LOVE pink) but there are many possibilities: pink, orange, black, green (bright green), red, yellow, cyan, blue (dark blue), dark green, lime and, of course, fuchsia. If I bought another one I would either choose black or green I think but they are pretty much all lovely vibrant colors. In the Salt and Pepper Plus there are three compartments for spices, one is labeled S for salt, one P for pepper and one simply has a dot for anything you choose to put in it. Right now I have pepper and sea salt in the P and S and the additional compartment is Himalayan pink salt. If I was going camping with it I might put paprika, lemon pepper or garlic powder in the final compartment for cooking. When I opened mine to take a photo of the inside I jostled the salt and pepper a bit unfortunately and got some pepper in the salt compartments... so that is a slight problem with this model. If you are one to only refill when things are out it really wouldn't be an issue at all I imagine. (Sorry about the not so awesome photos of the tabs... they didn't want to focus on my cell phone sadly.)
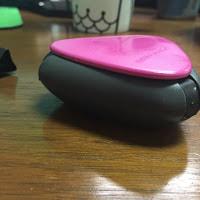
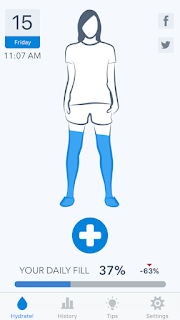
The labeled tabs are simple to pop out to sprinkle your ingredient onto food but they stay attached so that you don't lose the stopper... a plus if you tend to drop things like me. Durability wise I would give it 5 stars. Like I mentioned, I drop stuff... a lot... but it still looks brand new on the outside and even using the shaker regularly at work and when I'm out and about I still haven't seen any problems with the tabs/stoppers in the 5 months I have had it. For $9.99 I was pretty happy with my purchase and would make a second purchase if I was a regular camper (I'm not) so that I could travel with more spices easily. I love cooking and adding a few spices to my bag for the space of half a pack of tissues is something I would totally chose to do. Does the salt come out too fast? Not at all, both myself and my brother-in-law have used it without issue. I mention him because I can't always tell if something is too salty but he doesn't eat salt as often as I do so he would be able to tell if he accidentally used too much. I use the salt and pepper at lunch reguarly and if I angle the container slightly down and shake slightly I get exactly how much I want every time. It might be easy to over pour though if I dumped it vertically over my food... but the same would happen with any salt shaker. Another thing that I like is the fact that it is difficult to open the top to refill it. I know that seems to make no sense but the fact that it takes a bit more effort has meant that it has never opened accidentally in my bag or otherwise. It's a little annoying when it comes time to refill it but the lack of mess the rest of the time makes up for it in my opinion. As I mentioned at the beginning though, if you are refilling it when it is still mostly full you may have some cross contamination so don't refill it if you don't need too. I'm really liking this company's products so far. I may be ordering one of their Sporks in Titanium (I snapped my plastic Spork in two when traveling sadly but I loved it while I had it and my parents are still loving theirs as well) and a Pack-Up Cup here in the next couple of months. If I do I'll let you know how I like them compared to the other Spork and collapsible cup I had purchased and reviewed in the past.  One of the first things I was told to do once I started seeing a cardiologist for my condition (even before getting a diagnosis... remember, I was doing symptom management long before ever receiving a diagnosis as it took 6 years) was to up my salt intake drastically as well as my water. At this point, I'm pretty good about maintaining my salt intake as I have learned to listen to my body's signs that I need more salt and have adapted strategies that are, by this point, ingrained habits that get my sodium in. Water is a different issue though as I get lost in whatever I am doing and lose track of the time quite easily, especially if I'm out of my routine. The key I've found for my average workday is to keep two water bottles on my desk and just drink whenever I am thirsty... no stopping what I am doing, just reach for it and take a drink or two. Whenever I finish one I move on to the other... and usually fairly soon after that I need a bathroom break so fill the first back up while I'm already away from my desk. It's working fairly well so far when I have a normal day at work. I use two 0.75 L Camelbak bottles that I referenced in my travel post if you were wondering. If I drink when I am thirsty and stop when I'm not, I drink between 3-5 liters per day. I don't know many people who drink that much water unless they are making an effort to do so personally but perhaps everyone I know is just dehydrated all the time (not unlikely). I've found that, for me, if I aim for 4L then I'm needing IV infusions of saline less... which is a plus. Unfortunately drinking too much water can make you nauseous so I have to be careful to space it out well... and you are constantly needing to take bathroom breaks it seems, which is a bit annoying. But you do what you have to do, right? NOTE: I would not recommend drinking as much water as I do without taking care of your electrolyte needs as well so as not to end up with an imbalance. This is a point I cannot stress enough. I am not a doctor and do not claim to know about how much water you personally need for a happy and healthy body, I just know what I have to do for my specific body to function well. My needs are rarely the same as the 'norm' so do not take my daily requirements to be average in any way. If you are concerned you are not getting in enough (or too much) fluids please consult your doctor to ensure a healthy outcome. But what about those days that are not 'normal'... or the weekends? Well, there's the issue. I simply do no meet even the 3L minimum it takes to stop me from being thirsty (which they tell me is a sign of dehydration... bad news for someone like me) and definitely not the amount that has decreased my trips to get IVs when I'm out of my normal routine. So I started looking for apps to help me track as I always seem to misplace a paper version of a tracker and I'm never going to remember how much water I've had from the beginning of the day to the end unless the number is super low if previous experience has taught me anything about myself. I must've tried half a dozen apps and dismissed at least that many based on the reviews alone but I finally got down to the last three. I tracked with them both for a few days and finally landed on WaterMinder as the one I would keep due to its simplicity and ease of reporting. When you enter the app (after registration) you will see an outline of either a woman or a man. Since I am a woman, I see this lovely outline. As the day progresses and you log more water the blue level raises and the percentages on the bottom portion labeled "Your Daily Fill" update. One interesting tidbit about that blue level is that it changes how it fills the outline based on the position of your phone, like water in a cup. I got a bit of fun out of that I'll have to admit. Anyways, to enter a serving of water simply click the plus sign and the 'cup' sizes you selected in the settings tab will appear for quick entry. A regular bottle of water is 500mL so I would click on the 500mL bottle to show I had finished one of those for instance. Since this is customizable it is completely up to you how many options you have, or if they are in in mL or oz.
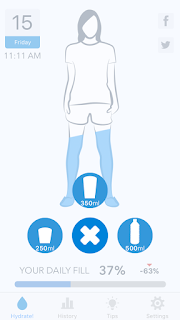
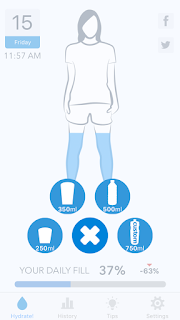
As you can see, once I added a 750mL bottle to represent my Camelbak it showed up on the quick add menu. To add a custom 'cup' click over to the Settings tab and tap "Add Cup" then enter the amount of water you wish to represent. Since my app is in the mL setting it asked for the amount in mL but if you have set your settings to oz then yours will ask for it in oz of course, no conversion necessary.
Another way to add water quickly, if you are using an iPhone, is to add it directly from the Today tab in the Notifications menu. Simply swipe down from the top of the screen to access the Notifications menu. 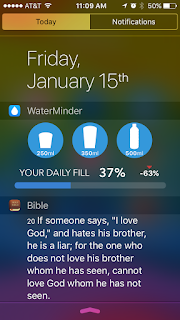 The other two tabs on the app are History and Tips. I wasn't super impressed with the Tips area as they don't appear to ever change but rather has a small essay on the benefits of water. I found it less helpful than a tip a day type option personally and didn't learn anything new but it is worth a quick read through in case there is something new to you. I have added a screenshot of the table of contents below. 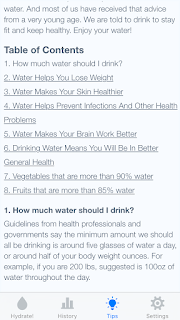 The History section was useful in that I can track my intake over just the day, the week, month or even the year. You can see that I had one day near New Years that I didn't come close to my goal in a quick glance as well as see an average for the time period and where I'm at today so far. 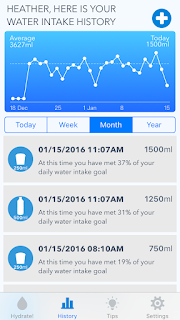 Other useful things about this app:
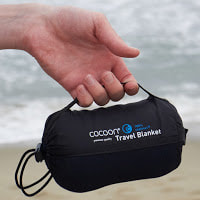
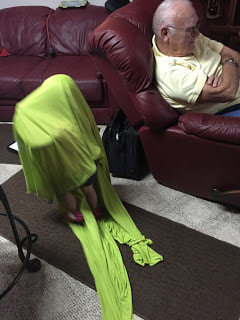
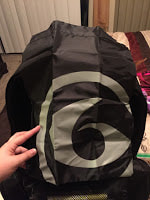
Have you found a water tracking app that is better than this? Have another app that you're sure I would love? If so, let me know! I'm always trying new health apps and would love to check it out. When I went on my trip to Kentucky I realized that I needed a travel blanket and all the blankets I had currently wouldn't fit in my bag... so I headed online to start researching good options. I get either cold or overheated pretty much round the clock (there's not a lot of in between unfortunately) so I have collected a LOT of blankets over the years and found a lot of duds in the process. I needed something to keep me warm for those chilled times but still be lightweight enough that I don't have to devote my carry-on to a blanket. Typically I have a thick sweater I keep with me year round when I am out but I really wanted something that would keep all of me warm instead of just my arms as I was going to be trying to sleep on the plane and shivering doesn't work too well with that goal. After reading a lot of reviews on travel sites I purchased the Cocoon CoolMax Blanket from Amazon as it seemed a good combination of quality and affordability. The cheapest color option was the 'tree frog' green so that is what I purchased. It ended up being basically a lime color which reminded me of my college dorm room but it wasn't a horrible color like some of the reviews had complained about (I didn't care so much about the color but rather the functionality). The color really isn't too bad but it is quite a bright color if you are opposed to vivid colors for your blankets. I ended up finding the bright color useful though as I could always find it... even when my niece decided it made a better ghost costume or superman cape than blanket and wandered off with it various times on my trip. The blanket is quite large compared to other travel blankets I have had, which is a plus. The description states that it is 55" x 70" but I didn't measure it to verify... it covered me from shoulders to toes completely with a little room to spare so I was happy. Unfortunately, while it is large it is not particularly thick. The thickness is about what I would expect for a thicker bed sheet yet somehow warmer than a simple sheet would be. The warmth of the blanket was enough to keep me comfortable on the planes all but once, when it got particularly cold, but that was only for a few minutes and most people would likely be quite comfortable. You can use this, or any travel blanket actually, even when you are not traveling. I keep my blanket in the trunk of my car in case I need it personally. I actually used the blanket today at the office as I forgot my sweater today at the house so I was freezing (why is it that office's are always so cold!?!). Space-wise I was quite happy with the amount of room this blanket took up as it was able to fit into my already quite packed backpack without issue. One feature that I liked was that it comes in a bag with a drawstring to keep the blanket in. I suggest that you keep the bag if you purchase this item as you don't need to roll the blanket or do anything special with it... just quickly stuff the blanket into the bag, pull the drawstring and you are ready to go, the bag doesn't seem to get much bulkier than when it is neatly folded and rolled. The blanket in the bag is larger than a can of soda but quite a bit smaller than my travel pillow. These are not my hands (and it is not my photo) as I have pretty small hands and didn't feel that you would get a good comparison. Overall I would say this was a good purchase for me but for some people it might be a little more expensive than they are willing to pay. If you have more room in your bag for a slightly bulkier blanket then there are a lot of other options out there that may work better for you. Let me know if you have found a fantastic blanket as I'm almost always cold so pretty much always looking at potential new blankets for my home or for travel. I'm going to start this post with saying that I don't use this app like it is intended- to run with. Instead I walk to it. I am getting a little faster (yay!) but I can't push myself too much right now as I could put myself back even further if I do. I was right on the cusp of being able to job for a minute when things went a bit topsy turvy in my life and my health responded by getting worse, of course. I took my time, managed to get off most of most of the medications I ended up back on with the flair and even managed to leave behind some of my supplements over the past year or so. Now it's time to exercise again... slowly. So I pulled out my old standard cardio app and realized they had completely revamped the entire app! That was interesting but pretty cool. I had already paid for seasons 1-3 before they redesigned it to be an annual subscription which was a little sad because new players will have paid less than me when it is all said and done but that's ok... I was there back when it started and supported it's growth so I don't mind too much. The app is called Zombies, Run and is by a UK based company called Six to Start. They have a few other apps that I will be reviewing later this month as well that are along the same lines: game meets radio show meets exercise app.
The game's website says the following about the game: "Run in the real world. Become a Hero in another. Only a few have survived the zombie epidemic. You are a Runner en-route to one of humanity's last remaining outposts. They need your help to gather supplies, rescue survivors, and defend their home. And you have another mission- one they don't know about..." That's a pretty general but accurate plot line... at least for the two and a half seasons I have worked my way through in the past. I restarted the series so I am back in season one working my way back to where I was in the story before. There were plenty of details I missed the first time through so feel free to re-run missions. They don't get boring. If you look in the settings area you will see that you can change the units to Standard or Metric, input your weight, change the volume of the game clips and etc. but there is also a section called 'clip spacing' that allows you to decide how often you would like a story clip to play... effectively lengthening or shortening your run. It is taking me about 20 minutes to get through a mission at 'clips play every 2.5 minutes' so if you want a longer mission then perhaps make it every 5 minutes or so. It is very easy to personalize your runs. I suggest checking this screen out fully before your first mission so that you know what your options are. Click on the mission and you are brought to a screen that allows you to choose the playlist that you wish to run to from your phone, chose how ZR will track your movement/pace/run, and decide if you want zombie chases (more on this later). When you start a new episode there is a recap to start with, similar to a TV series, and then the new 'mission' begins. For the majority of season one, as I assume that is where you will start, your comms operator is Sam Yao. He briefs you on your missions, warns you of incoming zombies he sees on his scanners, provides humor and generally just watches your six while you are outside the gates. Once you have been briefed you head outside the gates for the day's mission.Your chosen playlist will be interspersed with story clips that keep you in the alternate world of ZR throughout your run... I don't suggest you run at night as those zom noises can get a tad creepy. And there's a reason we don't send scouts out at night... just sayin'. If you selected to have zombie chases, which you are also able to customize when it comes to frequency, then you will also hear a warning about incoming zombies throughout the mission at various points. There will be tones that warn you how far away the zombie is as well as a voice that will tell you if you outpaced the zombie or needed to throw an item at it in order to escape. In order to escape you have to put on a burst of speed for about half a minute if I recall (I can't do these right now so have the feature turned off)... basically you sprint as fast as you can. If you throw an item at the zombie then you have lost an item that you 'picked up' on your run. These items can be used to rebuild Abel Township... where your character lives and works. This portion of the game has really grown over the years compared to what it started as. That pretty much covers the story missions... there are other types of missions you can chose to run as well. You can use Airdrop mode to retrieve supplies from Mullin's airbase at a location you chose in the real world, run a supply mission that is general and doesn't affect the storyline (so you can skip them or run them again and again... like we used to do in between seasons), do interval training that you customize yourself in the app, run with Radio Abel instead of a mission, or run in race mode. Radio Abel is basically a radio show that takes place within the world of ZR. These aren't missions but rather you just out running but getting to also hear about the world of post zombie apocalypse and learn more about the world your character resides in. They are a good change of pace and I find the hosts quite humorous. Race mode is exactly like it seems. There are 2 sets of 3 races- a 5k, 10k and 20k race with story lines all their own that take place either in the world of Abel Township or New Canton, the militarized quasi-enemy township not too far away. Abel and New Canton's powers that be to not see eye to eye but the runners will generally help each other out in a bind if they can... it is, after all, the fate of the world at stake. If you want to get really into the alternate world you can go into the game and read about the various things you pick up... some are supplies like water and sports bras (yes, sports bras... it's a running joke actually) and some are 'artifacts' that give you details about the developing story such as a CDC box or a newspaper clip about Netrophil. These items can be read about in the Codex tab. You can also go online and download the Abel Runner's Guide for free to get more into the mythology of the game. Just recently they have added a store where you can make purchases related to the game on their website if you are interested. There are also fans who have etsy and similar shops for "Runner 5" gear. The big news though is that they just launched the first ZR virtual race. I signed up even though I won't be running it... I'm hoping to get a few short jogs in by then though, we'll see! This was big news in the ZR community and spots sold out fairly quickly. Finally, you can sync your runs to the cloud, use health kit with the app to track your workouts and, of course, share your runs to social media. This is by far my favorite exercise app of all time and it doesn't surprise me one bit that it is now an award winning app... it rocks. (Once I am able to restart and complete the 5k training app that is a companion to ZR I will write a review of it as well but from what I recall it wasn't as in depth as this game is but it was still quite good. It takes place between episodes 1 and 2 of the original ZR game and is a C25K program so you go from walking to running/jogging a 5k by the end if you follow the program.) Sometimes I crave pizza. Shocking, I know. Not! Everyone likes pizza... why wouldn't you? There's the tang of the tomato sauce, tasty toppings ranging from crisp or sauteed veggies to savory meats and herbs, lots of cheesy goodness, and the garlic. I love garlic. Most of the time I end up just having to suck it up and deal with the consequences of eating a slice or two from the local pizzeria but the other day I went to Firecrust again and it was pretty amazing. I have been to Firecrust before, I got a fairly traditional pie with ricotta and mozzarella cheeses, basil, tomato sauce, olive oil and mushrooms. It was pretty fabulous. The crust was thin and crisp, perfect for the lightness of the toppings. All the toppings were fresh, from the ball of mozzarella they tore a chunk off of for my pizza to the basil and roasted mushrooms. I was a happy camper... but still had some tummy upset later.  This time when I went I saw that they had gluten free pizza crusts now! Hurray! I was pretty excited to try out my same pie but on their new crust. It did cost $2 extra but $2 and no consequences later? Totally worth it. The procedure to make the gluten free pizza went beyond just grabbing a gluten free crust and assembly lining it to the end though. They pulled special utensils out for my pizza, made sure to get ingredients from beneath the counter so there was no cross contamination from the wheat flour pizzas, and even checked to see if their pepperoni was gluten free (it isn't *sad trombone*)... all without me even asking or saying a word about it. The manager put my pizza in the oven and chatted with me while I waited... she was very knowledgeable about why the gluten free pizza crusts took longer and made sure that the box she put my pizza in didn't even get the packets of cheese and peppers 'just in case'... and never once did they make me feel like I was putting them to extra effort in any way. The customer service was fantastic! I got my pizza and felt very confident that it wasn't cross-contaminated in the slightest. I just have a sensitivity but if I had Celiac I would feel comfortable eating something these guys had whipped up for me, they were that on point with what their procedure should be. They even have a gluten free flat bread now for their salads I was informed as I picked up my order. 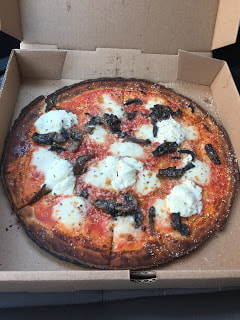 On to the flavors and textures. The toppings were as on point as they ever were, of course... creamy ricotta, flavorful mushrooms, tangy sauce... basically perfection on a pie. The crust wasn't the best I've ever had but it was far from the worst as well. The flavor was actually pretty good but I'm a big texture person. Flavor-wise, it was a little sweeter than traditional wheat flour crusts but very mild in flavor which was a plus as sometimes these crusts can taste quite nutty. I was told that they use tapioca starch as a main ingredient in the crusts so this could be reason for the more neutral but slightly sweet taste. The biggest issue I had with the crust was that it was a little too thick in my opinion which made it somewhat chewy in the center. This isn't an uncommon problem by any means and I've come to expect it from gluten free pizzas but if they would make the crust just a little thinner I think this issue would go away completely. It would also help solve the issue of needing to be cooked longer than their other pizzas which causes a little singe on the outside edge (it didn't taste burnt though!). It was a pretty good pizza all in all and was very filling. I would likely split this pizza if I went again as it is equivalent to a small pizza but, as with most gluten free 'breads', more calorie dense so you get filled up faster. As it was I ended up saving half to eat later in the day as a second meal. It was pretty tasty cold as well.
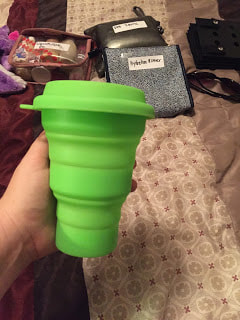
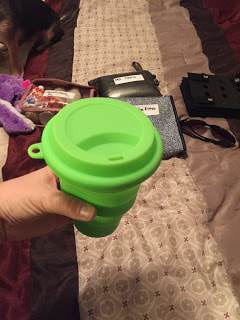
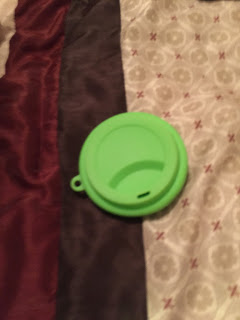
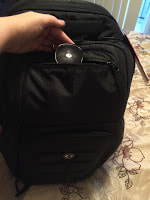
Oh! And for you vegans and vegetarians out there... they have vegan cheese and plenty of non-meat only toppings to try on their pizzas! I have not tried that cheese as I don't eat soy and I assume that it is soy based (I didn't ask but many of them are) but they do have it. They even have a sauce-less 'white' pizza if you can't have tomatoes. Auto-immune protocol people this could work for you. I'm not sure about the ingredients in their crust though, I'd suggest calling to ask if you were interested in going to make sure. They are pretty accommodating to various eating styles and needs I'd say. I recommend this restaurant for both my gluten eating and non-eating friends as the pizza, and the customer service, is top notch. I've become so accustomed to home and work being within minutes of each other that I am still getting used to being as over-prepared as I once was for medical issues that might arise. One of the things that I used to keep in my car was an extra water bottle and Gatorade powder. I don't usually drink Gatorade anymore like I have mentioned in a previous post but I still need to keep electrolyte drinks on hand for emergencies. To this end it seemed that I needed a collapsible cup or fold-able water bottle to mix up my electrolyte drink powder in that could fit in my med kit. I could of course just use my water bottle but I like to retain that as pure water due to the bite valve and straw mechanism being a little more difficult to get completely clean at times. I ended up deciding against a foldable water bottle as it would be more difficult to clean as well so I started searching for a cup that would fit my needs. The cup I ended up getting held 16 oz, was made of food grade silicone, and had a lid. It is called the LevelOne Collapsible Travel Silicone Camping Cup. The lid was a selling point because i wouldn't need a spoon or straw to mix up the drink, just cover the hole and agitate the cup until it is mixed. The fact that it held a full 2 cups of fluid was important as well since a lot of collapsible cups are much smaller... this means that the drink would end up being thick which is not something I can handle if feeling ill already typically (nausea is one of the first symptoms once my heart rate and blood pressure start doing gymnastics... followed by headache). I believe this is technically a camping cup which is why it has a spot to attach it via a chain or similar to the outside of a backpack. For my uses it will be in the medical bag I keep in my backpack but if you want to use it for camping this would be nice feature I can imagine.
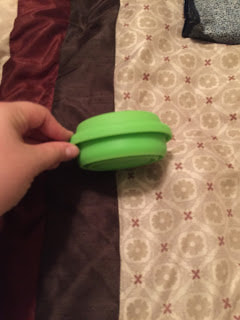
The cup doesn't collapse down as far as I would like but it isn't very bulky and fits easily into my med kit. One thing I do not like about it is that, due to the fact that it is silicone, it isn't particularly well suited to hot liquids. I don't see myself needing to drink hot liquids from it but when I gave it a try at home it wasn't a pleasant experience. The cup itself doesn't suffer from the heat at all but it was too hot to hold so I would not use it for coffee or tea should you use it as a camping cup. I did like that it was very easy to clean and that I can toss it in the dishwasher should I want to. I don't foresee a need to do so as I can clean it in the sink in a few seconds and let it air dry but I like options.
All in all I like this cup but it isn't something I would purchase multiple of or take camping as my only cup since I like to drink hot tea.
9/11/2015 6 Pack Bags Expedition 500 VS Isolator Fitness Isopack, Part Three: The ComparisonRead Now It was a difficult decision but I eventually settled on keeping the Isopack rather than the Expedition 500. Both bags seem very well made and quite useful. They also have many of the same features as they are meant to satisfy the same customer needs so it really all comes down to what you are needing in the particulars. For instance, if you are more concerned with branding then you may go with the Expedition as it is by a more well known/popular brand. If you are looking for a lot of space or need depth in the main compartment like I do then you will likely chose the Isobag as it's main compartment is deeper and a bit more roomy than the Expedition. If you are looking for a bag that comes with all the extras then you may want to go with the Expedition. Should you need to keep your meals cool for 12 hours or longer then you will likely go with the Isopack... its all about priorities. I made my choice because I loved the following about the Isopack:
Things I liked better about the Expedition:
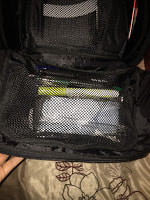
I wanted to offer a quick comparison chart between the two bags as the last piece of this series. If you have any questions about the bags just let me know and I will do my best to answer them!  9/10/2015 6 Pack Bags Expedition 500 VS Isolator Fitness Isopack, Part Two: The Expedition 500Read Now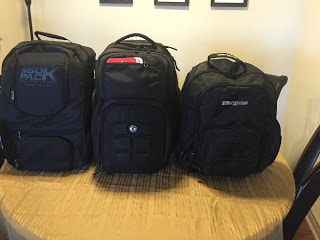 It was difficult to find a good comparison online of the two meal management backpacks I had narrowed it down to- the Expedition 500 and the Isopack. Since this was the case I ended up ordering both the Expedition 500 and the Isopack to compare and decide which worked best for me. I decided on the Isopack so the Expedition will be returned. I'm hoping that this post will help someone else that is trying to decide which to purchase so that they won't have to order blindly. Due to the large number of photos I have to divide the comparison into several pieces, here is the second... the Expedition 500. 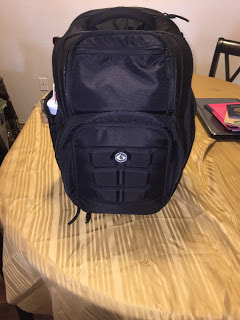 There is a chest clip to help distribute the weight. This is quite heavy even empty. I couldn't weigh it but I read that it was over 12 pounds empty and that seems pretty accurate. After it was full I definitely needed the weight distribution but it was just too heavy for me to carry easily so that was one of the negatives of this bag. 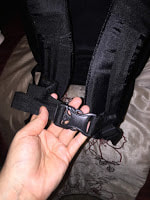 There are two front pockets. The very front one is meant for sunglasses and it fit mine quite well. The inside of the pocket is lined to avoid scratching your glasses. The only problem with this pocket is that once you fill the pocket behind it there is no longer room for the glasses if they aren't completely flat... which mine are not. The pocket behind it has two smaller compartments as well as a clip and a mesh pouch. I was able to put my wallet in this compartment and my keys in the sunglasses pouch.
Next up is the laptop compartment. I was able to fit the same laptop, kindle and paper notebook in this laptop pouch as in the Isopack. This pocket is lined with the same fabric as the sunglasses pocket to avoid scratching. There is a pouch for a tablet in this backpack just as in the Isopack.
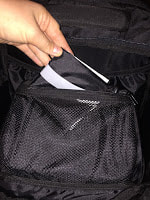
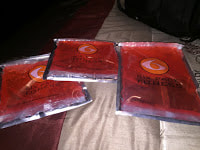
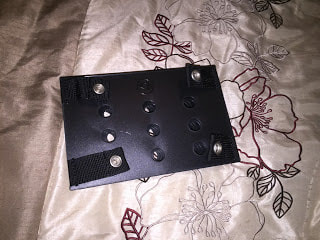
Inside the main compartment there are two small items that are not included with the Isopack: a drawstring bag and a vitamin/supplement storage container. These were nice additions but I personally didn't need them as I already had a set. Some bags seem to also come with a shaker bottle (I believe it was the black and red set from one of the sellers on Amazon) but that was another item that I didn't need. There are two side pockets that zip closed when not in use (or if you want to use them as another pocket) that convert into water and shaker bottle holders when unzipped. Zipping the pocket up helps to lock the bottle in place. I saw no issues with slippage of the bottles I placed in the pockets to test it out.
On to the inside of the main compartment... the front lays out for easy access to the inside pockets. There is one on the front of the bag, one on the top of the meal management section, a pocket on the back of the bag and two small pockets on the sides of the meal compartment. The side mesh compartments would fit a can of soda or small bottle of water. When you first get the bag you will see that the drawstring bag is located on top of the meal compartment. This is where I would continue to keep the bag. The last pocket, on the back, does not go all the way to the bottom of the bag but would be a good place to keep a laptop cord and wireless mouse.
I was able to put two smaller bags on the side of the meal management box but I did not use the mesh pouch. You should be able to put a pair of flats in the bag, one on each side in this area. A pair of minimalist running shoes would likely also fit here. A set of workout clothes fit behind the meal management area and left room to put items in the pouch above it or just atop the clothing. This is where I would put my toiletry bag.
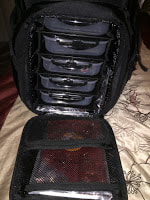
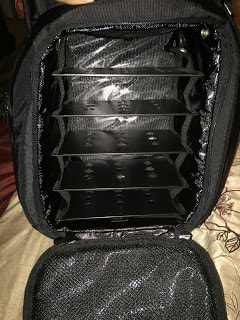
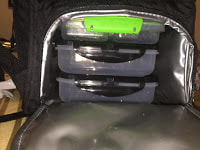
On top of the meal management bag you can put a few other odds and ends but cannot overfill the area atop the meal management area as the front of the bag angles in when you close the bag. I wasn't able to fit as much into this bag as I could in the Isopack. I was able to fit everything except the following and the ball: 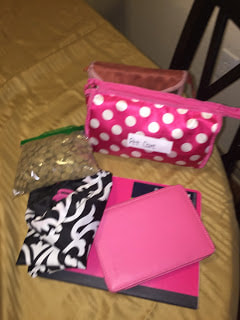 from the same items that were in the carry-on set of items as in the other bag...  And finally on to the meal management area. Here is what you see when you open the bag. There are five containers in a removable rack system as well as two small and one large gel ice pack.
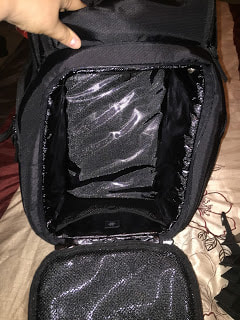
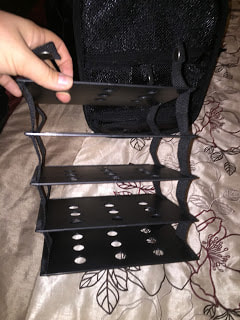
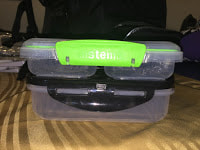
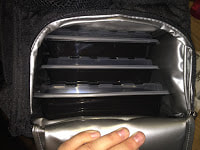
I wasn't a big fan of the rack system as finding replacements or containers the correct size proved to be a bit difficult. I did like that they are leak proof though! I also liked the fact that they seem very durable. Here is a photo of the rack system both extended and flat when removed as well as the meal area empty with and without the rack.
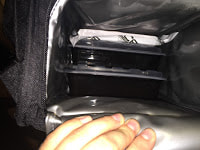
As you can see the rack simply snaps into the top of the meal area and drops down to extend. 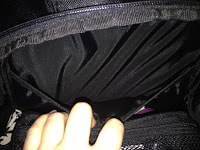 The last pockets are located on the front of the meal area. The large icepack fits in the back pocket (it goes from the top all the way down) and utensils and napkins fit in the shorter top mesh pocket.
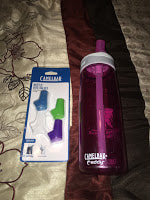
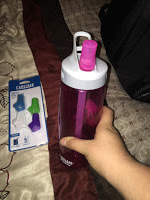
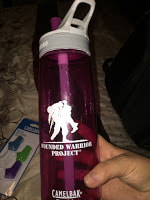
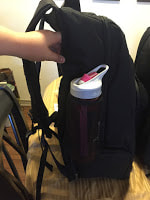
All in all this seems like a good all-in-one backpack if it wasn't so heavy to carry. It didn't fit quite as much as the Isopack but for most people that wouldn't be a problem since they don't need to carry around the medical items that I carry around. Without them I could fit everything I would need to carry in this bag quite easily... it carries everything I need for daily usage already just not quite everything I keep in my carry-on bag. Staying hydrated is of top priority for myself and others with dysautonomia. If we get dehydrated even a little our symptoms can flare badly so you will often see us with a bottle of water or electrolyte drink of some sort. I used to drink a lot of Gatorade and the like but they tend to have a lot of sugar, artificial dye and chemicals so I try to stay away from them these days. There are some days where I cannot do so if I want to control my symptoms but I am working on finding a similar formulation that doesn't have those ingredients or at least limits them significantly. For now I am making sure to eat plenty of salt, drink water throughout the day, and supplement with other minerals daily that I tend to be low on. To help with the goal of staying hydrated I have tried numerous water bottles but I find that they all eventually began to leak into the bag or tote that I was using which would cause issues as I could have homework, clothing, or even medical equipment in the bag that needed to stay dry. So far the Camelbak Eddy has been my favorite but it doesn't work well if you are bed bound and need to by supine. The best for that has been the Contigo Autoseal Water Bottle. This one began to leak after about 6 months but they do have a warranty that they will replace the top or the gasket if you contact them and send in the top that is leaking. I have had my Camelbak Eddy for over a year now with very few problems. It did begin to leak a few months ago but upon inspection it appeared that the bite valve needed replacing. I purchased a package of 4 valves on Amazon for $10 and the leaking went away. Easy fix! The Camelbak Eddy comes in several versions and colors from child sized bottles to 1L bottles. The one that I have is 0.75 liters and part of the purchase price went to support the Wounded Warrior Project. Just like there is a warranty on the Contigo bottle there is also one for the Camelbak. It does appear at first glance to be more difficult to utilize and doesn't cover general wear and tear which gasket leaks could fall under but should be an issue you could contact them to see if their warranty would cover it. I haven't needed to utilize the warranty yet so I cannot speak to it other than just reading over it. Note:If you cannot drink from a straw for some reason do not get this water bottle as you will need to use suction to drink from it that is slightly more than using a typical straw. As for how durable this bottle is I can say without a doubt that it can take quite the beating. It has been in numerous bags that have been tossed about, dropped fairly regularly and seen more than its share of bumps and falls over the last year. This rough handling has not caused any noticeable cracks or chips but it does have a small scuff at this point. All in all I would say this bottle was a good investment and I will likely purchase a second one in green soon. One thing to understand about these bottles is that they can be a little difficult to clean until you get the hang of it. The valves and straw remove to make the process easier and can be put in the dishwasher but make sure to get in the crevices by hand as tossing the valve in the dishwasher doesn't clean everywhere and you don't want to be drinking contaminated water.
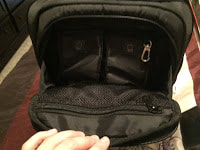
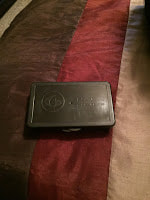
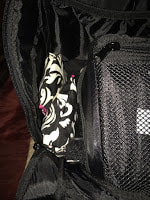
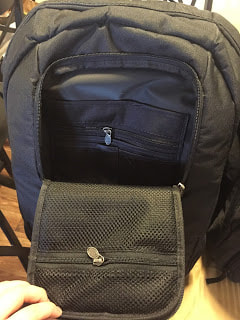
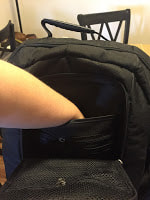
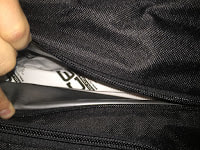
 It was difficult to find a good comparison online of the two meal management backpacks I had narrowed it down to- the Expedition 500 and the Isopack. Since this was the case I ended up ordering both the Expedition 500 and the Isopack to compare and decide which worked best for me. I decided on the Isopack so the Expedition will be returned. I'm hoping that this post will help someone else that is trying to decide which to purchase so that they won't have to order blindly. Due to the large number of photos I have to divide the comparison into several pieces so first... the Isopack! 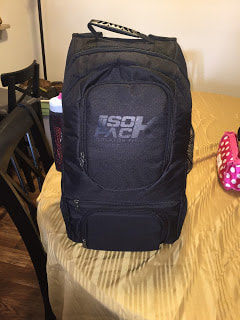 The front pocket (that has the logo) opens up like so:
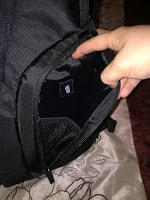
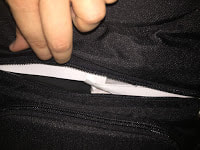
As you can see from the photos the pockets are fairly deep. You could fit a wallet, passport, phone, keys and a few other odds and ends that you need regularly here very easily. I am going to be using this area to carry the contents of my purse (since I am no longer carrying one on weekdays... I am keeping an empty purse in my vehicle in case I end up needing to go to lunch for work or some such) plus my passport and medical ID when I travel. I forgot to take a photo of the chest strap but this bag has a chest strap to help with weight distribution. Next we'll take a look at the laptop pocket.
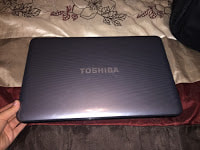
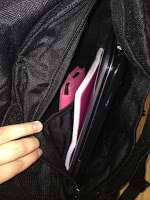
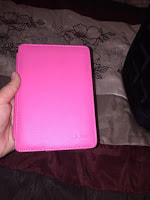
I was easily able to fit my laptop, kindle and a notebook in this pocket. The kindle is in a pink case and it didn't go to the bottom of the pouch. The pouch within the laptop area is meant for a tablet computer according to the website and it looks to me like it would easily fit. Here are better photos of the kindle and laptop so that you can see the size.
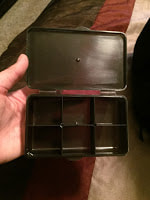
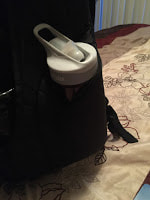
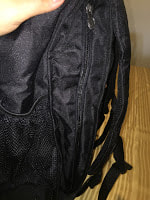
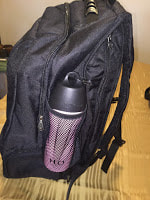
There is a small front pocket as well that I will be using to store utensils and a napkin. This is deep enough that I can put the two compartment plastic container with the green lid from a few photos down into and still easily zip closed. I will likely put that container in this pocket when I travel filled with nuts and seeds or a protein bar. 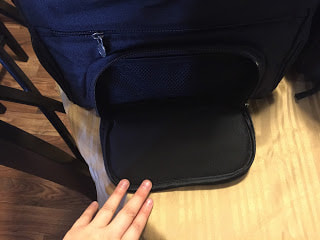 The water bottle pouches are made of mesh which I am a little concerned will snag but they seem to be of similar quality to the ones on my Targus backpack which hasn't snagged in about 6 months of near daily use. Both my Camelbak Eddy and the H2O4K9 fit in the pockets without issue.
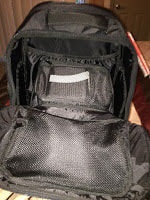
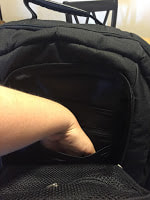
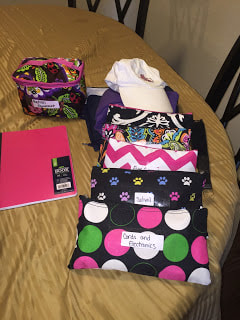
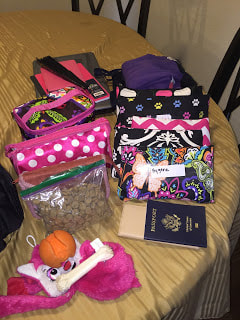
Next we will check out the main compartment. It is actually quite roomy and I was able to fit A LOT of stuff in the bag. Some of the small bags that you see here have been combined for my daily usage of this bag but when I was comparing them I was still trying out different organization methods with my cute new pouches I picked up while shopping with my mom last weekend. The photo on the left is for my daily use and on the right is for when it is being used as a carry on... everything fit in both cases. For the average user I will say that it can hold a binder, your gym clothes, and your toiletries easily. You may even be able to put your athletic shoes in the bag as well depending on what size shoe you wear and how bulky your clothing is.
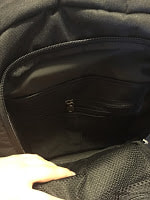
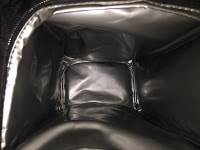
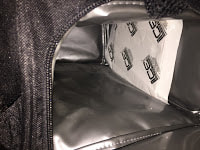
Here is the inside of the main compartment. It is quite deep and has a small mesh pouch on the front where I am keeping a small folded drawstring bag. 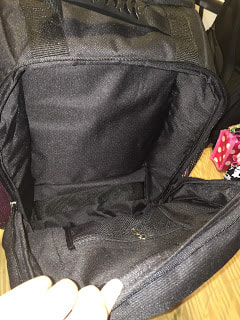 There is a zipper just above the front pocket that opens to a narrow pouch meant for the ice packs. It will fit one of the ice packs that come with the backpack. I had already purchased some of the smaller 7 oz. packs so I have a large one and a small one in the pouch and they fit perfectly. EDIT: It can fit both of the large packs that come with the bag... I was just putting them in wrong. {brainfog} Oops!
Here are the pouches... the one on the left is what comes with this backpack and the right are the smaller 7 oz. versions that are used in some of the other Isolator Fitness bags. According to the website the larger ones can keep food chilled for 12-16 hours. I have only used the smaller ones so far but it was still chilly at the end of the business day in my lunchbox so I don't doubt it. Further, these pouches are not gel or liquid even when they are defrosted so they should work fine with TSA regulations. I will let you know if they say otherwise once I travel in a couple of weeks. 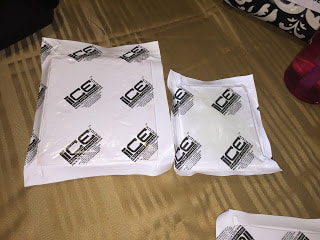 The final, and arguably most important, area is the meal management compartment.
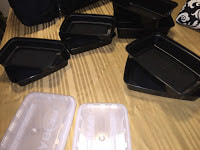
I used the containers from the 6 pack bag as well as the ones that came with this pack to show an accurate comparison.
All five of the containers fit in the bag plus one extra. A comparison picture of how it compared to the 6 pack bags container is below. 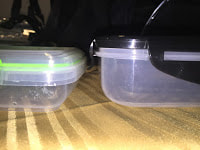 Now for the containers that came with the Isopack. I was able to fit one of the large ones, two medium ones and two small ones plus the second large Isobrick
Here is a photo of everything that fit in the cooler area. 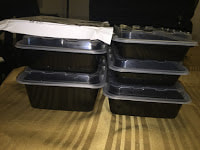 If you are wondering how many of the containers you get here is a close up of one of containers as well as a photo of all the containers that came with the backpack. There were two 12 oz., two 16 oz., two 28 oz., and two 38 oz in the bag to mix and match as you need them. Isolator Fitness has extra containers for sale if you want to purchase more.
Next up: The Expedition 500...
|
Archives
October 2022
Categories
All
|


 RSS Feed

© COPYRIGHT 2015. ALL RIGHTS RESERVED.