 I'm back again to tell you about another money-saving (or in this case, earning) app so that you can be sure it is legitimate- and decide if its worth your valuable time- before you download and try it yourself. This time I tried out the app CoinOut which seemed too good to be true from the description. They claim that you can get money for your receipts with no minimum payout and no gimmicks. While I went into it thinking it was going to be an epic disappointment I was pleasantly surprised to find that they were exactly as they presented themselves. A quick, bulleted run-down of what they offer and my experience with each:
All in all this app appears to be all its representing itself to be and is one I'm going to be keeping on my phone and uploading to when I upload my ibotta and ReceiptPal receipts every few days for sure. It took me less time to earn money on this one than it has ReceiptPal or ReceiptHog (review of this app is still in progress) and the cash out process was super simple so its got my vote for 'work' during CSI or on a lunch break. On to the walk through!
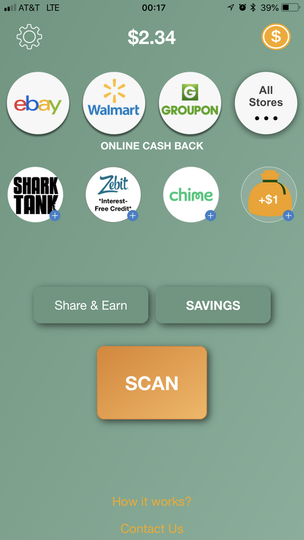
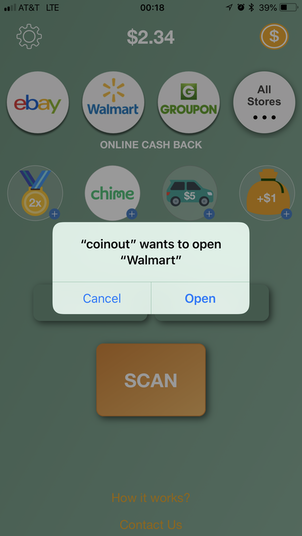
Once you open the app you will see this simple green screen. Clicking the orange "SCAN" button takes you to the photo on the right where you will align the receipt and scan it into the app. Its really as simple as that.
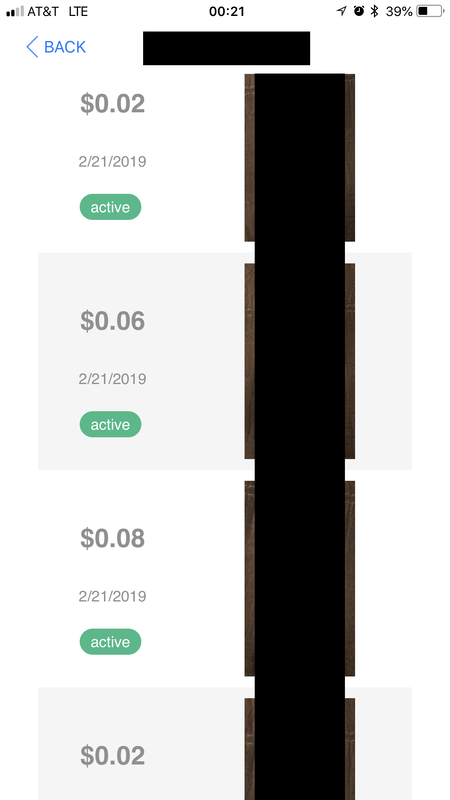
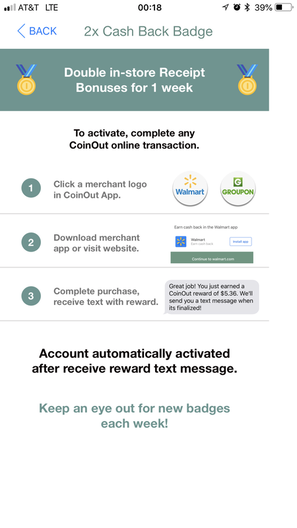
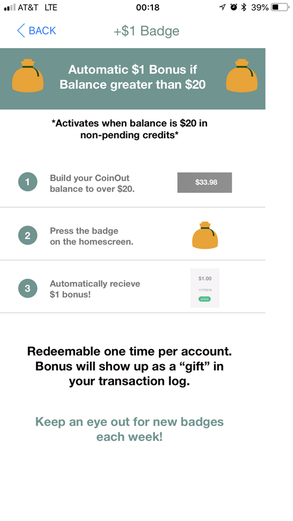
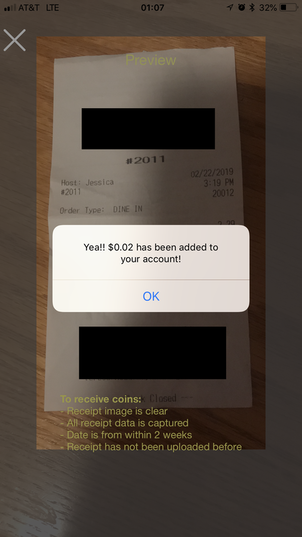
Again, sorry for blocking info but this store is around the corner from my place so blocked out the address and phone number get. *shrug* But yeah, $0.02 went into my account for this Wendy's receipt or a few dollars. I already showed you what happens when you click on a badge above when discussing them so I won't show you again but I will show you the row of icons above it. Those stores open for you to shop and get coins for shopping there as well. I haven't had opportunity or need to shop online really but I will try out this feature in the future.
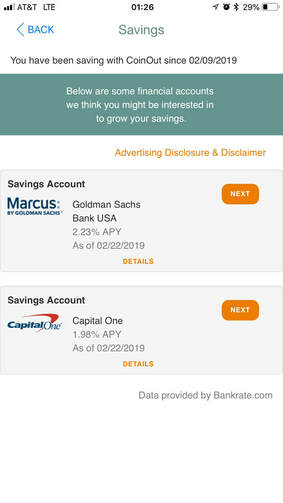
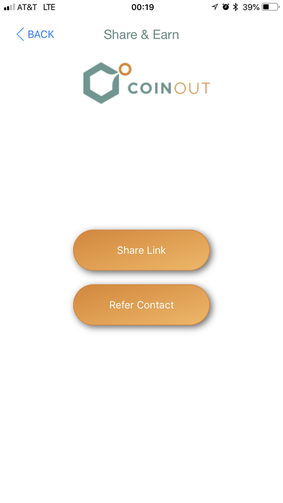
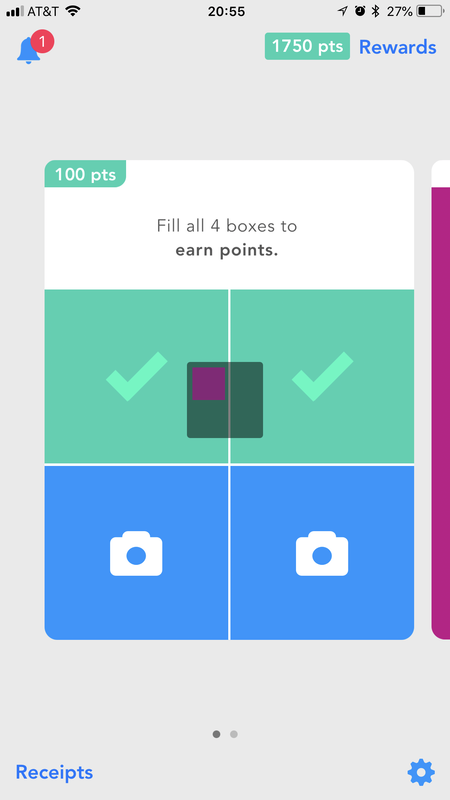
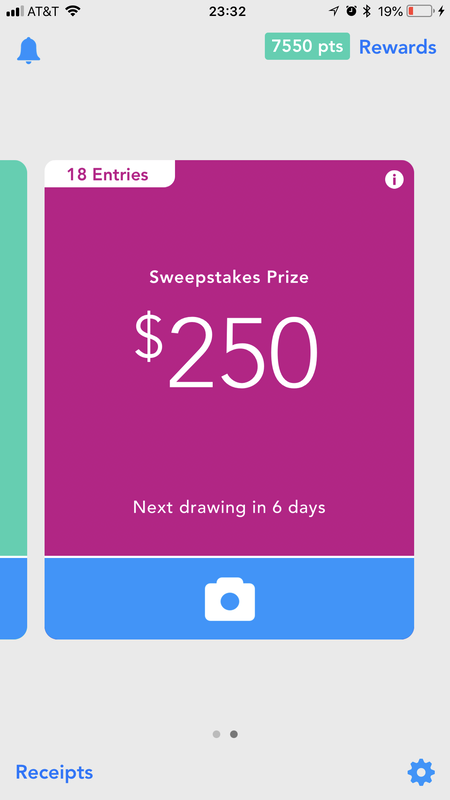
The last 2 screen grabs wrap ups this walk-through. Its a where you go when you hit the "Savings" or "Share & Earn" buttons. Savings is a list of suggested investment apps and savings accounts to deposit your money in. You can transfer it anywhere but they are giving you options if you want somewhere new. The Share & Earn area is their referral page. Currently you get $0.50 for referring someone who joins CoinOut. Speaking of referrals, if you're interested in trying out this app click over their webpage here or search them in the app store. My referral code is RCZ9JND if you don't mind supporting me in creating more content like this. It doesn't cost you anything and earns me a few extra coins which is always lovely. Until next time,   Receipt Pal is probably the easiest, low key ways to earn gift cards I have tried yet. It's an app that asks you to snap a photo of all of your receipts each week in exchange for points that can be redeemed for gift cards. When you open the app you are presented with 'cards' of 4 receipt photo uploads. Once you have uploaded 4 and they have been verified you get the 100 points listed on the left side of the card. If you fill all the cards for a given week then you are able to upload additional receipts for entries in a raffle drawing instead.
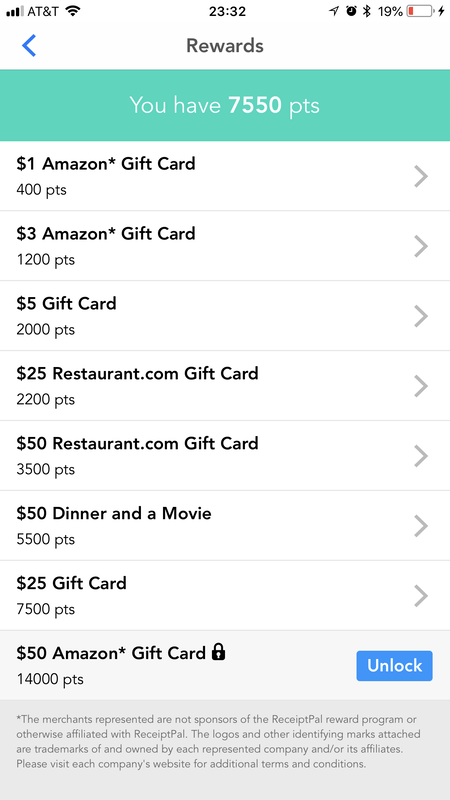
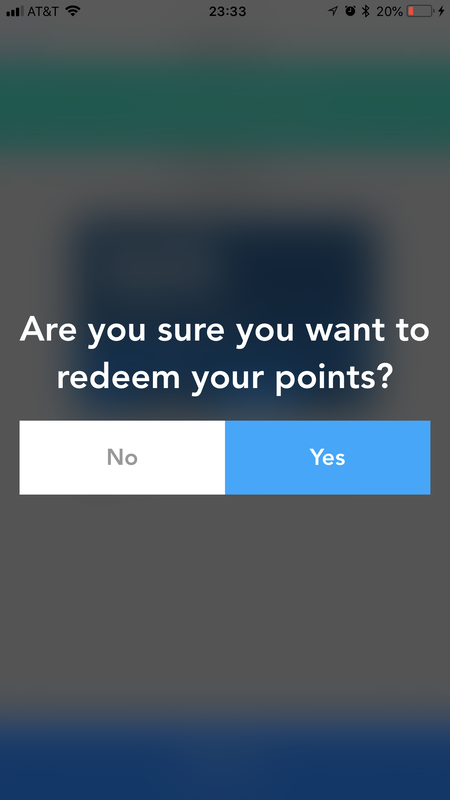
This isn't the app for you if you aren't comfortable sharing your receipts (for marketing purposes and such, that's why they can pay you after all) but it does pay out and requires minimal effort which is nice. Pay out, you say? What's that look like Heather? Well let's take a look! I saved my points up for what felt like forever because I wanted to get a $25 gift card. In reality it took about 6 months. So not a huge money earner but $50 a year here, $50 there and before you know it you've got free groceries for a month.
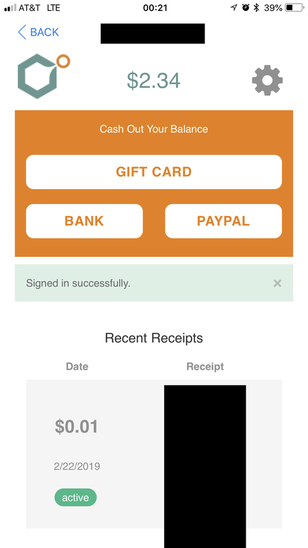
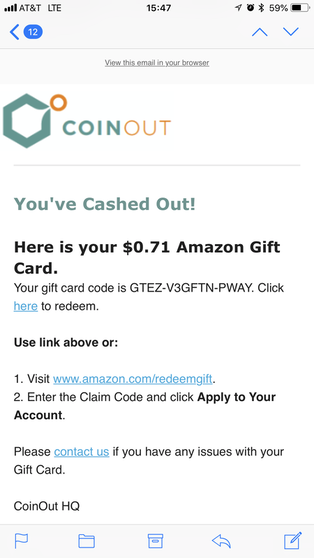
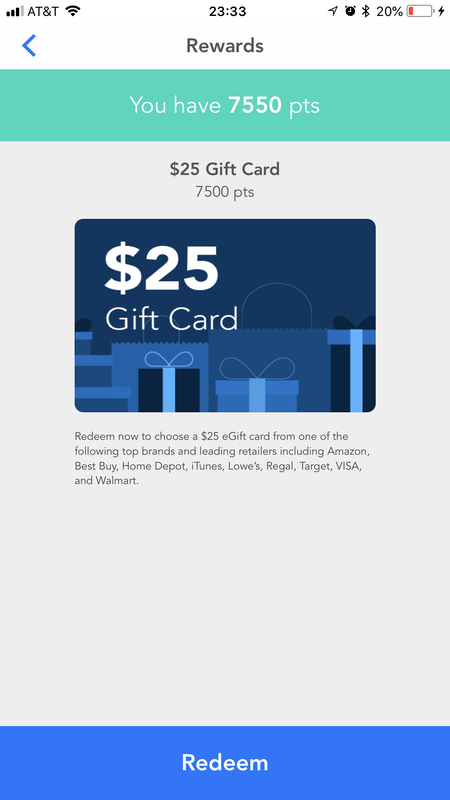
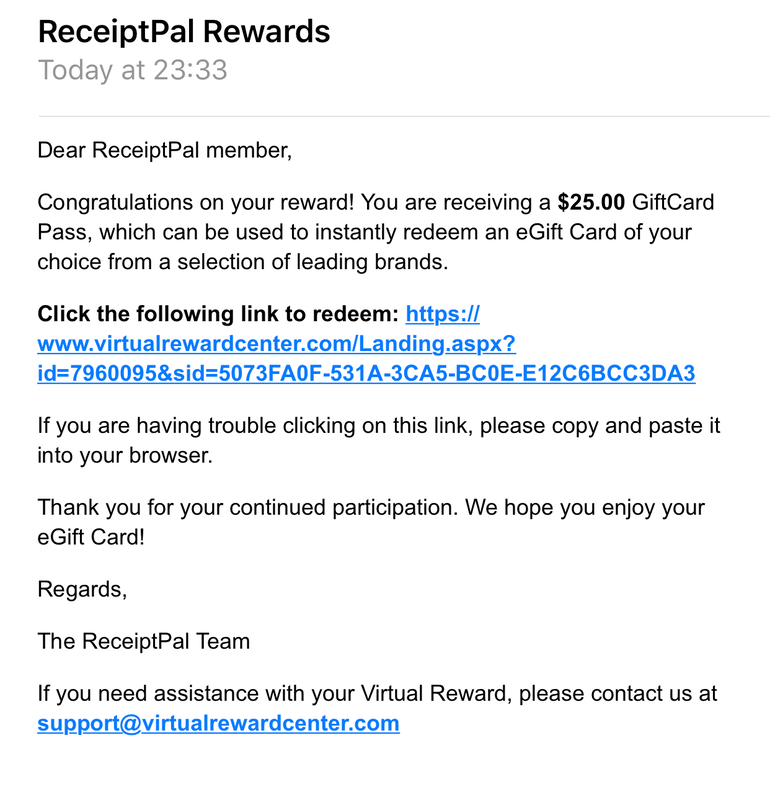
Once you choose what to redeem it is nearly instantly emailed over to you (note the time stamps below... at 11:33 PM I clicked Yes and I got the email within a minute.
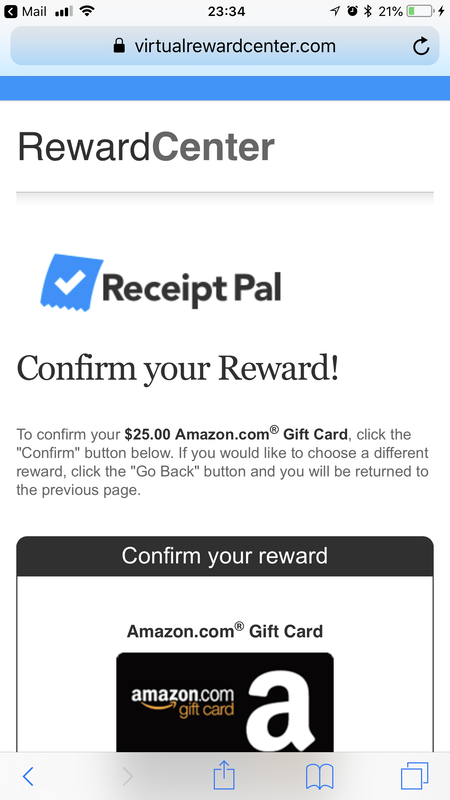
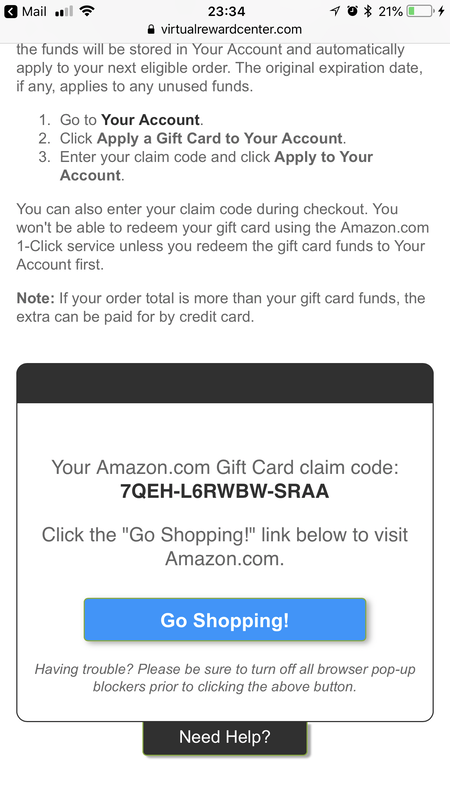
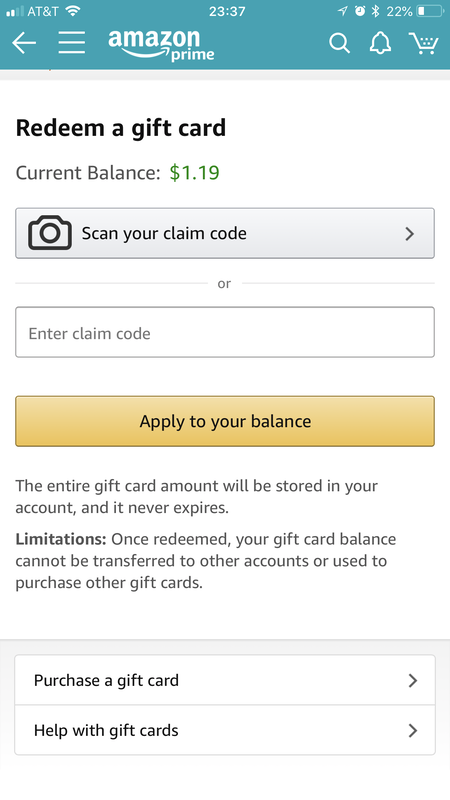
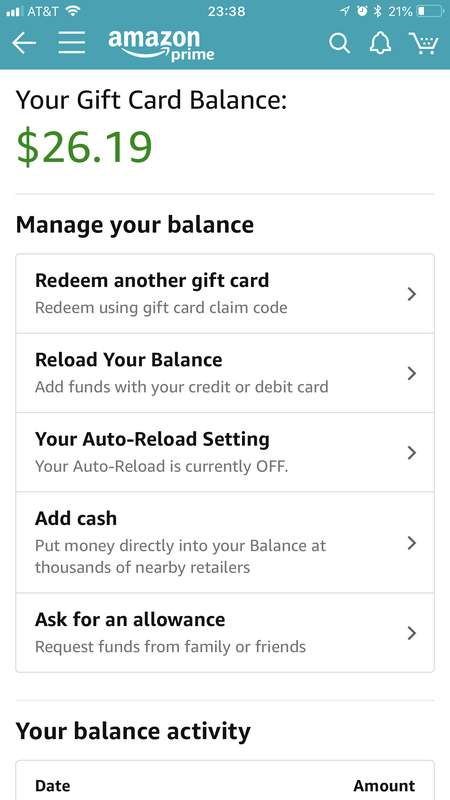
If you choose "gift card" rather than Restaurant.com (which I've used before and there isn't much in my area as I'm pretty far outside of Fort Worth at my new place. Check the website first before you elect that option is my suggestion.) then you have an added step of choosing which gift card you want to receive through the Virtual Reward system. I took screen shots of all the current options for you guys but it may change. I chose Amazon, of course, because I order from Amazon a lot... like too much if we're honest. The whole process took less than two minutes to get the Gift Card delivered (it did take me a few minutes to remember how to add it to Amazon, oops) and I already used the Gift Card towards some new teaching supplies for my online classroom- a rolling whiteboard! I was so excited to use a bunch of gift cards I had from various places to lower the price of the one I really wanted down to a more reasonable level.
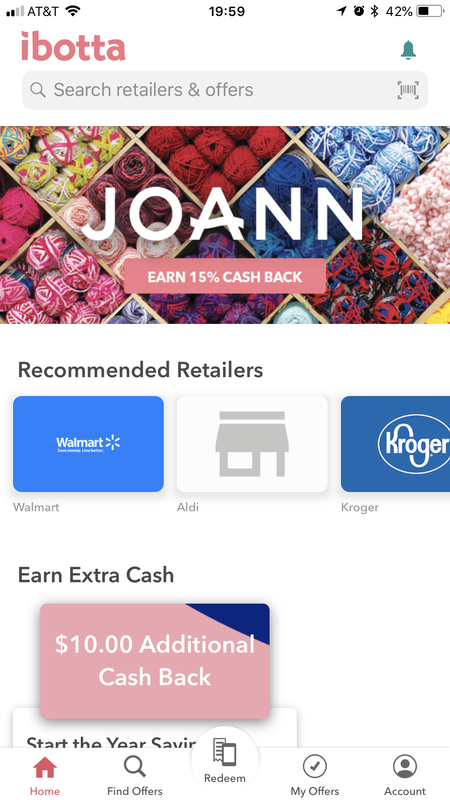
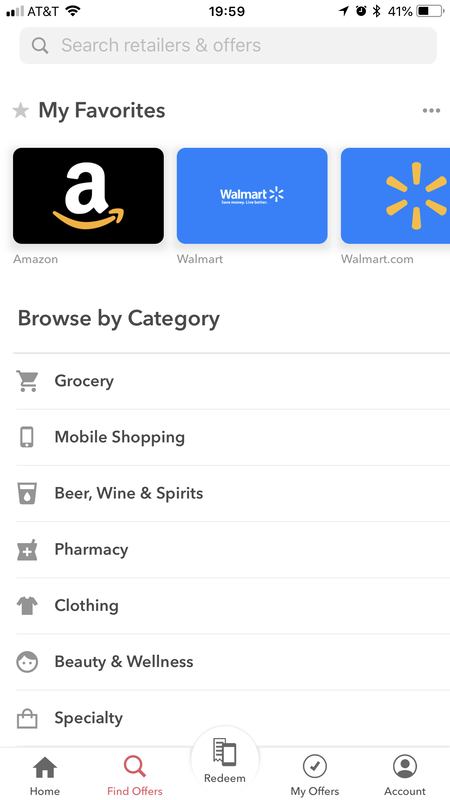
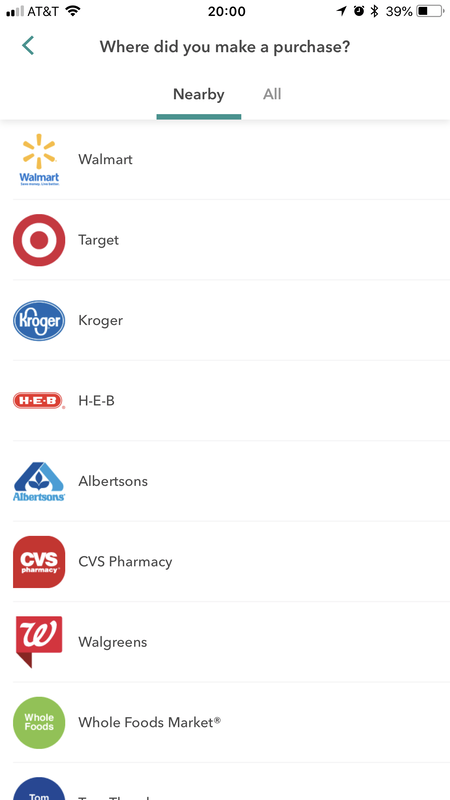
Obviously I am going to vote this one a big thumbs up as I got $25 out of it for simply scanning my receipts while watching The Great British Bake Off every week. I 100% suggest you use this one if you're cool sharing your receipts with marketing companies (NPD Group). To download this app just head to the app store and type in Receipt Pal or go to their website to click through to the app store directly. As a side note I'm already back up to almost enough for another $5 gift card but I plan on holding out for another $25 gift card in a few months. Until next time,   This month's app trial was Ibotta. I downloaded it years ago but never really used it as the location I was living in didn't have many store options (I was on a military base in the middle of nowhere). This time I took advantage of the app and earned about $10 in less than 2 weeks. That's pretty awesome in my mind so I won't be forgetting this one post weekly shop this year. I would equate Ibotta with couponing in that you get money back on items you purchased at the grocery or other stores. First you choose the location you shopped at then simply scroll through the offers checking off anything that you purchased. Sometimes you will need to watch a quick 10-15 second video or answer a survey question in order to add the offer to your list but most of the time the process has only taken me a couple of minutes per receipt. To add more cash back to your list you can scan through available options before you leave for the store in order to max out cash back by choosing brands that are available or picking up staples you may normally get another time while they have a larger coupon. For instance, I picked up a lipstick that I normally would have held off on until it was completed gone while there was a $2 coupon which stacked with a sale at the store made it cost next to nothing. I've now got a couple of them sitting there waiting for me when I need them. OK, time for a quick walk through. When you open the app you will see any additional offers available and a list of your recommended retailers. I'll look through this screen every now and again but I'm pretty habitual in my spending habits so typically skip right over to the the 'Find Offers" area.
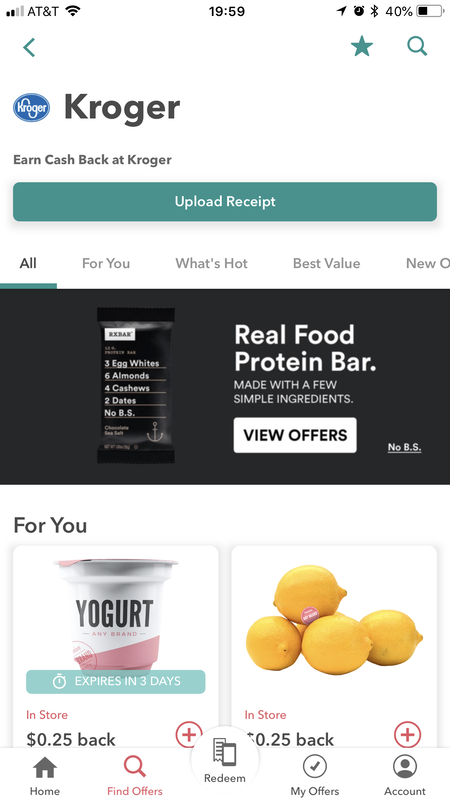
Scroll down to the location I shopped at... in this case Kroger. And just start clicking away at things I purchased or plan on purchasing.
Below are two examples of purchases I made this month for examples. You'll see that sometimes there are even bonuses just for going to the grocery store and uploading the receipt. If its $0.25 a week that's still over $10 back in addition to normal coupons every year.... this year I'd be on track to earn over $200 back from Ibotta. That's a nice chunk of change and can help fund my Christmas travel plans!
Now, payouts... you can cash out once you reach $20. Currently I'm sitting at $9.45 waiting to be paid out this time as you can see below. Cash out options are PayPal, Venmo, and a variety of gift card options. You can also get money for referrals and bonuses for everyone in your friend group hitting markers such as: 10 offers and $10 redeemed in a certain month so there is opportunity to add a few dollars on each month in addition to your normal redemptions. Further, there are in app purchase deals if you know you are going to be searching for an item such as flowers from 1800flowers.com or a Fire TV Recast, both of which are options listed this week. 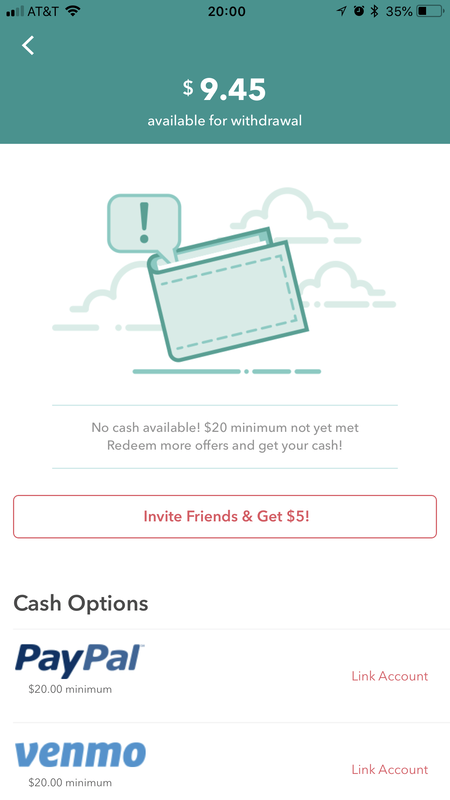 I would definitely suggest keeping this app on your phone for a little passive income, especially if you already coupon as you can stack those coupons with cash back for even more savings. To download click over to Ibotta and download the app. If you don't mind using my referral code (nkbmjfu) I'd appreciate it... as a perk, you'll get $10 closer to your first payout! Until next time,   I'm always looking for new money making apps to review for the blog. Typically I will work for about a month before deciding if I want to keep them on the list of things I will personally use going forward and I never post a review until I've come to that conclusion. I don't want to jump the gun and give you guys bad advice. If you read my monthly financial updates you will have seen that a new logo showed up for August- Poshmark. I tried out Poshmark for the blog and actually sold a couple of items! Woot! Poshmark is a clothing resale business with two parts- "Closet" sales and "Boutique" sales. I want to start by saying that I did not start a boutique so cannot give a thorough review of how much you could make by doing so but I think that you can get an idea of the work that would go into running a boutique on the platform to see if you may be interested from my review. I didn't start a boutique for a couple of reasons:
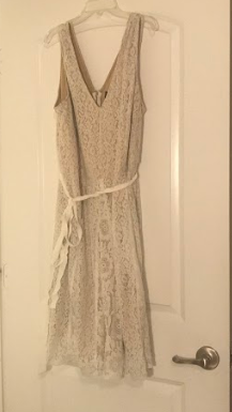
When I stumbled across Poshmark it was around 10:00 PM and I should have been sleeping (oh, insomnia... how are you old friend?) but of course I was scrolling through Facebook. I jumped up and decided right then that my closet needed some thinning. I've been losing weight so have plenty of items in my closet that are too big, on the edge of being the wrong size or were pulled out from the last time I was this size and aren't my current style. I found ten items that looked like they could go up on the site based on the items I had seen advertised. Posting was very easy: simply take photos of your items, fill in the descriptor boxes and you're done. I didn't have awesome lighting, mannequins, or an awesome camera but I thought that would make a great test for if the average- non store owner- could make any money reselling items on Poshmark. I sold a couple of within the first week... and nothing after that. To be fair, I did have to put my closet on vacation hold for a couple of weeks while I was traveling for work so that may have lowered the number of people who looked at my item, Since I wasn't selling as much as I wanted to get rid of I did a lot of research while I was gone both on Poshmark and the internet in general. Here's what I learned during the six weeks, from personal experience and research:
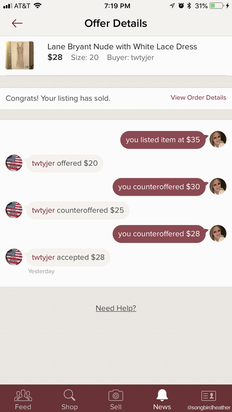
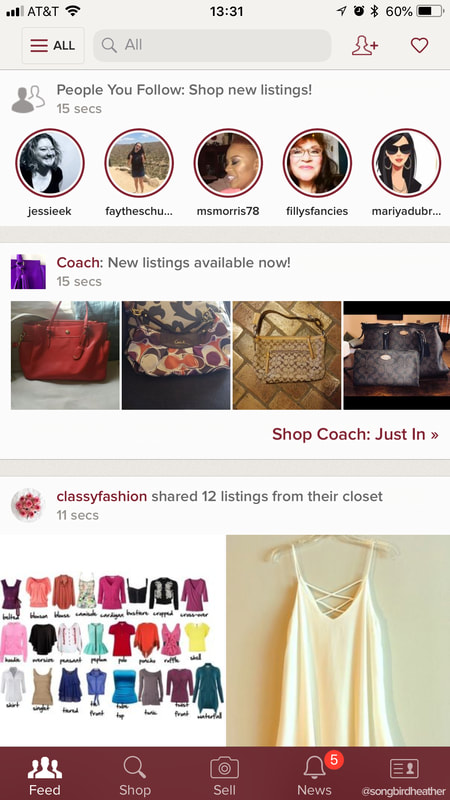
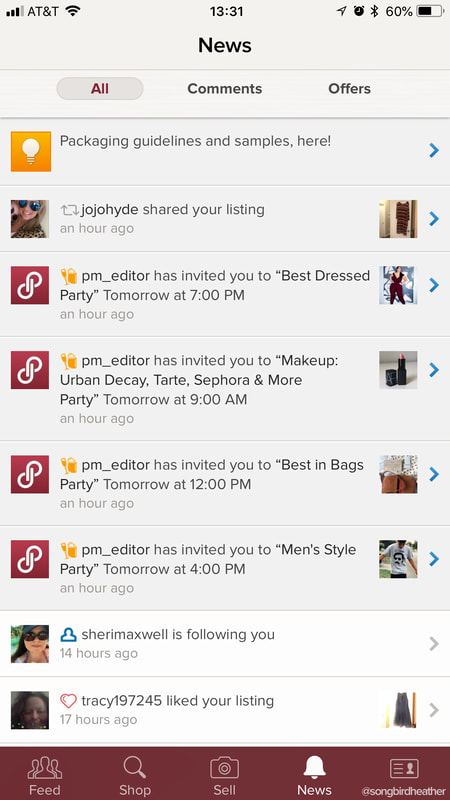
This dress sold for $28. I earned $22.40 from the sale from Poshmark.  Now into the process of getting a sale. Here is what the app looks like. Once you post an item for sale you will begin "sharing" it to your followers and in "Parties" for people to find and contact you about. Followers aren't just people you know. There are requirements for boutique and ambassadors to meet for number of shares, follows and etc. so you will get an initial influx of followers right away and many will share your items. Sharing someone else's items may inspire them to return the favor as well. Putting a discount on your closet for multiple item discounts may also garner views and increase purchases. The main way of getting attention to your items though is simply sharing them yourself. I was in the app several times a day sharing my items as well as joining parties to share my items too. Long term this isn't something I want to be doing so, while it will stay on my phone and I will continue with a once daily share, I won't be making Poshmark into a large side hustle for myself.
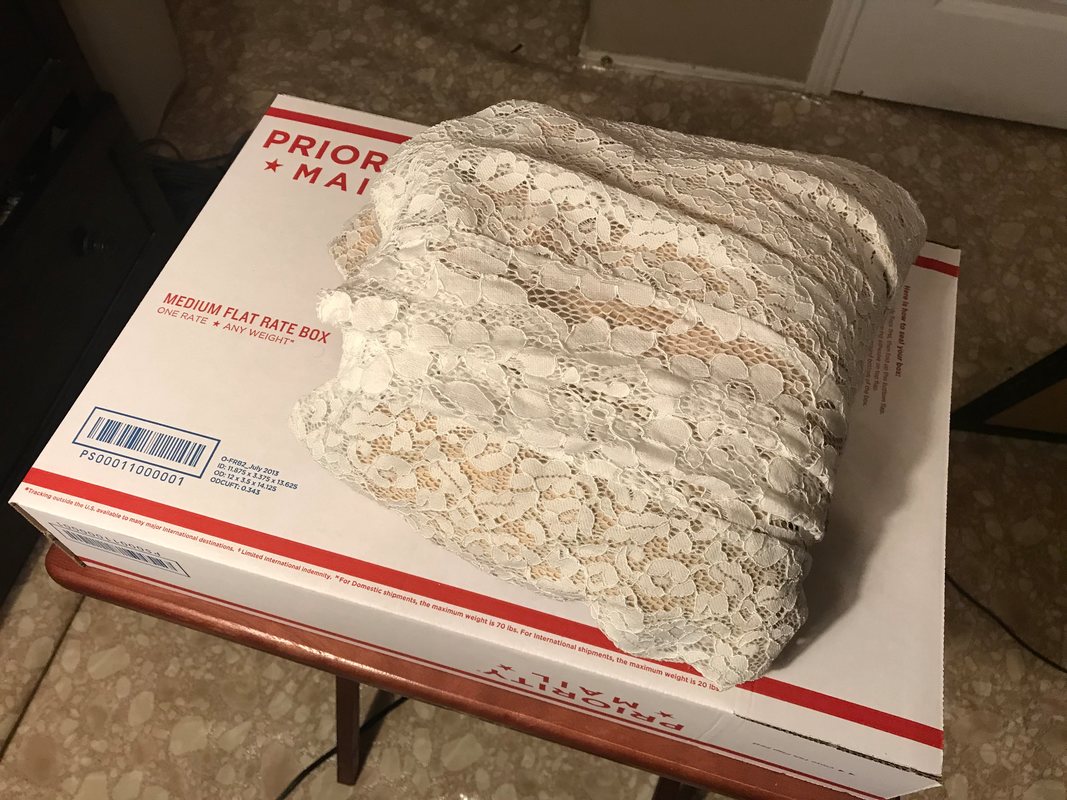
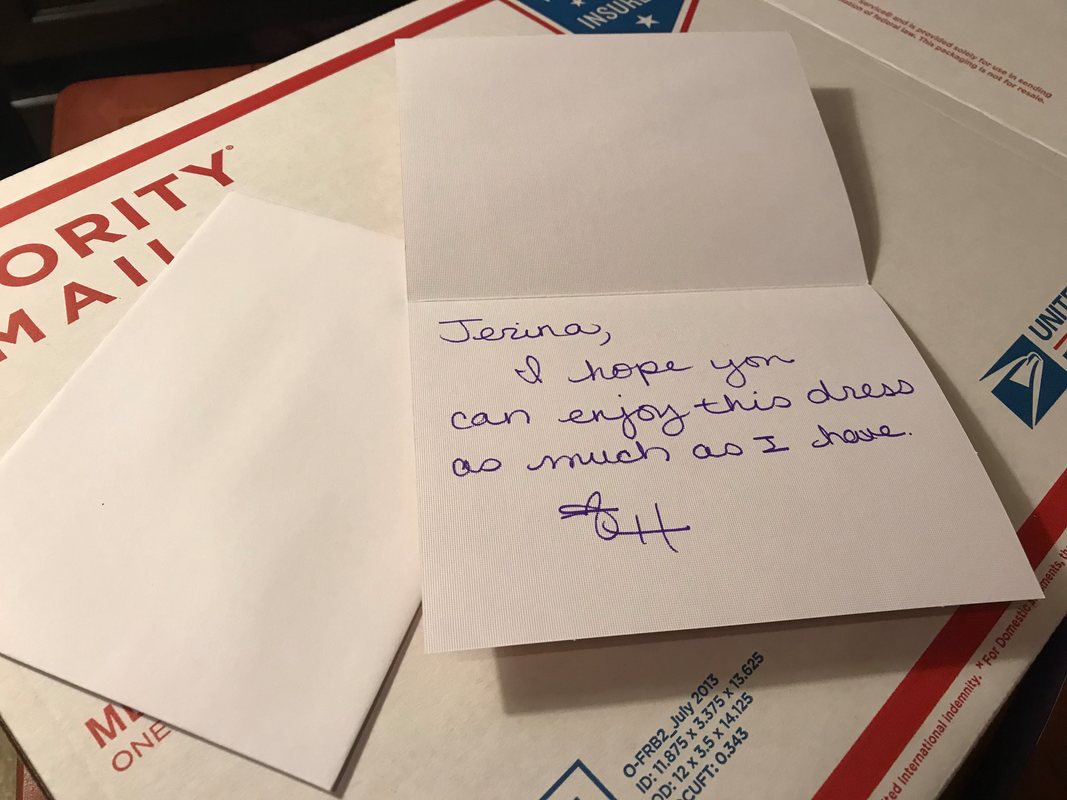
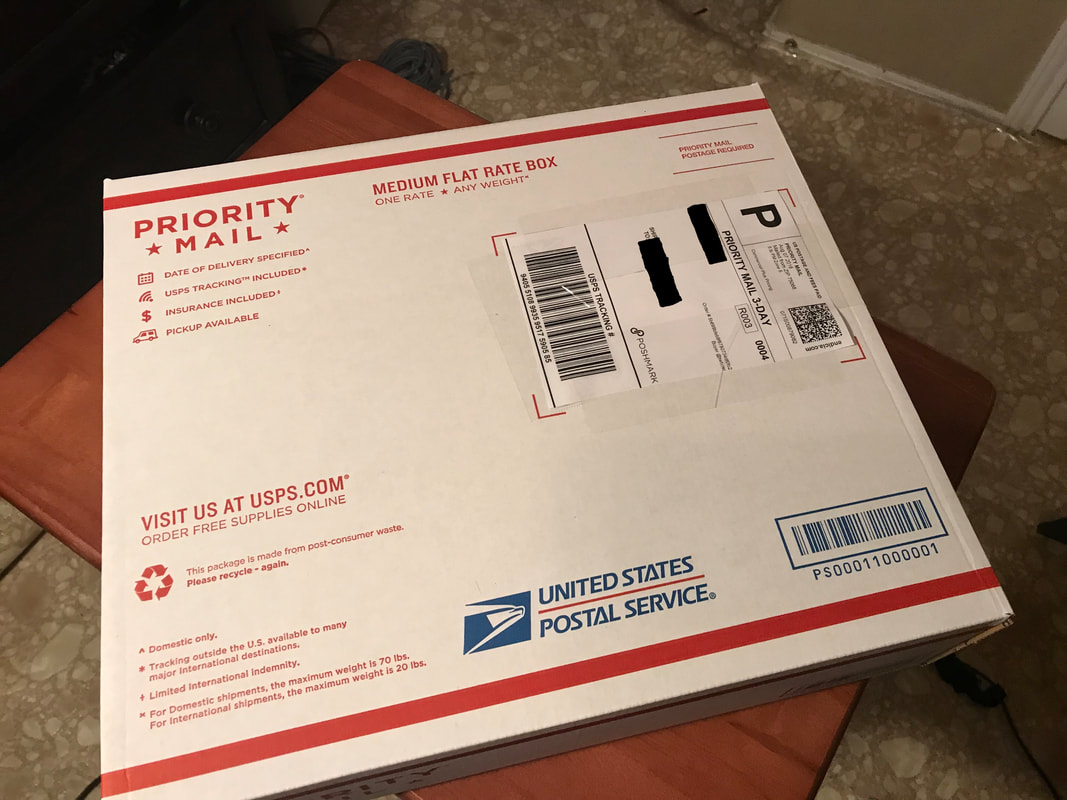
Once you make a sale you simply print off the prepaid label (the buyer has purchased shipping of your item through Poshmark), wrap the item in pretty paper for a better review, possibly add a quick note to the the buyer and send it off through priority mail. The most money you will spend here is in the wrapping and note as everything else is paid for. Make sure that you use a priority mail box so that it doesn't get sent back or you have to pay for a box. Priority shipping boxes are available for free at the US Post Office.
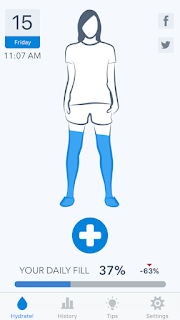
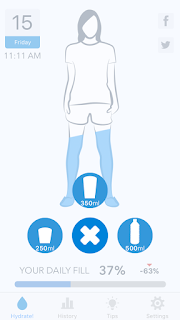
TheYou have three days to ship your items but I suggest you do it as soon as possible so that you get a higher review. Nobody wants to wait longer than they have to for something they bought- myself included! You do not receive your part of the purchase price until it has been received and accepted by the buyer. They have three days from receipt to do this or Poshmark will automatically accept it for them. This gives the buyer a change to inspect your item(s) for damage and ensure it matches the description. When they accept it they will give you a 5 star review that will let other buyers know that you are a good seller to buy from and funds will be available within about 24 hours for you to either purchase clothing from the app or request a direct deposit to your bank. Sneaky sneaky Poshmark, you know that we like clothes so you let us use our earnings in app... nope, not me! I had them send me the money so that it could be used towards my financial goals. The whole process from purchase to money in my bank took a little over a week due to shipping and waiting for the buyer to accept the items. I wouldn't use this method if you need money tomorrow but if you have clothes that you need to get rid of and don't mind giving it a little time and effort its certainly worth a try! If you want to try out Poshmark please use my referral code "songbirdheather". You and I will both get $5 to spend in the app when you do. It's not cash in our pockets but it is free money towards already discounted quality items. Yes please! They have cute stuff on there (after all, its people like you and me on there selling) and I keep finding stuff I want, I know you will too. Until next time, ciao!   Chances are you have a smart phone and spend quite a bit of time on it. In this series we're going to be going through some ways to make your smart phone pay for its own data plan. Over the next few months I'll be trying out money making apps, coupon apps, and other similar programs that can either save you or make you some extra cash. The first app we're going to be chatting about it Easy Shift, one I've been using on and off for about two years now. What exactly is Easy Shift? What will I have to do?Essentially, its a market research app that pays you to complete small tasks at various retail stores for a few dollars each. Typically the tasks, called "Shifts" will involve taking photos of an aisle or aisles and/or finding specific items to see if they are being sold at that location. You may also be checking prices, promotional materials, or noting what items are grouped together. The average time to complete a task ranges from 10 to 30 minutes (based on the shifts in my area) and pay is $2 to $20 per task. I've never been asked to make purchases at a store to complete a Shift but some people have and have stated that they are reimbursed once the shift is processed. Easy Shift was created by Quri, Inc. and is available for Apple and Android devices. Go to www.easyshiftapp.com to download the app. Now for the review... How much will I make?This can vary quite a bit unfortunately. If there are only a few shifts available near you on a specific day then it will be difficult to get enough well paying shifts to make it worth your while but then other days you may open the app to see dozens within a few blocks of where you're going shopping anyways. Those are the days I reserve as may as I can and spend a couple hours knocking out shifts. For example, I just opened the app and only see a few shifts near me currently... not really worth the time to run around and try to make $25 over the two hours they would probably take based on locations but there's one with $6 plus $0.20 per display found just a few miles from me that I could easily grab on my way home from work with fairly little effort or time. That will pay for my gas to/from work easily. Easy Shift is one of my go-to apps if I need to make a little bit extra money to add something small to my budget without shifting priorities. Its a quick way to make $50 extra on a day off if there are shifts near locations I'm going to be already. Last time I used the app I made $68 for an afternoon of taking photos of drug store shelves for market research. 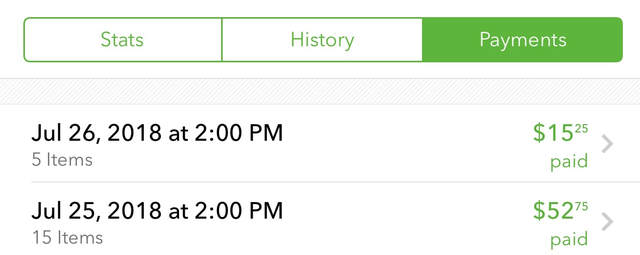 How and when will I get paid for my Shifts?This is the big perk as far as I'm concerned... unlike with other apps there is no minimum payout amount so you get paid only 48 hours after your shift is processed! Processing can take a few days but is often done within just one so you can get your money before the next weekend pretty easy. It may take a little longer for reimbursements from purchases (I've never had to be reimbursed so I'm not 100% here) but with my experience with their payment time I would highly doubt it. All payments are made to PayPal so you don't need to give them any banking information and you won't pay any fees to then transfer it to your bank account (or use it for your Netflix bill the next month straight from PayPal!). Who can use this app?Anyone with an iPhone or Android phone who is at least 18 years old (some Shifts may require you to be 21 or have a printer but they seem to be fairly infrequent from what I've been able to get Reserved), This is one of the ones that I've never taken off my phone and fall back on when I need a little extra gas money. I made $108 in my most active two weeks and the shifts were all along my route to other places I wanted to go. Like I said, I made $68 in a few hours when I put my mind to it a few weekends ago so I think its really what you make of it (and if they have Shifts available near you at that time) and definitely something to keep in your back pocket in case those concert tickets you've been wanting go on sale.   One of the first things I was told to do once I started seeing a cardiologist for my condition (even before getting a diagnosis... remember, I was doing symptom management long before ever receiving a diagnosis as it took 6 years) was to up my salt intake drastically as well as my water. At this point, I'm pretty good about maintaining my salt intake as I have learned to listen to my body's signs that I need more salt and have adapted strategies that are, by this point, ingrained habits that get my sodium in. Water is a different issue though as I get lost in whatever I am doing and lose track of the time quite easily, especially if I'm out of my routine. The key I've found for my average workday is to keep two water bottles on my desk and just drink whenever I am thirsty... no stopping what I am doing, just reach for it and take a drink or two. Whenever I finish one I move on to the other... and usually fairly soon after that I need a bathroom break so fill the first back up while I'm already away from my desk. It's working fairly well so far when I have a normal day at work. I use two 0.75 L Camelbak bottles that I referenced in my travel post if you were wondering. If I drink when I am thirsty and stop when I'm not, I drink between 3-5 liters per day. I don't know many people who drink that much water unless they are making an effort to do so personally but perhaps everyone I know is just dehydrated all the time (not unlikely). I've found that, for me, if I aim for 4L then I'm needing IV infusions of saline less... which is a plus. Unfortunately drinking too much water can make you nauseous so I have to be careful to space it out well... and you are constantly needing to take bathroom breaks it seems, which is a bit annoying. But you do what you have to do, right? NOTE: I would not recommend drinking as much water as I do without taking care of your electrolyte needs as well so as not to end up with an imbalance. This is a point I cannot stress enough. I am not a doctor and do not claim to know about how much water you personally need for a happy and healthy body, I just know what I have to do for my specific body to function well. My needs are rarely the same as the 'norm' so do not take my daily requirements to be average in any way. If you are concerned you are not getting in enough (or too much) fluids please consult your doctor to ensure a healthy outcome. But what about those days that are not 'normal'... or the weekends? Well, there's the issue. I simply do no meet even the 3L minimum it takes to stop me from being thirsty (which they tell me is a sign of dehydration... bad news for someone like me) and definitely not the amount that has decreased my trips to get IVs when I'm out of my normal routine. So I started looking for apps to help me track as I always seem to misplace a paper version of a tracker and I'm never going to remember how much water I've had from the beginning of the day to the end unless the number is super low if previous experience has taught me anything about myself. I must've tried half a dozen apps and dismissed at least that many based on the reviews alone but I finally got down to the last three. I tracked with them both for a few days and finally landed on WaterMinder as the one I would keep due to its simplicity and ease of reporting. When you enter the app (after registration) you will see an outline of either a woman or a man. Since I am a woman, I see this lovely outline. As the day progresses and you log more water the blue level raises and the percentages on the bottom portion labeled "Your Daily Fill" update. One interesting tidbit about that blue level is that it changes how it fills the outline based on the position of your phone, like water in a cup. I got a bit of fun out of that I'll have to admit. Anyways, to enter a serving of water simply click the plus sign and the 'cup' sizes you selected in the settings tab will appear for quick entry. A regular bottle of water is 500mL so I would click on the 500mL bottle to show I had finished one of those for instance. Since this is customizable it is completely up to you how many options you have, or if they are in in mL or oz.
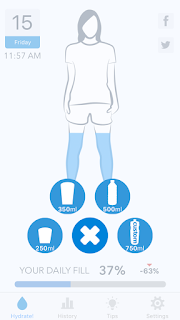
As you can see, once I added a 750mL bottle to represent my Camelbak it showed up on the quick add menu. To add a custom 'cup' click over to the Settings tab and tap "Add Cup" then enter the amount of water you wish to represent. Since my app is in the mL setting it asked for the amount in mL but if you have set your settings to oz then yours will ask for it in oz of course, no conversion necessary.
Another way to add water quickly, if you are using an iPhone, is to add it directly from the Today tab in the Notifications menu. Simply swipe down from the top of the screen to access the Notifications menu. 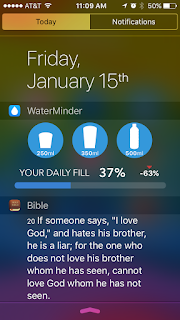 The other two tabs on the app are History and Tips. I wasn't super impressed with the Tips area as they don't appear to ever change but rather has a small essay on the benefits of water. I found it less helpful than a tip a day type option personally and didn't learn anything new but it is worth a quick read through in case there is something new to you. I have added a screenshot of the table of contents below. 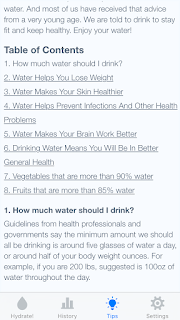 The History section was useful in that I can track my intake over just the day, the week, month or even the year. You can see that I had one day near New Years that I didn't come close to my goal in a quick glance as well as see an average for the time period and where I'm at today so far. 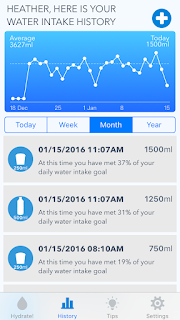 Other useful things about this app:
Have you found a water tracking app that is better than this? Have another app that you're sure I would love? If so, let me know! I'm always trying new health apps and would love to check it out. I'm going to start this post with saying that I don't use this app like it is intended- to run with. Instead I walk to it. I am getting a little faster (yay!) but I can't push myself too much right now as I could put myself back even further if I do. I was right on the cusp of being able to job for a minute when things went a bit topsy turvy in my life and my health responded by getting worse, of course. I took my time, managed to get off most of most of the medications I ended up back on with the flair and even managed to leave behind some of my supplements over the past year or so. Now it's time to exercise again... slowly. So I pulled out my old standard cardio app and realized they had completely revamped the entire app! That was interesting but pretty cool. I had already paid for seasons 1-3 before they redesigned it to be an annual subscription which was a little sad because new players will have paid less than me when it is all said and done but that's ok... I was there back when it started and supported it's growth so I don't mind too much. The app is called Zombies, Run and is by a UK based company called Six to Start. They have a few other apps that I will be reviewing later this month as well that are along the same lines: game meets radio show meets exercise app.
The game's website says the following about the game: "Run in the real world. Become a Hero in another. Only a few have survived the zombie epidemic. You are a Runner en-route to one of humanity's last remaining outposts. They need your help to gather supplies, rescue survivors, and defend their home. And you have another mission- one they don't know about..." That's a pretty general but accurate plot line... at least for the two and a half seasons I have worked my way through in the past. I restarted the series so I am back in season one working my way back to where I was in the story before. There were plenty of details I missed the first time through so feel free to re-run missions. They don't get boring. If you look in the settings area you will see that you can change the units to Standard or Metric, input your weight, change the volume of the game clips and etc. but there is also a section called 'clip spacing' that allows you to decide how often you would like a story clip to play... effectively lengthening or shortening your run. It is taking me about 20 minutes to get through a mission at 'clips play every 2.5 minutes' so if you want a longer mission then perhaps make it every 5 minutes or so. It is very easy to personalize your runs. I suggest checking this screen out fully before your first mission so that you know what your options are. Click on the mission and you are brought to a screen that allows you to choose the playlist that you wish to run to from your phone, chose how ZR will track your movement/pace/run, and decide if you want zombie chases (more on this later). When you start a new episode there is a recap to start with, similar to a TV series, and then the new 'mission' begins. For the majority of season one, as I assume that is where you will start, your comms operator is Sam Yao. He briefs you on your missions, warns you of incoming zombies he sees on his scanners, provides humor and generally just watches your six while you are outside the gates. Once you have been briefed you head outside the gates for the day's mission.Your chosen playlist will be interspersed with story clips that keep you in the alternate world of ZR throughout your run... I don't suggest you run at night as those zom noises can get a tad creepy. And there's a reason we don't send scouts out at night... just sayin'. If you selected to have zombie chases, which you are also able to customize when it comes to frequency, then you will also hear a warning about incoming zombies throughout the mission at various points. There will be tones that warn you how far away the zombie is as well as a voice that will tell you if you outpaced the zombie or needed to throw an item at it in order to escape. In order to escape you have to put on a burst of speed for about half a minute if I recall (I can't do these right now so have the feature turned off)... basically you sprint as fast as you can. If you throw an item at the zombie then you have lost an item that you 'picked up' on your run. These items can be used to rebuild Abel Township... where your character lives and works. This portion of the game has really grown over the years compared to what it started as. That pretty much covers the story missions... there are other types of missions you can chose to run as well. You can use Airdrop mode to retrieve supplies from Mullin's airbase at a location you chose in the real world, run a supply mission that is general and doesn't affect the storyline (so you can skip them or run them again and again... like we used to do in between seasons), do interval training that you customize yourself in the app, run with Radio Abel instead of a mission, or run in race mode. Radio Abel is basically a radio show that takes place within the world of ZR. These aren't missions but rather you just out running but getting to also hear about the world of post zombie apocalypse and learn more about the world your character resides in. They are a good change of pace and I find the hosts quite humorous. Race mode is exactly like it seems. There are 2 sets of 3 races- a 5k, 10k and 20k race with story lines all their own that take place either in the world of Abel Township or New Canton, the militarized quasi-enemy township not too far away. Abel and New Canton's powers that be to not see eye to eye but the runners will generally help each other out in a bind if they can... it is, after all, the fate of the world at stake. If you want to get really into the alternate world you can go into the game and read about the various things you pick up... some are supplies like water and sports bras (yes, sports bras... it's a running joke actually) and some are 'artifacts' that give you details about the developing story such as a CDC box or a newspaper clip about Netrophil. These items can be read about in the Codex tab. You can also go online and download the Abel Runner's Guide for free to get more into the mythology of the game. Just recently they have added a store where you can make purchases related to the game on their website if you are interested. There are also fans who have etsy and similar shops for "Runner 5" gear. The big news though is that they just launched the first ZR virtual race. I signed up even though I won't be running it... I'm hoping to get a few short jogs in by then though, we'll see! This was big news in the ZR community and spots sold out fairly quickly. Finally, you can sync your runs to the cloud, use health kit with the app to track your workouts and, of course, share your runs to social media. This is by far my favorite exercise app of all time and it doesn't surprise me one bit that it is now an award winning app... it rocks. (Once I am able to restart and complete the 5k training app that is a companion to ZR I will write a review of it as well but from what I recall it wasn't as in depth as this game is but it was still quite good. It takes place between episodes 1 and 2 of the original ZR game and is a C25K program so you go from walking to running/jogging a 5k by the end if you follow the program.) |
Archives
October 2022
Categories
All
|


 RSS Feed

© COPYRIGHT 2015. ALL RIGHTS RESERVED.